缘由
很早之前就听公司的WebGL同时调研过GPU压缩纹理,我之前也做过一些调研,发现有basis_universal工具可以实现快速的uastc、etc1s快速transcode到对应平台所支持的压缩纹理格式,但是由于wasm体积和loader等js体积过大而没有使用。后面发现有更轻量的transcode实现,所以想利用起来。
探索
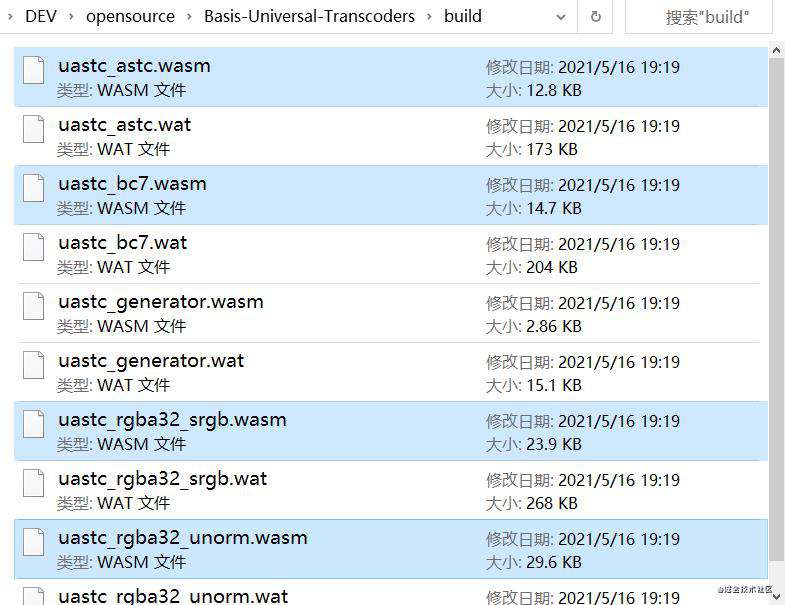
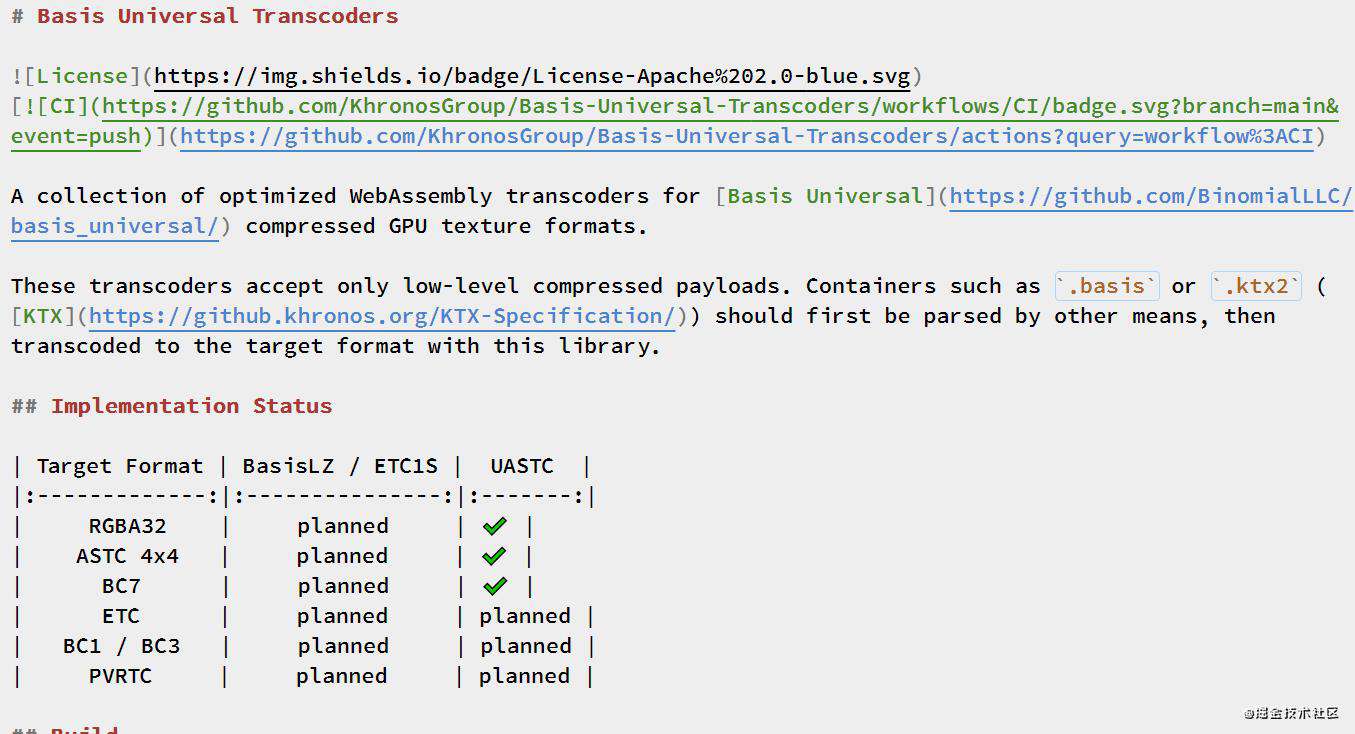
Basis-Universal-Transcoders是由KhronosGroup所使用AssemblyScript编写,相比于basis 220+kb的wasm,十分轻量,但是缺点是所支持的transcode的格式少,只有3种,还有开发不算太活跃。
后面了解到LayaAir的压缩纹理使用方案则是相对简单粗暴,ios使用pvrtc, 安卓etc1, 其他则是png/jpg。加上之前实现过hdr-prefilter-texture, 同样的思路也可硬应用到压缩纹理上面。
各种需要runtime处理的均可以预处理,runtime只需要加载预处理后的产物即可
所以就有这个这个GPU压缩纹理扩展,把basis transcode产出存储起来,runtime根据所支持的格式下载对应预处理后的格式。
前置知识
GLTF结构
既然目标是GLTF扩展,就需要了解GLTF格式。
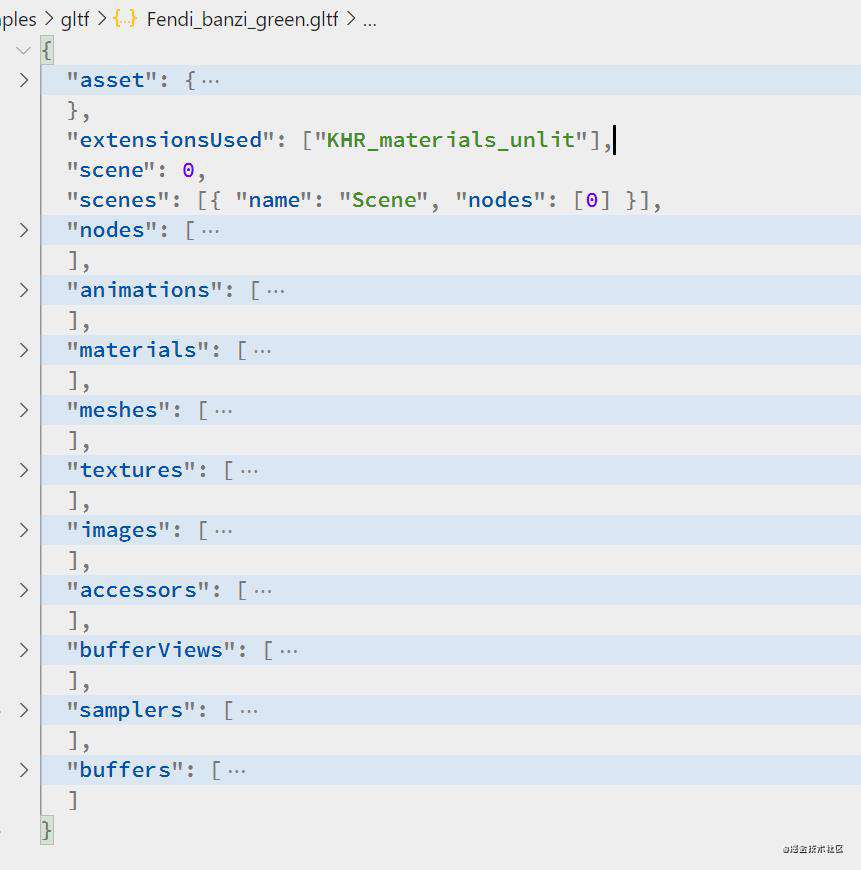
asset: 描述GLTF格式版本信息
extensionsUsed:告诉parser需要一下扩展,才能解析GLTF
其他的和关系型数据库的表有点类似,不过使用下标来进行关联,比如:
GLTF扩展
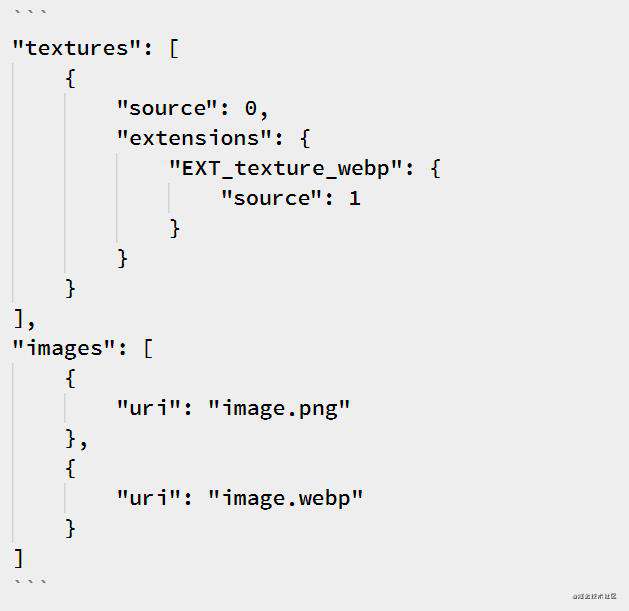
简单了解了GLTF的信息关联方式后,则可以着手了解GLTF扩展如何编写。需要实现GLTF扩展也可以理解为是一个降级扩展,和google所实现的EXT_texture_webp, 相当类似。
function GLTFTextureWebPExtension(parser) {
  this.parser = parser;
  this.name = EXTENSIONS.EXT_TEXTURE_WEBP;
  this.isSupported = null;
}

GLTFTextureWebPExtension.prototype.loadTexture = function (textureIndex) {
  var name = this.name;
  var parser = this.parser;
  var json = parser.json;

  var textureDef = json.textures[textureIndex];

  if (!textureDef.extensions || !textureDef.extensions[name]) {
    return null;
  }

  var extension = textureDef.extensions[name];
  var source = json.images[extension.source];

  var loader = parser.textureLoader;
  if (source.uri) {
    var handler = parser.options.manager.getHandler(source.uri);
    if (handler !== null) loader = handler;
  }

  return this.detectSupport().then(function (isSupported) {
    if (isSupported) return parser.loadTextureImage(textureIndex, source, loader);

    if (json.extensionsRequired && json.extensionsRequired.indexOf(name) >= 0) {
      throw new Error('THREE.GLTFLoader: WebP required by asset but unsupported.');
    }

    // Fall back to PNG or JPEG.
    return parser.loadTexture(textureIndex);
  });
};

GLTFTextureWebPExtension.prototype.detectSupport = function () {
  if (!this.isSupported) {
    this.isSupported = new Promise(function (resolve) {
      var image = new Image();

      image.src = 'data:image/webp;base64,UklGRiIAAABXRUJQVlA4IBYAAAAwAQCdASoBAAEADsD+JaQAA3AAAAAA';
      image.onload = image.onerror = function () {
        resolve(image.height === 1);
      };
    });
  }

  return this.isSupported;
};
可以看到关键只有两个方法,一个是detectSupport,一个是loadTexture,逻辑均比较容易理解,其中loadTexture是由GLTFLoader触发。

可以发现自定义GLTF扩展还是比较容易的,只需要在GLTFLoader里搜索this._invokeOne即可知道所支持的钩子函数有多少,目前有5个,分别是
- loadMesh
- loadBufferView
- loadMaterial
- loadTexture
- getMaterialType
实现
先整理实现的大概思路。
GLTF扩展部分
- 定义扩展的scheme
- detectSupport 通过获取gl读取扩展支持情况取得
- loadTexture 按照scheme加载对应数据,生成CompressedTexture并返回
工具部分
- 从GLTF/GLB加载,把里面包含的texture转换成basis, 然后decode成astc|bc7|dxt|pvrtc|etc1
- 按照scheme格式存储导出gltf。
定义scheme
参考EXT_texture_webp可知,扩展配置存放在extensions.EXT_texture_webp中,也就是只需要定义这部分格式即可。
{
  "textures": [
    {
      "source": 0,
      "extensions": {
        "EXT_GPU_COMPRESSED_TEXTURE": {
          "astc": 1,
          "bc7": 2,
          "dxt": 3,
          "pvrtc": 4,
          "etc1": 5,
          "width": 2048,
          "height": 2048,
          "hasAlpha": 0,
          "compress": 1
        }
      }
    }
  ],
  "buffers": [
    { "name": "buffer", "byteLength": 207816, "uri": "buffer.bin" },
    { "name": "image3.astc", "byteLength": 48972, "uri": "image3.astc.bin" },
    { "name": "image3.bc7", "byteLength": 50586, "uri": "image3.bc7.bin" },
    { "name": "image3.dxt", "byteLength": 10686, "uri": "image3.dxt.bin" },
    { "name": "image3.pvrtc", "byteLength": 21741, "uri": "image3.pvrtc.bin" },
    { "name": "image3.etc1", "byteLength": 22360, "uri": "image3.etc1.bin" }
  ]
}
格式很简单,一看就明白,astc|bc7|dxt|pvrtc|etc1字段指向buffers[i]。
生成对应结构的GLTF
这里一部分可以参考basis的webgl/texture/index.html,循环生成5种类型的压缩纹理产物保存到bin文件即可,然后手动编写GLTF文件即可。
至此,基础版已经可以编写出来了。
export class GLTFGPUCompressedTexture {
  constructor(parser) {
    this.name = 'EXT_GPU_COMPRESSED_TEXTURE';
    this.parser = parser;
  }

  detectSupport(renderer) {
    this.supportInfo = {
      astc: renderer.extensions.has('WEBGL_compressed_texture_astc'),
      bc7: renderer.extensions.has('EXT_texture_compression_bptc'),
      dxt: renderer.extensions.has('WEBGL_compressed_texture_s3tc'),
      etc1: renderer.extensions.has('WEBGL_compressed_texture_etc1'),
      etc2: renderer.extensions.has('WEBGL_compressed_texture_etc'),
      pvrtc:
        renderer.extensions.has('WEBGL_compressed_texture_pvrtc') ||
        renderer.extensions.has('WEBKIT_WEBGL_compressed_texture_pvrtc'),
    };
    return this;
  }

  loadTexture(textureIndex) {
    const { parser, name } = this;
    const json = parser.json;
    const textureDef = json.textures[textureIndex];

    if (!textureDef.extensions || !textureDef.extensions[name]) return null;

    const extensionDef = textureDef.extensions[name];
    const { width, height, hasAlpha } = extensionDef;

    for (let name in this.supportInfo) {
      if (this.supportInfo[name] && extensionDef[name] !== undefined) {
        return parser
          .getDependency('buffer', extensionDef[name])
          .then(buffer => {
            // TODO: 支持带mipmap的压缩纹理
            // TODO: zstd压缩

            const mipmaps = [
              {
                data: new Uint8Array(buffer),
                width,
                height,
              },
            ];


            // 目前的buffer是直接可以传递到GPU的buffer
            const texture = new CompressedTexture(
              mipmaps,
              width,
              height,
              typeFormatMap[name][hasAlpha],
              UnsignedByteType,
            );
            texture.minFilter =
              mipmaps.length === 1 ? LinearFilter : LinearMipmapLinearFilter;
            texture.magFilter = LinearFilter;
            texture.generateMipmaps = false;
            texture.needsUpdate = true;

            return texture;
          });
      }
    }

    // Fall back to PNG or JPEG.
    return parser.loadTexture(textureIndex);
  }
}
丰富细节
- 由于etc1s产出的basis,体积小,但是质量差,uastc质量高,但是体积大,所以需要使用无损压缩。
- 需要支持mipmap, GPU压缩纹理无法在GPU快速生成mipmap,需要实现mipmap加载
- 既然需要压缩,可能需要使用web worker加速,wasm加速,SIMD加速等
- CLI转换工具支持多进程,批量处理,输出大小统计信息
- 编写性能测试用例,对比 KTX2+uastc 的压缩纹理方案,记录数据整理表格
- PC端、手机浏览器对比,还有ImageBitmapLoader,纹理数量大小,分辨率大小等对比
- 少图片使用 UI 线程 decode, 多图片使用 worker decode
- 完善资源释放逻辑,dipose
然后就有了相对完善的解决方案gltf-gpu-compressed-texture
性能数据
运行环境 Chrome 93, CPU Intel I9 10900 ES 版,核显 HD630
加载 BC7 格式,use ImageBitmapLoader,THREE r129,localhost,disable cache: true
| 模型 | 参数 | load | render | 总耗时 | 模型大小 | 依赖大小 | banzi_blue | gltf-tc zstd no-mimap no-worker | 36.10ms | 1.60ms | 37.70ms | 506kb | 22.3kb | banzi_blue | gltf-tc no-zstd mimap no-worker | 25.80ms | 1.50ms | 27.30ms | 2.2mb | 22.3kb | banzi_blue | gltf-tc zstd mimap no-worker | 37.90ms | 1.60ms | 39.50ms | 648kb | 22.3kb | banzi_blue | gltf ktx2 uastc | 534.70ms | 1.70ms | 536.40ms | 684kb | 249.3kb | banzi_blue | glb | 32.80qms | 6.00ms | 38.80ms | 443kb | banzi_blue | gltf | 27.70ms | 4.90ms | 32.60ms | 446kb | BoomBox | gltf-tc zstd mipmap worker | 153.50ms | 23.70ms | 177.20ms | 6.6mb | 22.3kb | BoomBox | gltf-tc zstd mipmap no-worker | 241.10ms | 9.40ms | 250.50ms | 6.6mb | 22.3kb | BoomBox | glb ktx2 uastc | 506.10ms | 9.30ms | 515.40ms | 7.1mb | 249.3kb | BoomBox | glb | 156.10ms | 89.50ms | 245.60ms | 11.3mb | BoomBox | gltf | 120.20ms | 58.80ms | 179.00ms | 11.3mb |
|---|
可以明显看到相比于 KTX2+uastc 的压缩纹理方案,从加载耗时和依赖大小,有大幅优势,模型大小也有不少优势
同时也可以看到 BoomBox gltf-tc zstd mipmap worker load+render 耗时,与 gltf 耗时 相差不大,但是模型大小有大幅优势
MI 8 下的测试数据可以查看 screenshots 目录
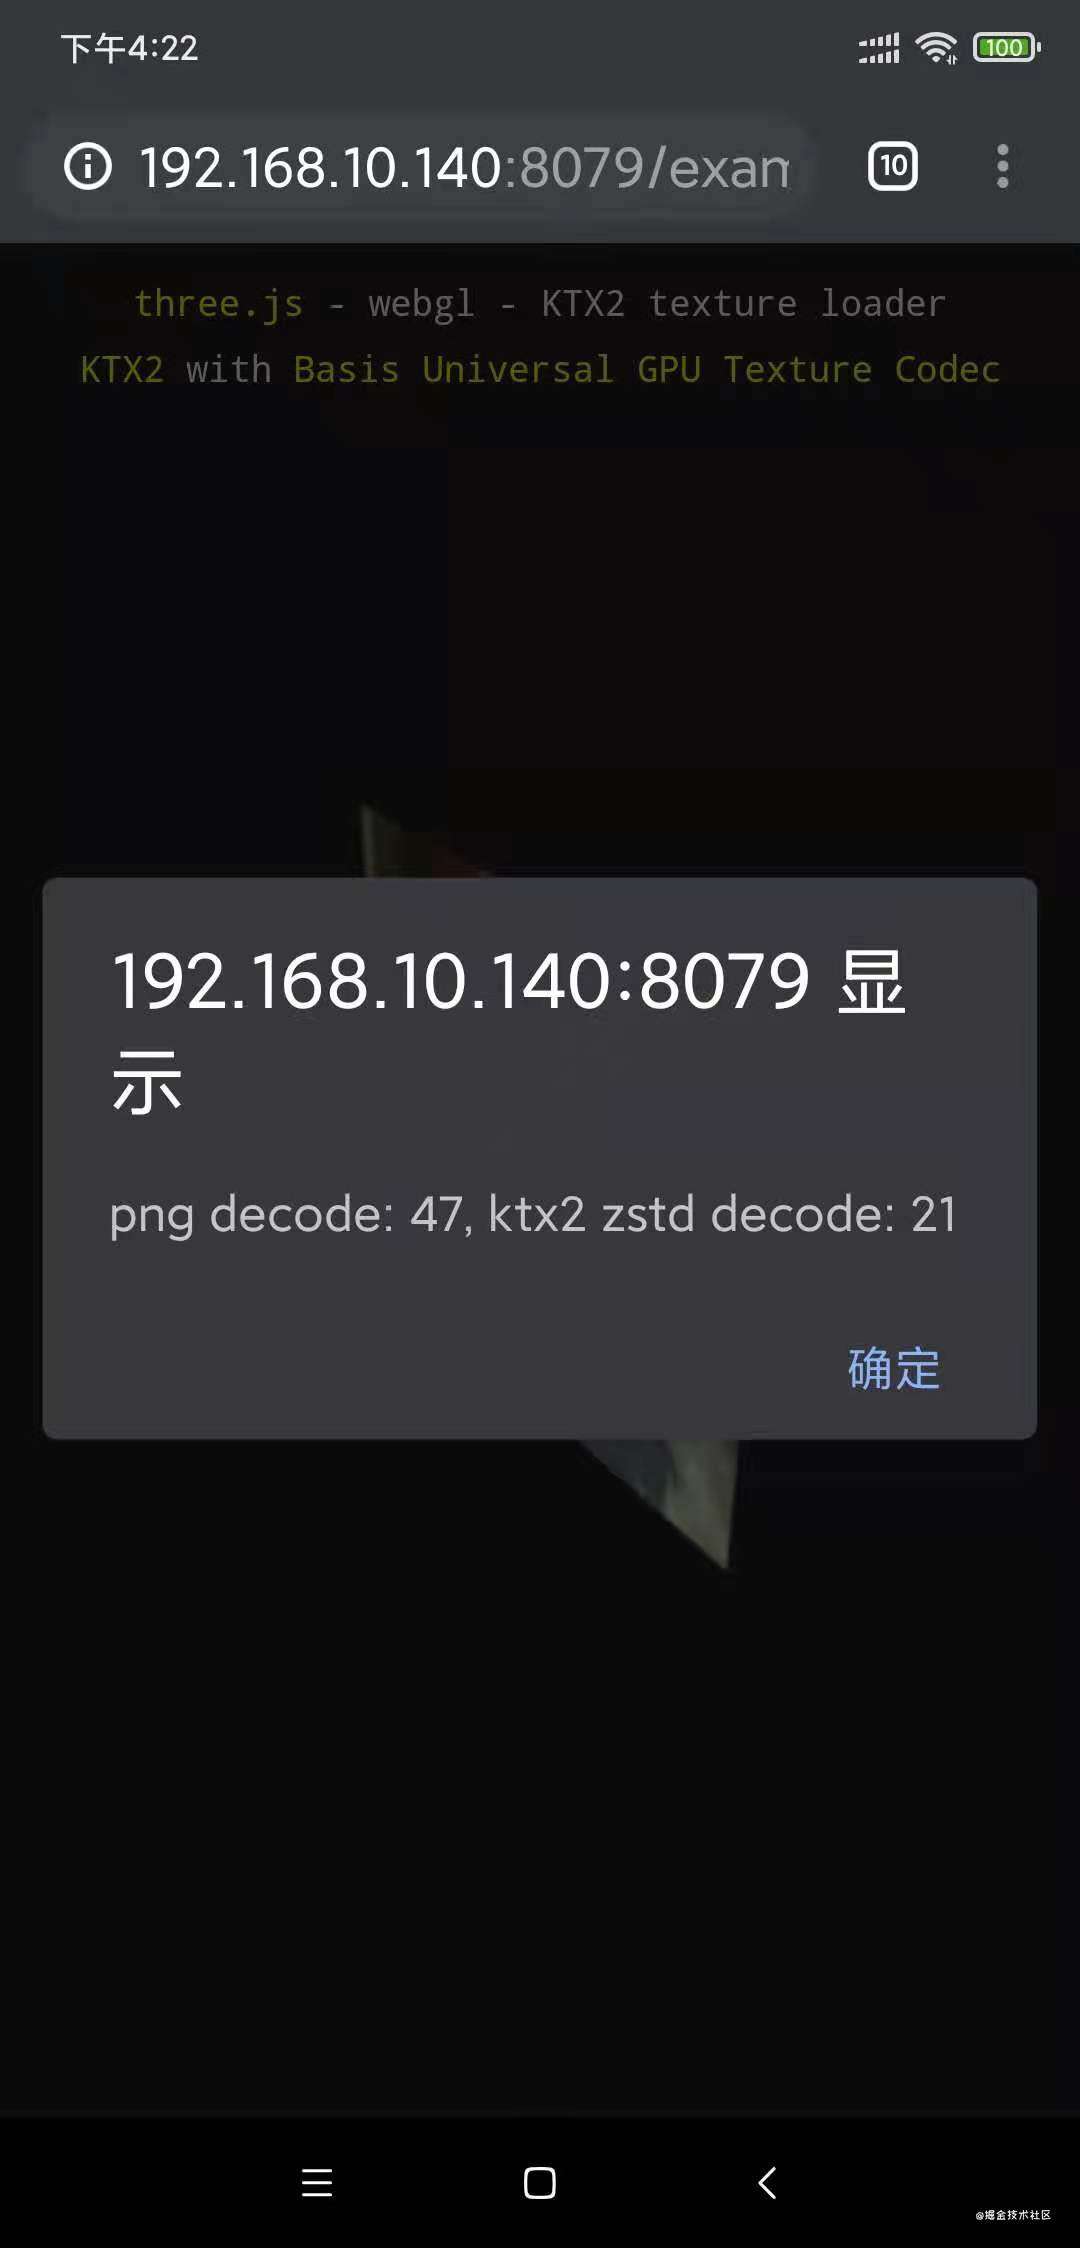
微信 webview 下 BoomBox 均比 glb/gltf 快,属于异常,chrome 下表现正常,banzi_blue 则稍慢一些,KTX2 的方案依然很慢
命令行使用
> npm i gltf-gpu-compressed-texture -S
# 查看帮助
> gltf-tc -h

  -h --help                                              显示帮助
  -i --input [dir] [?outdir] [?compress] [?mipmap]       把gltf所使用纹理转换为GPU压缩纹理并支持fallback

Examples:
  gltf-tc -i ./examples/glb ./examples/zstd
  gltf-tc -i ./examples/glb ./examples/no-zstd 0
  gltf-tc -i ./examples/glb ./examples/no-mipmap 1 false
  gltf-tc -i ./examples/glb ./examples/no-zstd-no-mipmap 0 false

# 执行
> gltf-tc -i ./examples/glb ./examples/zstd

done: 6417ms    image3.png      法线:false      sRGB: true
done: 13746ms   image2.png      法线:true       sRGB: false
done: 14245ms   image0.png      法线:false      sRGB: true
done: 14491ms   image1.png      法线:false      sRGB: false
done: 577ms     FINDI_TOUMING01_nomarl1.jpg     法线:true       sRGB: false
done: 568ms     FINDI_TOUMING01_Basecoler.png   法线:false      sRGB: true
done: 1267ms    lanse_banzi-1.jpg       法线:false      sRGB: true
done: 577ms     FINDI_TOUMING01_Basecoler.png   法线:false      sRGB: true
done: 604ms     FINDI_TOUMING01_nomarl1.jpg     法线:true       sRGB: false
done: 1280ms    lvse_banzi-1.jpg        法线:false      sRGB: true

cost: 17.75s
compress: 1, summary:
  bitmap: 11.22MB
  astc  : 7.18MB
  etc1  : 1.85MB
  bc7   : 7.16MB
  dxt   : 3.04MB
  pvrtc : 2.28MB
NPM 包使用
import { GLTFLoader, CompressedTexture, WebGLRenderer } from 'three-platfromzie/examples/jsm/loaders/GLTFLoader';
import GLTFGPUCompressedTexture from 'gltf-gpu-compressed-texture';

const gltfLoader = new GLTFLoader();
const renderer = new WebGLRenderer();
const scene = new Scene();

gltfLoader.register(parser => {
  return new GLTFGPUCompressedTexture(parser, renderer, {
    CompressedTexture: THREE.CompressedTexture,
  });
});

gltfLoader.loadAsync('./examples/zstd/BoomBox.gltf').then((gltf) => {
  scene.add(gltf.scene);
});
折腾发现
- 压缩纹理minFilter和magFilter支持有限
- zstd比png decode速度快,所以有zpng格式出现
- 比zstd更好的是az64不过没开源,也不知道实际性能情况
- ktx2Loader里使用的居然zstddec是在UI线程decode, 所以提个PR,实现worker pool decode
- 利用transferable传递buffer不能是经过Offset的TypeArray, 比如Uint8Array(buffer, dataOffset), 需要clone一下Uint8Array.from(new Uint8Array(buffer, dataOffset));
- epic有类似basis transcode方案和压缩格式 oodle, 闭源
- zstd还可能可以使用到tf模型上面去,不过tf也有自己的数据压缩
- 有实现在GPU decode Huffman, Massively Parallel Huffman Decoding on GPUs
- 最开始提到的Basis-Universal-Transcoders,babylon已经应用起来了, 只是还是标注实验性
- zstd wasm应该是未使用SIMD版本,并且是上一年构建的,使用最新版本构建wasm,不过未能成功跑起来
- IOS 上传纹理会卡GIF,使用了压缩纹理则不会
最后
欢迎大家使用gltf-gpu-compressed-texture,欢迎star
常见问题FAQ
- 免费下载或者VIP会员专享资源能否直接商用?
- 本站所有资源版权均属于原作者所有,这里所提供资源均只能用于参考学习用,请勿直接商用。若由于商用引起版权纠纷,一切责任均由使用者承担。更多说明请参考 VIP介绍。
- 提示下载完但解压或打开不了?
- 找不到素材资源介绍文章里的示例图片?
- 模板不会安装或需要功能定制以及二次开发?


发表评论
还没有评论,快来抢沙发吧!