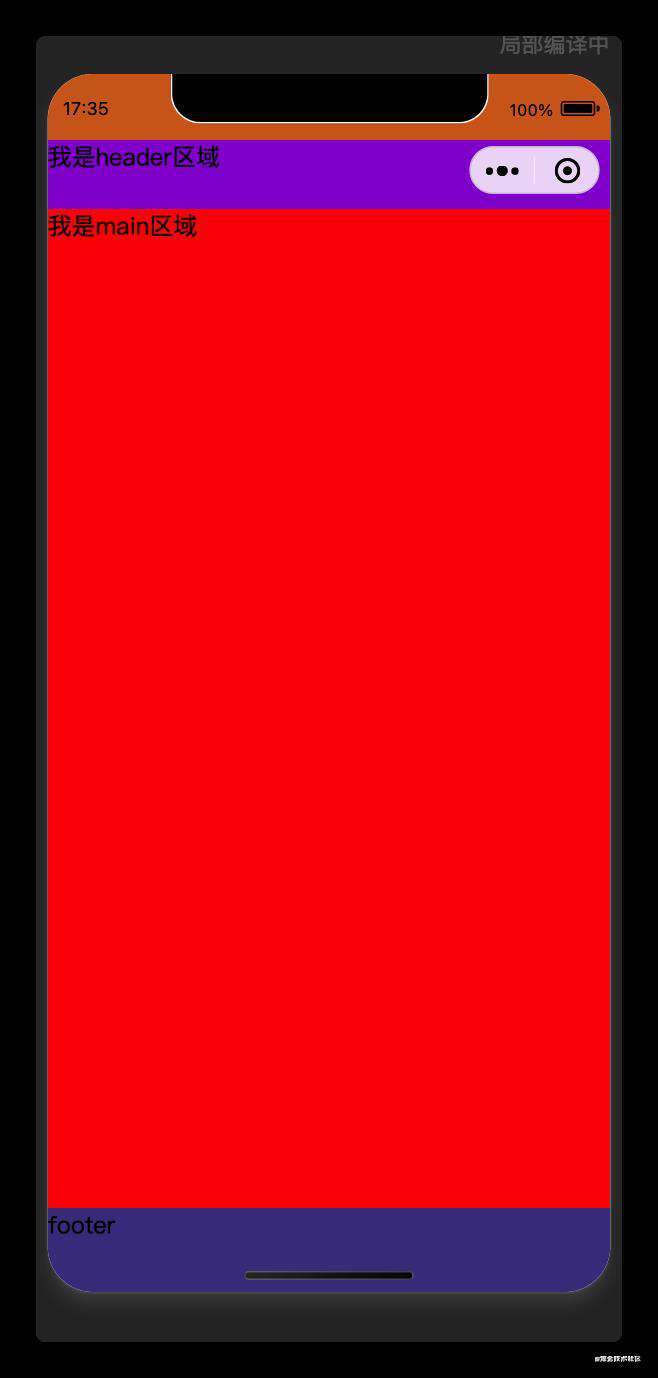
如图,我们实现一个这样的布局组件header+main+footer,为了方便编写样式,这里使用了less
 项目结构如下:
.
├── app.js
├── app.json
├── app.wxss
├── components
│   └── layout  // 布局组件
│       └── main-layout
│           ├── main-layout.js
│           ├── main-layout.json
│           ├── main-layout.less
│           ├── main-layout.wxml
│           └── main-layout.wxss
├── pages
│   └── layout-test
│       ├── layout-test.js
│       ├── layout-test.json
│       ├── layout-test.less
│       ├── layout-test.wxml
│       └── layout-test.wxss
├── project.config.json
├── project.private.config.json
└── sitemap.json
components/layout/main-layout/main-layout.wxml布局代码如下
<view class="layout__">
  <!-- header -->
  <view class="layout__header" style="padding-top: {{statusBarHeight}}px">
    <view class="layout__header-wrapper">
      <slot name="header"></slot>
    </view>
  </view>

  <!-- main -->
  <view class="layout__main" style="padding-top: {{statusBarHeight + 46}}px">
    <slot name="main"></slot>
  </view>

  <!-- footer -->
  <view class="layout__footer">
    <slot name="footer"></slot>
  </view>
</view>
components/layout/main-layout/main-layout.wxssjs代码
// components/layout/main-layout/main-layout.js
Component({
  options: {
    // 允许组件有多个插槽
    multipleSlots: true
  },
  /**
   * 组件的初始数据
   */
  data: {
    // 状态栏高度
    statusBarHeight: 0
  },

  /**
   * 在组件实例进入页面节点树时执行
   */
  attached() {
    const {statusBarHeight} = wx.getSystemInfoSync()
    console.log('系统信息⚙️⚙️⚙️:', statusBarHeight)  // 44(单位为px)
    this.setData({
      statusBarHeight
    })
  }
})
components/layout/main-layout/main-layout.less样式代码
.layout__ {
  position: relative;
  width: 100vw;
  height: 100vh;
  /* header */
  /* “&” 这里代表的是父级选择器的名称  */
  &header {  // 这里代表的就是.layout__
    background-color: chocolate;
    position: fixed;
    left: 0;
    right: 0;
    top: 0;
    z-index: 10;
    &-wrapper { // 这里代表的就是.layout__header
      height: 46px;
      background-color: darkviolet;
      box-sizing: border-box;
    }
  }

  /* footer */
  &footer {
    background-color: darkslateblue;
    position: fixed;
    left: 0;
    right: 0;
    bottom: 0;
    /* env是一个css函数,可以通过这个函数来获取iPhone X等刘海屏手机的安全区域来适配
    参考链接?:https://developer.mozilla.org/zh-CN/docs/Web/CSS/env()
    */
    padding-bottom: env(safe-area-inset-bottom);
    z-index: 10;
  }
}
在app.json中注册为全局组件
  "usingComponents": {
    "main-layout": "/components/layout/main-layout/main-layout"
  }
首先把要使用布局组件的页面设置自定义导航栏,在页面配置文件xxx.json中设置自定义导航栏或者app.json设置全局自定义导航栏
{
  "navigationStyle": "custom"
}
在pages/layout-test/layout-test.wxml文件中使用
<main-layout>
  <view class="header" slot="header">
    我是header区域
  </view>

  <view class="main" slot="main" style="background-color: red; height: 1000px">
    我是main区域
  </view>
  <view class="footer" slot="footer">
    footer
  </view>
</main-layout>
常见问题FAQ
- 免费下载或者VIP会员专享资源能否直接商用?
- 本站所有资源版权均属于原作者所有,这里所提供资源均只能用于参考学习用,请勿直接商用。若由于商用引起版权纠纷,一切责任均由使用者承担。更多说明请参考 VIP介绍。
- 提示下载完但解压或打开不了?
- 找不到素材资源介绍文章里的示例图片?
- 模板不会安装或需要功能定制以及二次开发?


发表评论
还没有评论,快来抢沙发吧!