这是我参与更文挑战的第7天,活动详情查看: 更文挑战

今天开始说到了 Mac Menubar 的功能显示了。
开篇之前
Mac 有一个不太起眼却又非常有价值的地方——顶部菜单右边的 Menubar。事实上,Mac 的 Menubar 设计绝不是仅仅和 Windows 一样的展示常驻后台的程序,它依托于顶部 Menubar 的「任何情况都会存在」的特性。扩展了 Mac 下与其他应用的交互,从简单的展示到快捷的操作,用好 Menubar 是可以有效提升 Mac 效率。
所以,一样的,我也想在开发的 Mac 日历也有这样的展示功能。
Electron Tray
这里就不得不先介绍 Electron's Tray。
在本项目中,主要借鉴 Timestamp,封装成 TrayService:
import type { Rectangle} from 'electron';
import { Tray, nativeImage} from 'electron';
export default class TrayService {
  tray: Tray;
  label: string;
  clickHandler: any;

  constructor() {
    this.label = '';
    const icon = nativeImage.createEmpty();
    this.tray = new Tray(icon);
    this.tray.on('click', () => (this.clickHandler || (() => {}))());
  }

  getBounds(): Rectangle {
    return this.tray.getBounds();
  }

  getLabel(): string {
    return this.label;
  }

  setLabel(label: string): this {
    if (this.tray.isDestroyed()) {
      return this;
    }

    this.tray.setTitle((this.label = label));
    return this;
  }

  onClick(fn: any): void {
    this.clickHandler = fn;
  }
}
这里主要介绍代码:
- 因为我没设计好这个产品的 Icon,所以这里先置空;
- Label 的内容有外部控制,今天主要是显示「农历 星期 时间」三个元素信息,之后还会有更复杂的内如呈现 (这里先保密);
click事件,这个好理解,只要点击 Tray,Electron 显示或者消失;- 因为要做到日历的 Electron 显示在 Menubar 正下方,所以需要借助
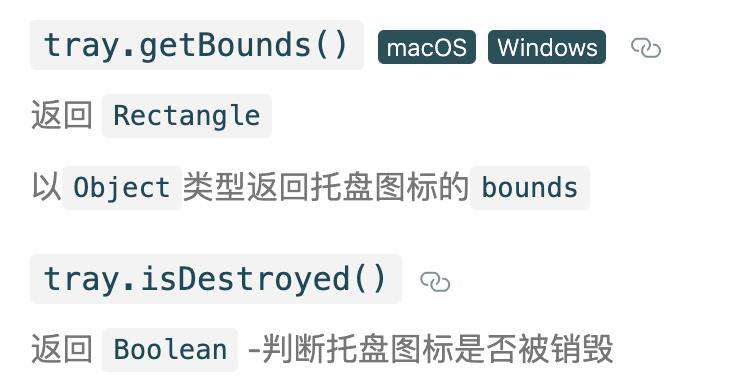
getBounds()值,具体查看文档:www.electronjs.org/docs/api/tr…

Electron 显示
完成了 TrayService,现在需要把 Electron 显示在其正下方。
// Tray 点击事件,获取 getBounds(),为 Election 显示服务
this.trayService.onClick(() => {
  const bounds = this.trayService.getBounds();
  const currentMousePosition = screen.getCursorScreenPoint();
  const currentDisplay = screen.getDisplayNearestPoint(
    currentMousePosition,
  );
  this.setPosition(bounds.x + bounds.width / 2, currentDisplay.workArea.y);

  if (this.isVisible()) {
    this.hide();
  } else {
    this.show();
  }
});
看 this.setPosition() 方法:
setPosition(x: number, y: number, centerToX = true): this {
this.window.setPosition(
  centerToX ? Math.round(x - this.window.getSize()[0] / 2) : x,
  y,
);
return this;
}
内容输出
万事具备,只欠我们需要展示的内容。今天只是动态显示:「农历 星期 时间」。
为了配合动态实时显示效果,需要借助定时器功能,这里封装为:ClockService,直接看代码:
'use strict';

import { app } from 'electron';
const Moment = require('moment');
import LunarService from './LunarService';

export default class ClockService {
  format: any;
  onTickHandler: any;
  intervalId: any;
  constructor() {
    Moment.locale(app.getLocale());
    // this.setFormat("MM/DD HH:mm:ss");
    // lll
    this.setFormat('MMMDo dddd HH:mm:ss');
    this.start();
  }

  start(): this {
    if (typeof this.onTickHandler !== 'function') {
      this.onTickHandler = () => {};
    }

    this.intervalId = setInterval(() => this.onTickHandler(this), 1000);

    return this;
  }

  stop(): this {
    if (this.intervalId) {
      this.intervalId = clearInterval(this.intervalId);
    }

    return this;
  }

  onTick(callback: any): this {
    this.onTickHandler = callback;

    return this;
  }

  getFormat(): any {
    return this.format;
  }

  setFormat(format: any): this {
    if (typeof format !== 'string') {
      return this;
    }

    this.format = format;

    return this;
  }

  toString(): string {
    const lunarService = new LunarService();
    const dayTextInChinese = lunarService.showNongliData(true);
    return dayTextInChinese + ' ' + Moment().format(this.getFormat());
  }
}
相信大家都能理解这功能的含义了。在定时器执行时,实时拿到显示的内容,填充到 Tray 的 Label 上:
this.clockService.onTick((clock: { toString: () => string; }) => {
  this.trayService.setLabel(clock.toString());
});
所以具体只看上面的 clock.toString() 函数了,显示农历数据 + Moment() 值。
这个「农历数据」和日历每个日期里展示的一致,看之前笔记的应该不陌生了:
showNongliData(changeShowFestivals: boolean): string {

if (changeShowFestivals) {
  const solarFestivals = this.solar.getFestivals();

  if (solarFestivals.length > 0) {
    return solarFestivals.join(' ');
  }

  const lunarFestivals = this.lunar.getFestivals();

  if (lunarFestivals.length > 0) {
    return lunarFestivals.join(' ');
  }
}

return this.lunar.getJieQi() ||
`${this.lunar.getMonthInChinese()}月${this.lunar.getDayInChinese()}`;
}
小结
哦了,最后,我们 yarn watch 直接看效果:

至于 Memubar 上内容的显示,有待于下一步不断的挖掘。
今天算是开始涉猎 Electron 的开发了,至于更多的 Electron 功能我们继续折腾,未完待续!
这个项目的所有记录基本放进专栏里了,欢迎查看: Electron+Vue3 MAC 版日历开发记录
常见问题FAQ
- 免费下载或者VIP会员专享资源能否直接商用?
- 本站所有资源版权均属于原作者所有,这里所提供资源均只能用于参考学习用,请勿直接商用。若由于商用引起版权纠纷,一切责任均由使用者承担。更多说明请参考 VIP介绍。
- 提示下载完但解压或打开不了?
- 找不到素材资源介绍文章里的示例图片?
- 模板不会安装或需要功能定制以及二次开发?


发表评论
还没有评论,快来抢沙发吧!