Material Components是Google官方对Material Deign的最佳实践,这个库试图在不同的Android版本中统一Material Design UI组件的外观和使用代码,当然也在不同的平台上统一这些组件(有针对iOS、web和Flutter的库的版本)。Material Components库还实现了新的Material Design规范中引入的功能。
官方的文档对Material Components有着非常详细的讲解,地址如下所示。
github.com/material-co…
这次要讲的就是Material Components中对于Shape的处理。
Shape
MaterialShapeDrawable类提供了非常有用的工具集,可以为我们的应用程序实现非常酷的效果。MaterialShapeDrawable类让我们可以通过指定最终形状的边缘和角落的样子来定义形状。这些基本的形状定义可以另外使用插值浮动属性来控制,以允许角和边缘的动画。
为了创建自定义的MaterialShapeDrawable,可以使用ShapeAppearanceModel构造函数。ShapeAppearanceModel使用EdgeTreatment和CornerTreatment两个类来存储形状的每个Edge和Corner的信息(总是有4个Edge和4个Corner,尽管你可以为它们定义几乎任何形状)。你可以为每个Edge和Corner设置不同的处理方式,也可以通过一次调用为所有Edge和Corner设置相同的处理方式。
在ShapePathModel中,也有一些预定义的现成的Edge和Corner处理,它们已经实现了Material Design规范中介绍的大部分形状效果。目前已经有了圆角处理(float radius)、切角处理(float size)或三角边缘处理(float size, boolean inside),它们都能像你期望的那样完美地工作。
关于Shape的处理,官方有详细的文档,地址如下。
github.com/material-co…
最简单的使用
通过ShapeAppearanceModel的Builder函数可以很方便的控制边角的Shape,代码如下所示。
val shapePathModel = ShapeAppearanceModel.builder()
    .setAllCorners(RoundedCornerTreatment())
    .setAllCornerSizes(10.dp())
    .build()
val backgroundDrawable = MaterialShapeDrawable(shapePathModel).apply {
    setTint(Color.parseColor("#bebebe"))
    paintStyle = Paint.Style.FILL
}
test1.background = backgroundDrawable
MaterialShapeDrawable实际上充当了一个Drawable的角色,用于创建一个指定Shape的背景。
除了上面这种设置setAllCorners和setAllCornerSizes来确定Corner的方式,还可以通过下面这种方式。
.setAllCorners(CornerFamily.ROUNDED, 8.dp())
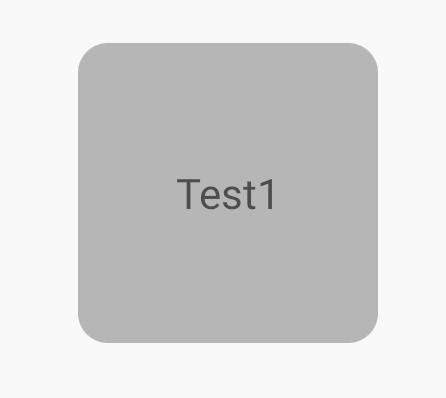
展示如图所示。
类似的,还可以指定Edge的效果。
val shapePathModel = ShapeAppearanceModel.builder()
    .setAllCorners(RoundedCornerTreatment())
    .setAllCornerSizes(10.dp())
    .setAllEdges(TriangleEdgeTreatment(8.dp(), true))
    .build()
val backgroundDrawable = MaterialShapeDrawable(shapePathModel).apply {
    setTint(Color.parseColor("#bebebe"))
    paintStyle = Paint.Style.FILL_AND_STROKE
    strokeWidth = 2.dp()
}
test1.background = backgroundDrawable
展示如图所示。
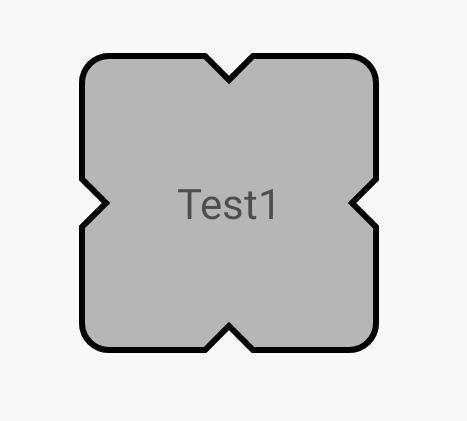
MaterialShapeDrawable还可以对描边进行设置,如上图所示。
不过这里要注意的是View的布局边界问题,默认情况下,超出布局边界的内容是会被裁剪的,所以这里在使用TriangleEdgeTreatment(8.dp(), true),第二个参数isInside设置的是true,如果设置成false,就需要指定parent view的clipChildren属性为false了。
(test1.parent as? ViewGroup)?.clipChildren = false
这一点很重要,如果是封装的自定义View,通常可以在attachToWindow中进行设置。
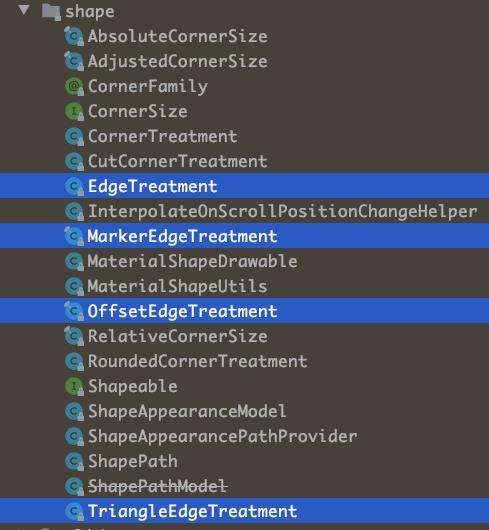
在源码中,已经内置了很多不同种类的EdgeTreatment和CornerTreatment,这些基本的Edge和Corner的处理,可以满足大部分的使用场景。
自定义CornerTreatment和EdgeTreatment
除了系统自定义的基本的Edge和Corner以外,还可以自定义Edge和Corner的样式。其实代码很简单,就是针对给定的ShapePath进行一些裁剪处理,下面就列举了一些处理的Demo,相信大家一看就能明白是如何处理的了。
class InnerCutCornerTreatment : CornerTreatment() {
    override fun getCornerPath(shapePath: ShapePath, angle: Float, f: Float, size: Float) {
        val radius = size * f
        shapePath.reset(0f, radius, 180f, 180 - angle)
        shapePath.lineTo(radius, radius)
        shapePath.lineTo(radius, 0f)
    }
}

class InnerRoundCornerTreatment : CornerTreatment() {
    override fun getCornerPath(shapePath: ShapePath, angle: Float, f: Float, size: Float) {
        val radius = size * f
        shapePath.reset(0f, radius, 180f, 180 - angle)
        shapePath.addArc(-radius, -radius, radius, radius, angle, -90f)
    }
}

class ExtraRoundCornerTreatment : CornerTreatment() {
    override fun getCornerPath(shapePath: ShapePath, angle: Float, f: Float, size: Float) {
        val radius = size * f
        shapePath.reset(0f, radius, 180f, 180 - angle)
        shapePath.addArc(-radius, -radius, radius, radius, angle, 270f)
    }
}

class ArgEdgeTreatment(val size: Float, val inside: Boolean) : EdgeTreatment() {
    override fun getEdgePath(length: Float, center: Float, f: Float, shapePath: ShapePath) {
        val radius = size * f
        shapePath.lineTo(center - radius, 0f)
        shapePath.addArc(
            center - radius, -radius,
            center + radius, radius,
            180f,
            if (inside) -180f else 180f
        )
        shapePath.lineTo(length, 0f)
    }
}

class QuadEdgeTreatment(val size: Float) : EdgeTreatment() {
    override fun getEdgePath(length: Float, center: Float, f: Float, shapePath: ShapePath) {
        shapePath.quadToPoint(center, size * f, length, 0f)
    }
}
针对单边、单角的处理
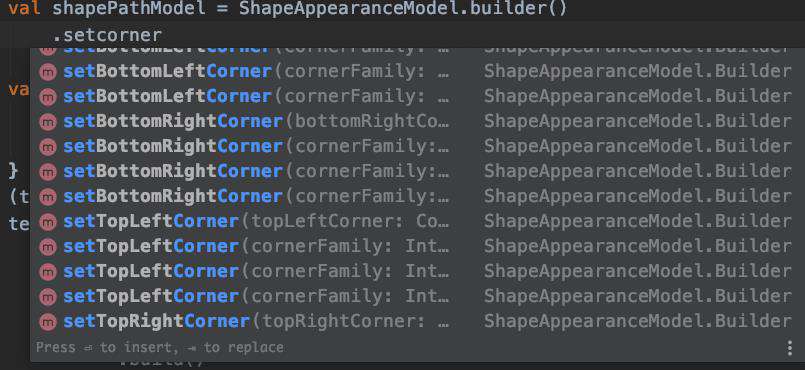
除了可以通过allXXX来统一设置四个角和边的属性,当然也是可以指定某个角或者边的,ShapeAppearanceModel的Builder同样提供了下面的这些方法来处理单边和单角。
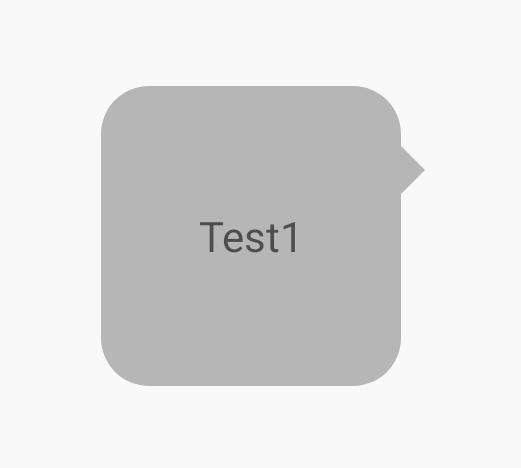
借助单边、单角的处理,可以完成一些常用的样式处理,例如,聊天界面边界的气泡效果,代码如下所示。
val shapePathModel = ShapeAppearanceModel.builder()
    .setAllCorners(RoundedCornerTreatment())
    .setAllCornerSizes(16.dp())
    .setRightEdge(object : TriangleEdgeTreatment(8.dp(), false) {
        override fun getEdgePath(
            length: Float,
            center: Float,
            interpolation: Float,
            shapePath: ShapePath
        ) {
            super.getEdgePath(length, 12.dp(), interpolation, shapePath)
        }
    })
    .build()
val backgroundDrawable = MaterialShapeDrawable(shapePathModel).apply {
    setTint(Color.parseColor("#bebebe"))
    paintStyle = Paint.Style.FILL
}
(test1.parent as? ViewGroup)?.clipChildren = false
test1.background = backgroundDrawable
展示效果如图所示。
阴影的处理
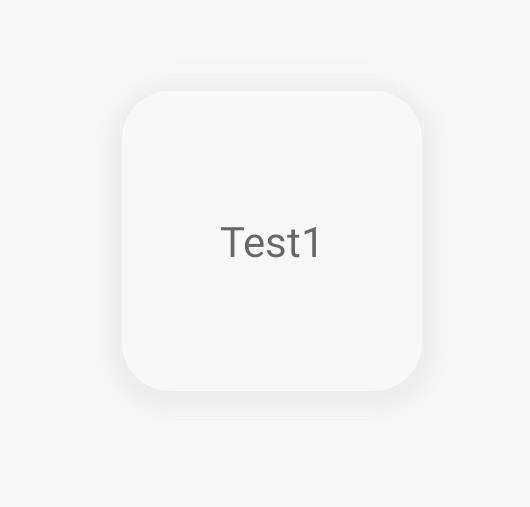
虽然MD提供了setElevation来设置View的高程,但是国内的设计师普遍不认同这种设计理念,认为Elevation设置的阴影比较生硬不够自然,借助MaterialShapeDrawable,我们同样可以来处理阴影。
一般来说,处理阴影不外乎下面几种方式。
- translationZ与elevation,国内设计师不喜欢
- 使用9Patch阴影图,一般可以通过inloop.github.io/shadow4andr… 来创建,同时View需要预留阴影空间
- 通过setShadowLayer来绘制,使用比较局限
就目前而言,比较成熟的就是使用MaterialShapeDrawable来实现阴影效果,代码如下所示。
val shapePathModel = ShapeAppearanceModel.builder()
    .setAllCorners(RoundedCornerTreatment())
    .setAllCornerSizes(16.dp())
    .build()
val backgroundDrawable = MaterialShapeDrawable(shapePathModel).apply {
    setTint(Color.parseColor("#05bebebe"))
    paintStyle = Paint.Style.FILL
    shadowCompatibilityMode = MaterialShapeDrawable.SHADOW_COMPAT_MODE_ALWAYS
    initializeElevationOverlay(this@MainActivity)
    shadowRadius = 16.dp().toInt()
    setShadowColor(Color.parseColor("#D2D2D2"))
    shadowVerticalOffset = 2.dp().toInt()
}
(test1.parent as? ViewGroup)?.clipChildren = false
test1.background = backgroundDrawable
首先,阴影处于布局边界之外,所以需要使用clipChildren属性,同时,设置自定义阴影的核心在于shadowCompatibilityMode参数,它由几个枚举(SHADOW_COMPAT_MODE_DEFAULT、SHADOW_COMPAT_MODE_NEVER、SHADOW_COMPAT_MODE_ALWAYS),其中SHADOW_COMPAT_MODE_DEFAULT表示是使用elevation的阴影绘制方式,还是fake shadow的绘制方式。
这里需要设置为SHADOW_COMPAT_MODE_ALWAYS,表示始终使用fake shadow。它的几个参数shadowRadius、setShadowColor、shadowVerticalOffset分别代表了绘制阴影的三个参数,效果如图所示。
综上,通过Material Components的MaterialShapeDrawable,基本上就可以实现Material Design的所有Shape处理。在现代化的Android开发中,Google已经对应用层的很多设计、开发方式进行了统一和梳理,利用这些先进的开发工具,可以让我们平时的开发更加方便。

更多内容,请关注我的个人网站 xuyisheng.top/
常见问题FAQ
- 免费下载或者VIP会员专享资源能否直接商用?
- 本站所有资源版权均属于原作者所有,这里所提供资源均只能用于参考学习用,请勿直接商用。若由于商用引起版权纠纷,一切责任均由使用者承担。更多说明请参考 VIP介绍。
- 提示下载完但解压或打开不了?
- 找不到素材资源介绍文章里的示例图片?
- 模板不会安装或需要功能定制以及二次开发?


发表评论
还没有评论,快来抢沙发吧!