CSS3-边框
border-radiusbox-shadowborder-image
【1】box-shadow
box-shadow: 50px 50px 0 20px #ffb;
图:
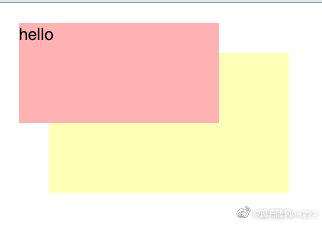
解析:
参数1:X轴,图中为30,因为50-20=30;
参数2:Y轴,图中为30,因为50-20=30;
参数3:模糊距离
参数4:阴影大小,默认可省略不写时为0。
参数4:颜色。
【2】border-image
border-image-repeat: 重复(repeat)、拉伸(stretch)或铺满(round)。
border-image: url(border.png) 30 round;
【3】半透明边框
rgba或hsla
color: hsla(1,0%,100%,.2);
border: solid 3px;
border-color: rgba(255,255,0,.2);
【4】多重边框
【4.1】用 box-shadow
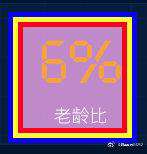
background: #fbfb;
box-shadow: 0 0 0 5px #f00, 0 0 0 10px #ff0, 0 0 0 15px #00f;
【4.2】用 outline
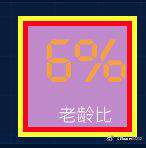
background: #fbfb;
outline: 5px solid #ff0;
border: 5px solid #f00;
outline 和 border 的区别:
outline不占空间,border占空间- 设置圆角(
border-radius)之后,border边框会贴紧,outline不会 outline-set可以设置边距
区别的图片
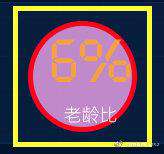
区别的代码:
background: #fbfb;
outline: 5px solid #ff0;
border: 5px solid #f00;
border-radius: 50%;
outline-offset: 10px;
CSS3-background
【1】background-origin
背景区域的位置,有如下属性:
-
content-box:padding值会起效,以padding开始的单位开始显示背景; -
padding-box:padding不会影响背影,直接从border里面开如显示背影; -
border-box:border不会影响背景,直接把border的内容也算在背影里面,背景会减去border的长度。
【2】background-image
背景图,有如下属性:
-
url():图片地址 -
line-gradient:创建线性渐变的图片 -
redial-gradient:创建径向渐变的图片 -
repeating-line-gradient:创建重复线性渐变的图片 -
repeating-redial-gradient:创建重复径向渐变的图片
与background-size组合的话,可以生成条纹背景。
【2.1】linear-gradient
背景 2 色平铺
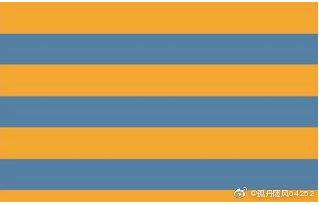
background: linear-gradient(#ff0 50%, #f00 50%);
background-size: 100% 50%;
【2.1.1】linear-gradient:条纹背景
背景为上下 2 色分割
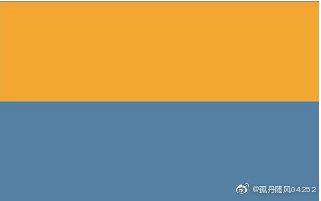
backgorund-image: linear-gradient(#ff0 50%, #f00 50%)
背景 2 色平铺
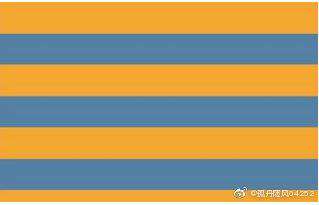
background: linear-gradient(#ff0 50%, #f00 50%);
background-size: 100% 50%;
背景 2 色任意角度平铺
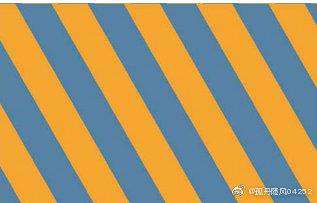
background-image: repeating-linear-gradient(60deg,yellow 0%,yellow 5%,green 0%,green 10%);
【2.1.2】linear-gradient:切角效果
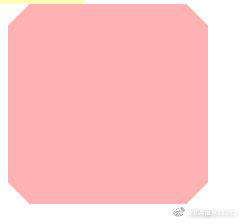
width: 200px;
height: 200px;
background:#ffb;
background: linear-gradient(135deg, transparent 15px,#fbb 0) top left,
      linear-gradient(-135deg, transparent 15px,#fbb 0) top right,
      linear-gradient(-45deg, transparent 15px, #fbb 0) bottom right,
      linear-gradient(45deg, transparent 15px, #fbb 0) bottom left;
background-size:50% 50%;
background-repeat:no-repeat;
【2.2】repeating-linear-gradient
背景 2 色任意角度平铺
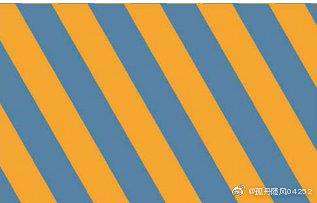
background-image: repeating-linear-gradient(60deg,yellow 0%,yellow 5%,green 0%,green 10%);
【3】background-position 位置
让背景图在距离右边和底部都是 20px,如图:
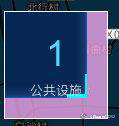
【3.1】background-position
方法一:
background: url(img_url) no-repeat;
background-position: bottom 20px right 20px;
方法二:
padding: 20px;
background: url(img_url) no-repeat;
background-position: bottom right;
background-origin: content-box;
background-origin:content-box;和padding:20px结合起来的效果和方法一一样。
【3.2】calc
background: url(img_url) no-repeat;
background-position: calc(100% - 20px, 100% - 20px);
【4】background-attachment
背景依附,默认为scroll,随背景滚动
background-attachment: fixed; // 背景不会随内容滚动
用background-attachment实现滚动提示
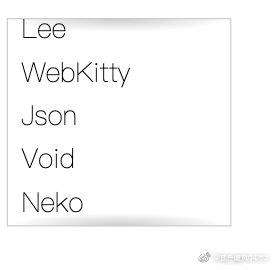
background-image: radial-gradient(at top, rgba(0,0,0,0.2), rgba(0,0,0,0));
background-repeat: no-repeat;
background-size: 100% 15px;
background-attachment: local, scroll;
CSS3-transform
所有旋转效果
/* 转换中心 */
transform-origin: top;
/* 旋转 */
transform: rotate(45deg);
/* 倾斜 */
transform: skew(45deg);
/* 梯形效果 */
transform: perspective(45deg);
/* 平移 */
transform: translate(20px, 10px);
/* 缩放 */
transform: scale(.5);
也可以所有属性合并:
transform: rotate(45deg) translate(20px, 10px) scale(.5) skew(45deg);
【1】rotate:旋转
【1.1】正方形
.lin{
  width: 200px;
  height: 200px;
  overflow: hidden;
  transform: rotate(45deg);
}
.lin > img{
  width: 100%;
  height: 100%;
  transform: rotate(-45deg)scale(1.5);
}
如果不用scale(1.5)的话就是八角形。
【1.2】长方形
.lin-long > img{
  clip-path: polygon(50% 0, 100% 50%, 50% 100%, 0 50%);
  transition: ls clip-path;
}
.lin-long > img:hover{
  clip-path: polygon(0 0 , 100% 0, 100% 100%, 0 100%);
}
【2】skewX:倾斜
transform: skewX(-45deg);
skewX 默认会把字体内容也旋转,解决方式是加伪元素
.box{
  position: relative;
  width: 100px;
  height: 50px;
  text-align: center;
  line-height: 50px;
}
.box::before{
  content: '';
  position: absolute;
  bottom: 0;
  top: 0;
  right: 0;
  left: 0;
  z-index: -1;
  background-color: #ffb;
  transform: skewX(-45deg);
}
【3】perspective:梯形效果
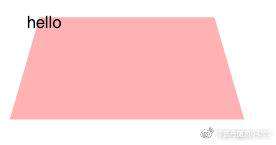
transform: perspective(30px)rotateX(5deg);
同样会导致内容变成梯形,所以用伪元素生成
.border{
  width: 200px;
  height: 100px;
  position: relative;
}
.border::before{
  content: '';
  position: absolute;
  bottom: 0;
  top: 0;
  left: 0;
  right: 0;
  z-index: -1;
  background:#fbb;
  transform: perspective(30px)rotateX(5deg);
}
CSS3-各种阴影
【1】边框阴影:box-shadow
【1.1】单侧阴影
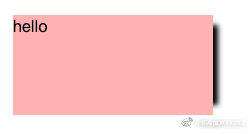
box-shadow: 15px 0 5px -10px #000;
【1.2】多侧阴影
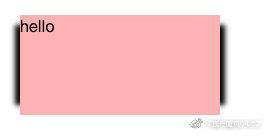
box-shadow: 15px 0 5px -10px #000, -15px 0 5px -10px #000;
【2】文字阴影:text-shadow

text-shadow: 5px 5px 5px #f00;
参数:x 轴、y 轴、阴影、颜色。
【3】多边形阴影:drop-shadow
文字也会有阴影
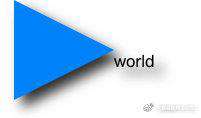
width: 0;
height: 0;
border: 100px solid ;
border-color: transparent transparent red;
filter: drop-shadow(5px 5px 5px #000);
参数:x 轴、y 轴、阴影、颜色。
【4】通过阴影弱化背景
box-shadow: 0 0 0 50vmax rgba(0,0,0,.8);
重点:用伪元素设置 blur
.cover{
  width: 600px;
  height: 500px;
  position: relative;
}
.cover::before{
  content: '';
  position: absolute;
  top: 0;
  left: 0;
  width: 600px;
  height: 500px;
  filter: blur(5px);
  background: url('./floor.jpeg') center center no-repeat;
  z-index: -1;
}
.content{
  position: absolute;
  left: 30%;
  top: 50%;
  width: 300px;
  height: 100px;
  border: 1px solid #fbb;
}
<div class="cover">
  <div class="content">我是内容</div>
</div>
常见问题FAQ
- 免费下载或者VIP会员专享资源能否直接商用?
- 本站所有资源版权均属于原作者所有,这里所提供资源均只能用于参考学习用,请勿直接商用。若由于商用引起版权纠纷,一切责任均由使用者承担。更多说明请参考 VIP介绍。
- 提示下载完但解压或打开不了?
- 找不到素材资源介绍文章里的示例图片?
- 模板不会安装或需要功能定制以及二次开发?


发表评论
还没有评论,快来抢沙发吧!