前言
前一篇文章介绍了 fastify 通过 schema 来序列化 JSON,为 Node.js 服务提升性能的方法。今天的文章会介绍 fastify 使用的路由库,翻阅其源码(lib/route.js)可以发现,fastify 的路由库并不是内置的,而是使用了一个叫做 find-my-way 的路由库。

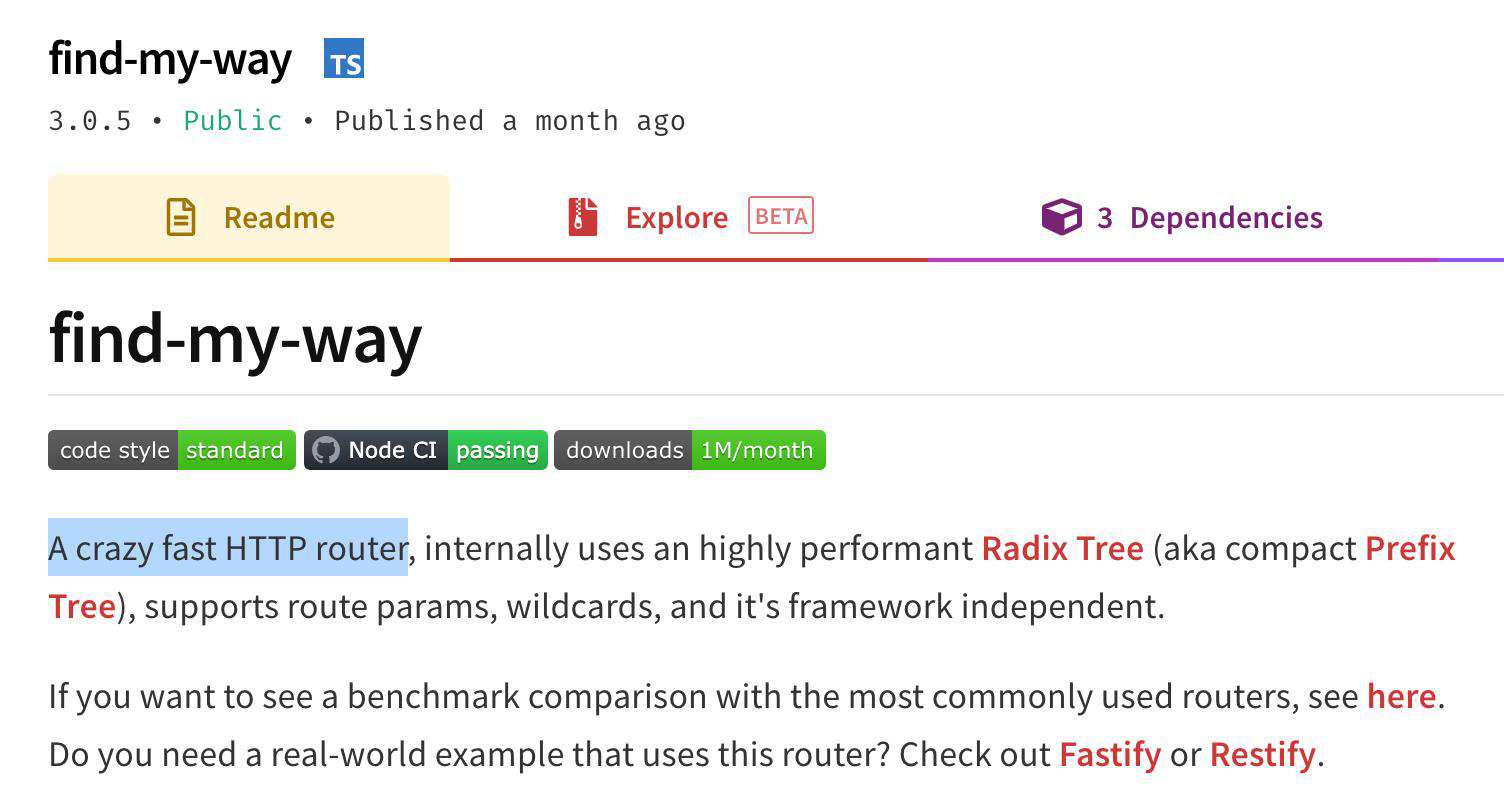
这个路由库的简介也很有意思,号称“超级无敌快”的 HTTP 路由。

看上去 fastify 像是依赖了第三方的路由库,其实这两个库的作者是同一批人。

如何使用
find-my-way 通过 on 方法绑定路由,并且提供了 HTTP 所有方法的简写。
const router = require('./index')()

router.on('GET', '/a', (req, res, params) => {
  res.end('{"message": "GET /a"}')
})
router.get('/a/b', (req, res, params) => {
  res.end('{"message": "GET /a/b"}')
}))
其实内部就是通过遍历所有的 HTTP 方法名,然后在原型上扩展的。
Router.prototype.on = function on (method, path, opts, handler) {
  if (typeof opts === 'function') {
    // 如果 opts 为函数,表示此时的 opts 为 handler
    handler = opts
    opts = {}
  }
  // ...
}
for (var i in http.METHODS) {
  const m = http.METHODS[i]
  const methodName = m.toLowerCase()
  // 扩展方法简写
  Router.prototype[methodName] = function (path, handler) {
    return this.on(m, path, handler)
  }
}
绑定的路由可以通过 lookup 调用,只要将原生的 req 和 res 传入 lookup 即可。
const http = require('http')

const server = http.createServer((req, res) => {
  // 只要将原生的 req 和 res 传入 lookup 即可
  router.lookup(req, res)
})

server.listen(3000)
find-my-way 会通过 req.method/req.url 找到对应的 handler,然后进行调用。
Router.prototype.lookup = function lookup (req, res) {
  var handle = this.find(req.method, sanitizeUrl(req.url))
  if (handle === null) {
    return this._defaultRoute(req, res, ctx)
  }
  // 调用 hendler
  return handle.handler(req, res, handle.params)
}
路由的添加和查找都基于树结构来实现的,下面我们来看看具体的实现。
Radix Tree
find-my-way 采用了名为 Radix Tree(基数树) 的算法,也被称为 Prefix Tree(前缀树)。Go 语言里常用的 web 框架echo和gin都使用了Radix Tree作为路由查找的算法。

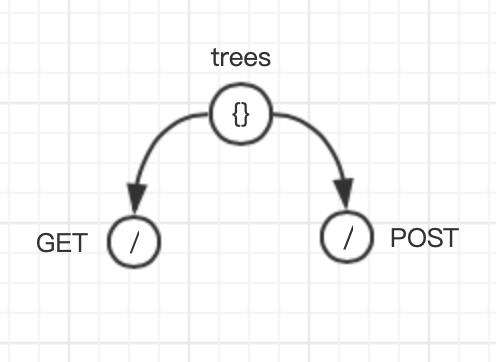
在 find-my-way 中每个 HTTP 方法(GET、POST、PUT ...)都会对应一棵前缀树。
// 方法有所简化...
function Router (opts) {
  opts = opts || {}
  this.trees = {}
  this.routes = []
}

Router.prototype.on = function on (method, path, opts, handler) {
  if (typeof opts === 'function') {
    // 如果 opts 为函数,表示此时的 opts 为 handler
    handler = opts
    opts = {}
  }
  this._on(method, path, opts, handler)
}

Router.prototype._on = function on (method, path, opts, handler) {
  this.routes.push({
    method, path, opts, handler,
  })
  // 调用 _insert 方法
  this._insert(method, path, handler)

}
Router.prototype._insert = function _insert (method, path, handler) {
  // 取出方法对应的 tree
  var currentNode = this.trees[method]
  if (typeof currentNode === 'undefined') {
    // 首次插入构造一个新的 Tree
    currentNode = new Node({ method })
    this.trees[method] = currentNode
  }
  while(true) {
    // 为 currentNode 插入新的节点...
  }
}
每个方法对应的树在第一次获取不存在的时候,都会先创建一个根节点,根节点使用默认字符(/)。

每个节点的数据结构如下:
// 只保留了一些重要参数,其他的暂时忽略
function Node(options) {
  options = options || {}
  this.prefix = options.prefix || '/' // 去除公共前缀之后的字符,默认为 /
  this.label = this.prefix[0]         // 用于存放其第一个字符
  this.method = options.method        // 请求的方法
  this.handler = options.handler      // 请求的回调
  this.children = options.children || {} // 存放后续的子节点
}
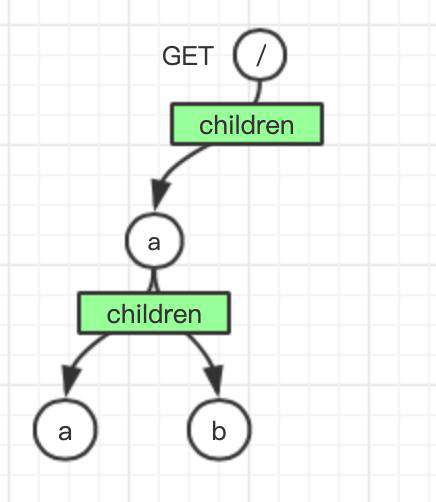
当我们插入了几个路由节点后,树结构的具体构造如下:
router.on('GET', '/a', (req, res, params) => {
  res.end('{"message":"hello world"}')
})
router.on('GET', '/aa', (req, res, params) => {
  res.end('{"message":"hello world"}')
})
router.on('GET', '/ab', (req, res, params) => {
  res.end('{"message":"hello world"}')
})

Node {
  label: 'a',
  prefix: 'a',
  method: 'GET',
  children: {
    a: Node {
      label: 'a',
      prefix: 'a',
      method: 'GET',
      children: {},
      handler: [Function]
    },
    b: Node {
      label: 'b',
      prefix: 'b',
      method: 'GET',
      children: {},
      handler: [Function]
    }
  },
  handler: [Function]
}
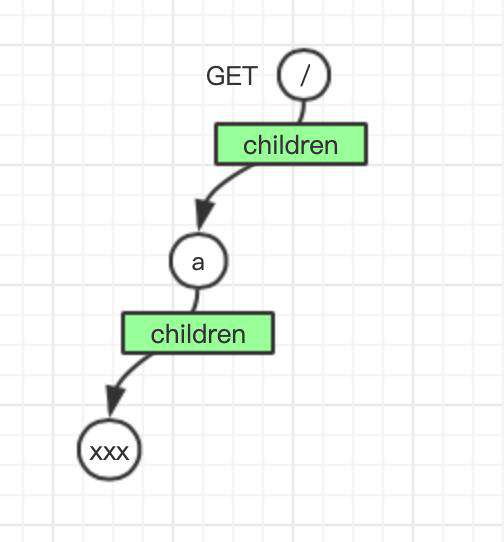
如果我们绑定一个名为 /axxx 的路由,为了节约内存,不会生成三个 label 为x 的节点,只会生成一个节点,其 label 为 x,prefix 为 xxx。
router.on('GET', '/a', (req, res, params) => {
  res.end('{"message":"hello world"}')
})
router.on('GET', '/axxx', (req, res, params) => {
  res.end('{"message":"hello world"}')
})

Node {
  label: 'a',
  prefix: 'a',
  method: 'GET',
  children: {
    a: Node {
      label: 'x',
      prefix: 'xxx',
      method: 'GET',
      children: {},
      handler: [Function]
    }
  },
  handler: [Function]
}
插入路由节点
通过之前的代码可以看到, on 方法最后会调用内部的 _insert 方法插入新的节点,下面看看其具体的实现方式:
Router.prototype._insert = function _insert (method, path, handler) {
  // 取出方法对应的 tree
  var currentNode = this.trees[method]
  if (typeof currentNode === 'undefined') {
    // 首次插入构造一个新的 Tree
    currentNode = new Node({ method })
    this.trees[method] = currentNode
  }

  var len = 0
  var node = null
  var prefix = ''
  var prefixLen = 0
  while(true) {
    prefix = currentNode.prefix
    prefixLen = prefix.length
    len = prefixLen
    path = path.slice(len)
    // 查找是否存在公共前缀
    node = currentNode.findByLabel(path)
    if (node) {
      // 公共前缀存在,复用
      currentNode = node
      continue
    }
    // 公共前缀不存在,创建一个
    node = new Node({ method: method, prefix: path })
    currentNode.addChild(node)
  }
}
插入节点会调用 Node 原型上的 addChild 方法。
Node.prototype.getLabel = function () {
  return this.prefix[0]
}

Node.prototype.addChild = function (node) {
  var label = node.getLabel() // 取出第一个字符做为 label
  this.children[label] = node
  return this
}
本质是遍历路径的每个字符,然后判断当前节点的子节点是否已经存在一个节点,如果存在就继续向下遍历,如果不存在,则新建一个节点,插入到当前节点。

查找路由节点
find-my-way 对外提供了 lookup 方法,用于查找路由对应的方法并执行,内部是通过 find 方法查找的。
Router.prototype.find = function find (method, path, version) {
  var currentNode = this.trees[method]
  if (!currentNode) return null

  while (true) {
    var pathLen = path.length
    var prefix = currentNode.prefix
    var prefixLen = prefix.length
    var len = prefixLen
    var previousPath = path
    // 找到了路由
    if (pathLen === 0 || path === prefix) {
      var handle = currentNode.handler
      if (handle !== null && handle !== undefined) {
        return {
          handler: handle.handler
        }
      }
    }
    // 继续向下查找
    path = path.slice(len)
    currentNode = currentNode.findChild(path)
  }
}

Node.prototype.findChild = function (path) {
  var child = this.children[path[0]]
  if (child !== undefined || child.handler !== null)) {
    if (path.slice(0, child.prefix.length) === child.prefix) {
      return child
    }
  }

  return null
}
查找节点也是通过遍历树的方式完成的,找到节点之后还需要放到 handle 是否存在,存在的话需要执行回调。
总结
本文主要介绍了 fastify 的路由库通过 Radix Tree 进行提速的思路,相比于其他的路由库通过正则匹配(例如 koa-router 就是通过 path-to-regexp 来解析路径的),效率上还是高很多的。

常见问题FAQ
- 免费下载或者VIP会员专享资源能否直接商用?
- 本站所有资源版权均属于原作者所有,这里所提供资源均只能用于参考学习用,请勿直接商用。若由于商用引起版权纠纷,一切责任均由使用者承担。更多说明请参考 VIP介绍。
- 提示下载完但解压或打开不了?
- 找不到素材资源介绍文章里的示例图片?
- 模板不会安装或需要功能定制以及二次开发?


发表评论
还没有评论,快来抢沙发吧!