前言
在说 More in js 之前,想必大家对 React 的 All in js 都不陌生,各位看官莫被干扰,本文与 React 无关。More in js 为笔者开发过程中的一些实例尝试,可能大家都有过类似的开发经历,但少有人思考这么做的价值。

SFC 组件结构
讲到 Vue 的 SFC 组件结构,大家首先想到的一定是 template script style 三部曲。实际表现形式如下:
<template>
    ...
</template>

<script>
    ...
</script>

<style>
    ...
</style>
上面的代码就是 Vue 的 SFC 基础结构了,那这跟我们的 More in js 又有啥关系呢?
SFC 常见问题
我们通常在业务组件开发时,避免不了出现复杂布局情况,组件嵌套(一层又一层,层层不一样),此时再加上业务逻辑的处理,代码行数轻轻松松破 1000+。
那么在维护或开发此类代码时,可能就是为了加一个属性导致我们在 template 和 script 之间反复横跳,开发体验较差,也带来了额外的时间成本。(此时某位暴躁老哥已经开始砸键盘了!)

上图是笔者开发中的一个画布组件,其代码行数不算样式部分也突破了 2000+,对于正在修改业务逻辑的我突然需要给视图组件加个属性,直接促使肾上腺素飙升!
灵感来源
对于上述问题的解决方案是在业务组件封装时产生的灵感。
通常 UI 组件库的基础组件并不能满足我们复杂的业务需求时,会对齐进行二次封装,那么对于源组件的 props 和 events 我们也是需要暴露给外界来降低上手成本,只针对该处的场景提供便利性,纵享丝滑体验。
例如:
<template>
  <Button
    class="async-button"
    ref="main"
    v-bind="mergeProps"
    :loading="loading"
    @click.prevent="onClick"
  >
    <slot></slot>
  </Button>
</template>

<script>
import { omit, merge } from 'lodash'

export default {
  name: 'AsyncButton',
  props: {
    /**
     * 使用原始 Button 事件
     * @default false
     */
    useRaw: { type: Boolean, default: false }
  },
  data() {
    return {
      loading: false
    }
  },
  computed: {
    mergeProps() {
      const defaultProps = { type: 'primary' }
      return omit(merge(defaultProps, this.$attrs), 'loading')
    }
  },
  methods: {
    /**
     * 处理点击事件。
     */
    onClick(e) {
      // useRaw: true 使用原始单击事件,false 使用异步单击事件
      if (this.useRaw) {
        this.$emit('click', e)
      } else {
        this.loading = true
        this.$emit('click', () => (this.loading = false), e)
      }
    }
  }
}
</script>
上面代码是对 Button 组件做的一层简单封装,让使用者能够在点击时自动启动加载状态,在需要时通过回调函数来关闭加载状态。
对于源 Button 组件的 props 通过 Vue 提供的 v-bind 和 $attrs 实现属性穿透,那么反过来我们思考下是否可以把该方式应用到业务组件开发中?
答案是可以的。
More in js
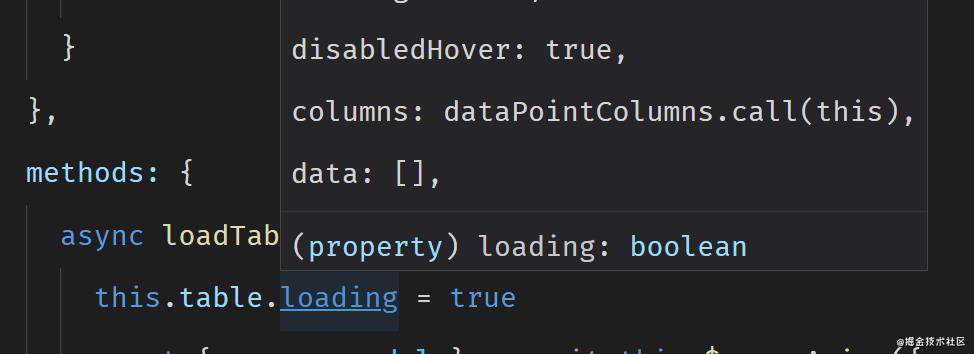
提出的 More in js 概念就是为了让 Vue 开发者能够更好地专注于业务逻辑部分的处理,配合 IDE 的定义跳转功能,可以相对的优化上述问题。
<template>
  <SpecialTabs class="data-point-tabs" left-label="上传文件" right-label="已上传的文件列表">
    <!-- upload start -->
    <template slot="left">
      <SingleUpload ref="singleUpload" v-bind="singleUpload" />
    </template>
    <!-- upload end -->

    <!-- table start -->
    <template slot="right">
      <!-- table -->
      <Table class="file-table" v-bind="table" @hook:created="loadTableData" />

      <!-- modal start -->
      <Modal v-bind="modal" v-model="modal.show" transfer>
        <!-- modal footer -->
        <template slot="footer">
          <Button @click="toggleModal(false)">取消</Button>
          <Button v-bind="confirmBtn" @click="submitForm">确定</Button>
        </template>

        <!-- edit form -->
        <EditForm
          ref="editFormRef"
          :key="`edit-form_${updateFormFlag}`"
          :info="table.singleSelected"
          @on-validated="handleValidated"
          @on-submitted="handleSubmitted"
        ></PointForm>
      </Modal>
      <!-- modal end -->
    </template>
    <!-- table end -->
  </SpecialTabs>
</template>

<script>
import SpecialTabs from '@/components/SpecialTabs'
import SingleUpload from '@/components/SingleUpload'
import { dataPointColumns } from './entity/data-point'
import DeleteMixin from '@/mixins/delete'
import EditForm from './components/edit-form.vue'
import { showErrorMessage } from '@/util/error'

export default {
  name: 'DataPoint',
  mixins: [DeleteMixin],
  components: { SpecialTabs, SingleUpload, EditForm },
  data() {
    return {
      singleUpload: {
        autoUpload: true,
        loading: false,
        uploadRequest: this.uploadRequest,
        beforeUpload: this.handleBeforeUpload
      },
      table: {
        border: true,
        loading: false,
        disabledHover: true,
        columns: dataPointColumns.call(this),
        data: [],
        singleSelected: {},
        actionOptions: [...]
      },
      modal: {
        title: '配置表单',
        maskClosable: false,
        show: false
      },
      confirmBtn: {
        type: 'primary',
        loading: false
      },
      updateFormFlag: 0
    }
  },
  computed: {
    /**
     * DeleteMixin
     */
    deleteOption() {
      return {
        deleteUrl: '/db_table/delete',
        method: 'delete',
        loading: true,
        params: (selection) => ({ table_name: selection[0].table_name }),
        afterDelete: (flag) => flag && this.loadTableData()
      }
    }
  },
  methods: {
    ...
  }
}
</script>
上述代码是对 More in js 的一次尝试,组件的属性对象显示声明在 data 中,通过 v-bind 来动态绑定到模板上,能够提升代码的阅读性,让开发者更加专注业务逻辑层,对于视图层只关注在布局即可。

配合 IDE 的定义跳转功能,能够轻松实现对视图层组件的属性控制及添加,减少代码横跳次数,提升开发效率。
Vue3 更优体验
在 Vue2 中由于 options api 的结构,我们的组件开发通常在单文件中,不会对内部业务逻辑过于聚合,所以 More in js 方式只会解决单文件内部的代码横跳问题。
但是在 Vue3 的 hooks api 中,我们可以通过抽离业务逻辑到 @use/xxx 后,让视图层与逻辑层的代码高度聚合,使用 More in js 可以更好的维护组件状态,不需要频繁的切换文件来更新属性信息。
// dp.vue
<template>
  <SpecialTabs class="data-point-tabs" left-label="上传文件" right-label="已上传的文件列表">
    <!-- upload start -->
    <template slot="left">
      <SingleUpload ref="singleUploadRef" v-bind="singleUploadAttrs" />
    </template>
    <!-- upload end -->

    <!-- table start -->
    <template slot="right">
      <!-- table -->
      <Table class="file-table" v-bind="tableAttrs" @hook:created="loadTableData" />

      <!-- modal start -->
      <Modal v-bind="modal" v-model="modal.show" transfer>
        <!-- modal footer -->
        <template slot="footer">
          <Button @click="toggleModal(false)">取消</Button>
          <Button v-bind="confirmBtn" @click="submitForm">确定</Button>
        </template>

        <!-- edit form -->
        <EditForm
          ref="editFormRef"
          :key="`edit-form_${updateFormFlag}`"
          :info="tableAttrs.singleSelected"
          @on-validated="handleValidated"
          @on-submitted="handleSubmitted"
        ></PointForm>
      </Modal>
      <!-- modal end -->
    </template>
    <!-- table end -->
  </SpecialTabs>
</template>

<script setup>
...

const { singleUploadAttrs, ... } = useUpload()
const { tableAttrs, ... } = useTable()
</script>


// @use/upload.js
...

export default function useUpload() {
    const singleUploadAttrs = reactive({
        autoUpload: true,
        loading: false,
        uploadRequest: uploadRequest,
        beforeUpload: handleBeforeUpload
    })

    function uploadRequest() {...}

    function handleBeforeUpload() {...}

    ...

    return { singleUploadAttrs, ... }
}


// @use/table.js
...

export default function useTable() {
    const tableAttrs = reactive({
        border: true,
        loading: false,
        disabledHover: true,
        columns: dataPointColumns(),
        data: [],
        singleSelected: {},
        actionsOptions: [...]
    })

    function loadTableData() {
        ...

        tableAttrs.data = [...]
    }

    ...

    return { tableAttrs, ... }
}
Volar 体验提升
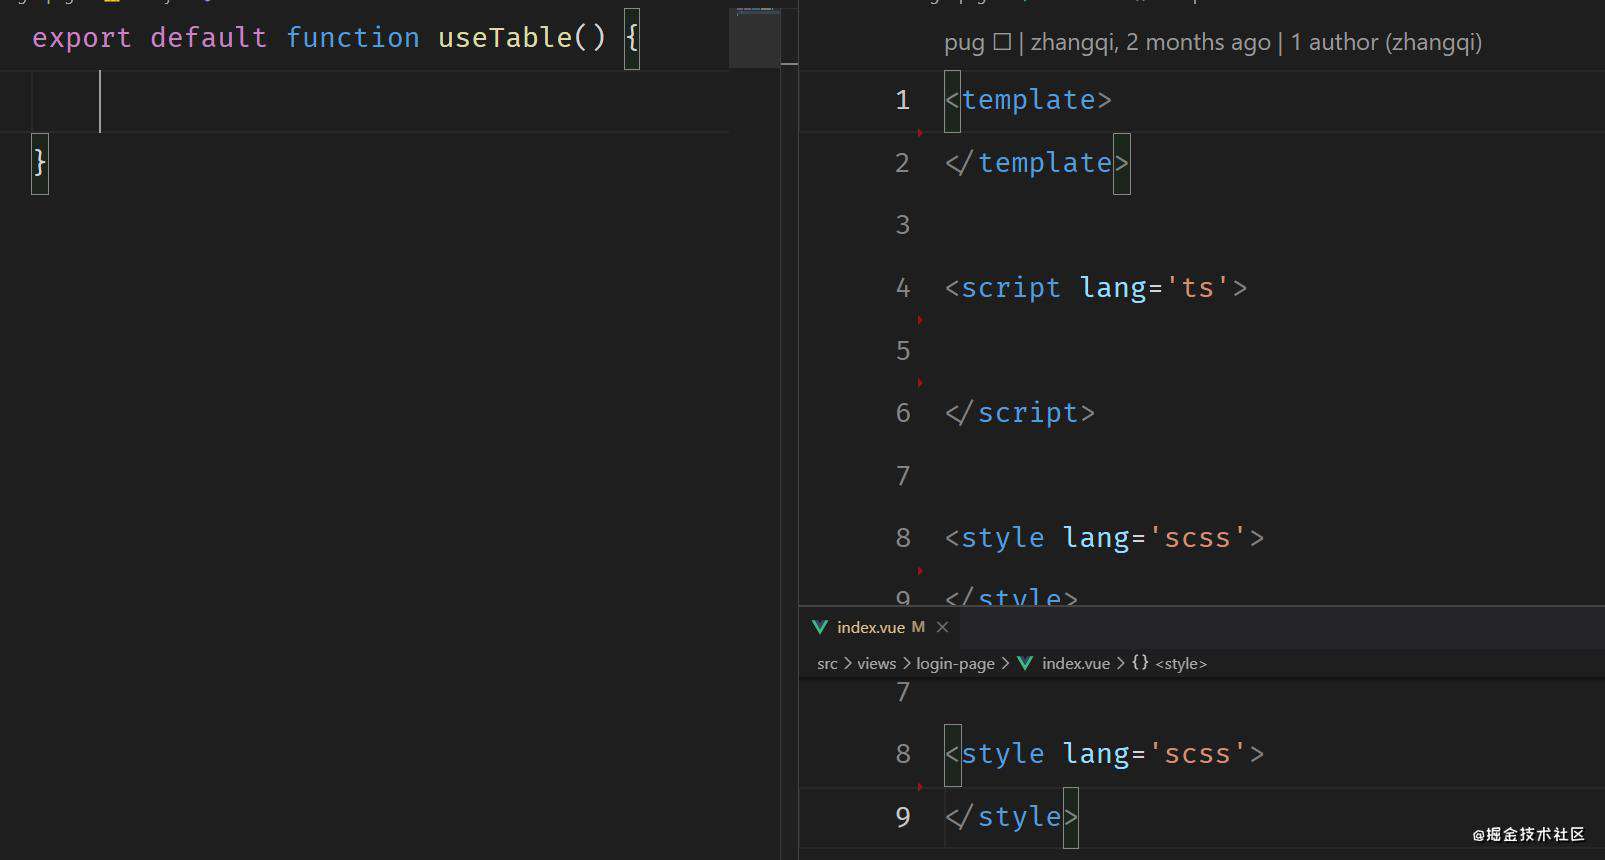
随着 Vue3 的稳定,IDE 方面的插件也有了新的支持,官方维护的 Volar 脱颖而出,这里只重点说明 Volar 的编辑器拆分功能来让体验更加丝滑。

通过拆分编辑器,配合 More in js 方式,只需要关注左侧 hooks 代码即可让开发体验上升一个台阶。
总结
本次灵感主要解决开发时繁琐的代码横跳,从而找出更优的开发体验,但非最优体验,因人而异,请各位看官勿喷。有何问题,可评论区留言,谢谢!
相逢即是缘,挥一挥手指,留下一个赞吧!(^▽^)

常见问题FAQ
- 免费下载或者VIP会员专享资源能否直接商用?
- 本站所有资源版权均属于原作者所有,这里所提供资源均只能用于参考学习用,请勿直接商用。若由于商用引起版权纠纷,一切责任均由使用者承担。更多说明请参考 VIP介绍。
- 提示下载完但解压或打开不了?
- 找不到素材资源介绍文章里的示例图片?
- 模板不会安装或需要功能定制以及二次开发?


发表评论
还没有评论,快来抢沙发吧!