redux
1、安装
yarn add redux
or
npm install redux
2、基本概念
核心概念
- state - 状态
- reducer - 纯函数,提供具体的修改状态的方法
- store - 仓库,管理状态的地方
- action - 动作,发起对state的修改
流程
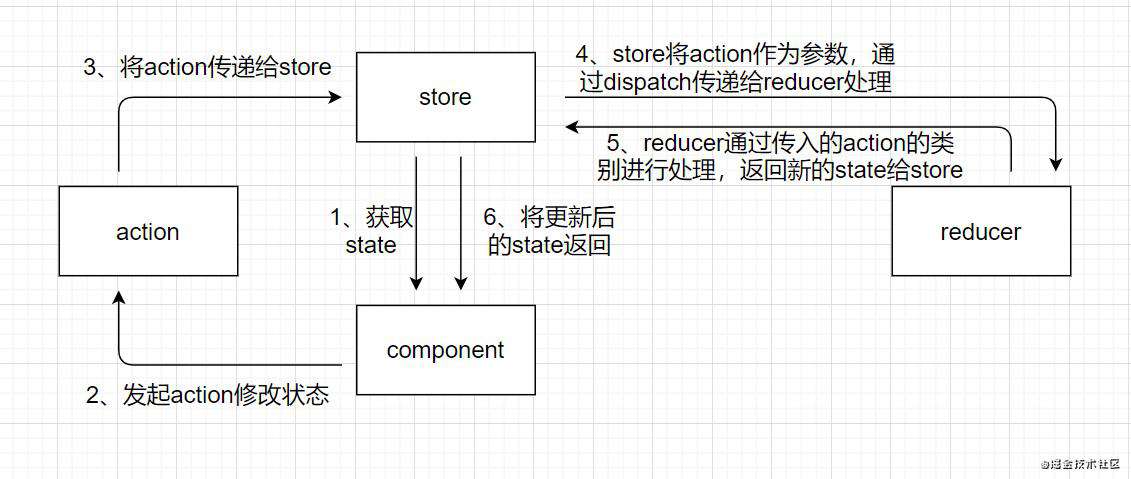
三大原则
- 单一数据源。简单来说就是所有的state都必须在同一个store中。
- state是只读的。这样确保了视图和网络状态都不能直接修改state,要修改state只能通过action。action是一个描述已发生事件的普通状态。
- 使用纯函数来修改。为了描述action要如何修改state,你必须编写reducers。Reducer 只是一些纯函数,它接收先前的 state 和 action,并返回新的 state。
3、Store
Store 有以下职责:
- 必须接受reducer
- 维持应用的 state;
- 提供 getState() 方法获取 state;
- 提供 dispatch(action) 方法更新 state;
- 通过 subscribe(listener) 注册监听器
- 通过 subscribe(listener) 返回的函数注销监听器。
- 通过 replaceReducer(nextReducer) 替换 store 当前用来计算 state 的 reducer。
4、Reducer
Reducer是一个纯函数,它有以下职责:
- 接收state和action
- 对action进行处理
- 返回新的state
绝对禁止的事情:
- 修改传入参数;
- 执行有副作用的操作,如 API 请求和路由跳转;
- 调用非纯函数,如 Date.now() 或 Math.random()。
注意点:
- 不要直接修改state,你可以使用使用展开运算符对旧的state进行拷贝
- 在 default 情况下返回旧的 state。遇到未知的 action 时,一定要返回旧的 state。
5、Action
action的职责:
- 它必须是一个对象
- 它必须要有type属性
- 通过 store.dispatch(action) 发起修改,store 会调用 reducer 函数,reducer根据会根据action和当前的state返回一个新的state
6、实现一个简单的counter
store.js
import { createStore } from "redux";

const initialState = {
  count: 0,
};

//  创建reducer, 根据不同的action.type返回新的state
const reducer = (state = initialState, action) => {
  switch (action.type) {
    case "ADD": {
      return { count: state.count + 1 };
    }
    case "DEC": {
      return { count: state.count - 1 };
    }
    case "SET": {
      return { count: action.value };
    }

    default: {
      return state;
    }
  }
};

//	创建store,负责将state和reducer连接在一起
const store = createStore(reducer);
//	它底下有四个api
//	store.getState - 获取state
//	store.dispatch	- 更新state
//	store.subscribe - 注册监听器,如果需要解绑这个变化监听器,执行 subscribe 返回的函数即可
//	store.replaceReducer - 替换 store 当前用来计算 state 的 reducer

export default store;
App.js
import store from "./store";
import React from "react";
import ReactDOM from "react-dom";

//	检测state是否更新
const unSubscribe = store.subscribe(() => {
  console.log("更新了", store.getState());

  //  因为我们没有使用hook,所以react不会更新,我们只能使用render重新渲染一遍
  ReactDOM.render(
    <React.StrictMode>
      <App />
    </React.StrictMode>,
    document.getElementById("root")
  );
});

const App = () => {
//	调用getState获取属性
  const { count } = store.getState();
  const dispatch = store.dispatch;

  return (
    <>
      <div>{count}</div>
      <!-- 调用dispatch(action), action是一个普通对象 -->
      <button
        onClick={() => {
          dispatch({
            type: "ADD",
          });
        }}
      >
        +
      </button>

      <button
        onClick={() => {
          dispatch({
            type: "DEC",
          });
        }}
      >
        -
      </button>

      <!-- 除了设置type这个必要属性之外,还能添加别的属性,在reducer可以访问的到 -->
      <button
        onClick={() => {
          dispatch({
            type: "SET",
            value: 0,
          });
        }}
      >
        设置为0
      </button>
      <button
        onClick={() => {
          unSubscribe();
        }}
      >
        取消监听
      </button>
    </>
  );
};

export default App;
index.js
import React from "react";
import ReactDOM from "react-dom";

import App from "./App";

ReactDOM.render(
  <React.StrictMode>
    <App />
  </React.StrictMode>,
  document.getElementById("root")
);
Result:
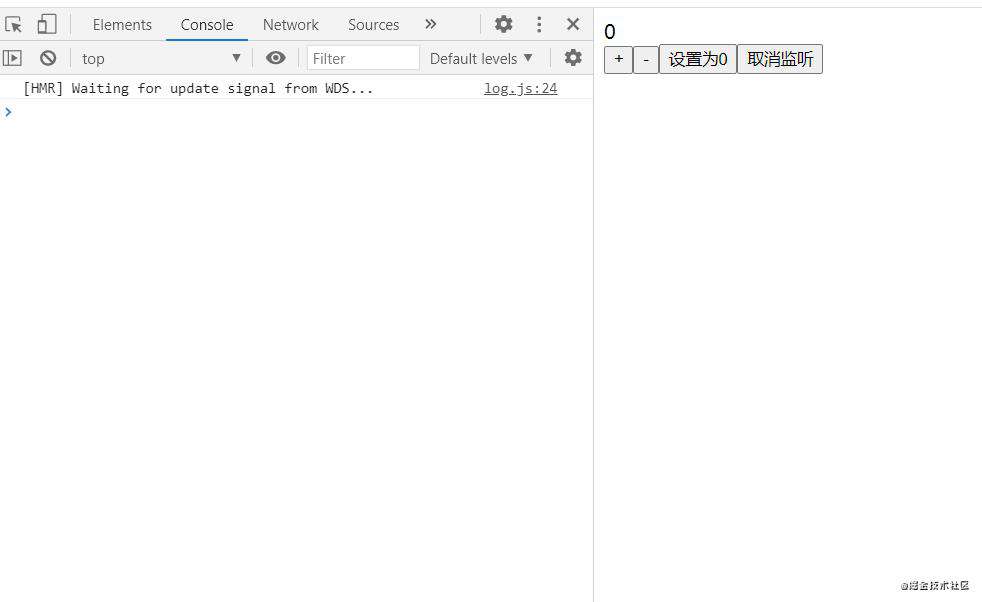
react-redux
上面的例子中,直接用react + redux写起来感觉一点都不优雅:
- 我们要手动调用 store.subscribe 来监听state的变化
- 监听器中state的变化不会自动刷新视图,要手动刷新
为了更加有好的使用redux,我们需要结合另一个库react-redux来进行操作
1、安装
yanr add react-redux
or
npm install --save react-redux
2、react-redux 7.0 之前的使用
Provider 组件
react-redux借鉴了react中的Context api,提供了一个 Provider 组件,使我们在Provider组件内的子组件可以访问 store ,而不用每次都需要 import store 。
connect 连接器
connect是一个高阶组件,负责把传入的组件与redux关联起来。也就是说不用我们手动的调用subscribe而且手动render,connect 做了性能优化来避免很多不必要的重复渲染。
使用react-redux对counter进行修改
index.js
import React from "react";
import ReactDOM from "react-dom";
import store from "./store";
import { Provider } from "react-redux";

import App from "./App";

//	跟Context api类似,需要将store传进去
ReactDOM.render(
  <Provider store={store}>
    <App />
  </Provider>,
  document.getElementById("root")
);
App.js
import { connect } from "react-redux";

//	因为我们在connect中进行过了相关的处理,不然这里的props应该是props = {state, dispatch}
const App = (props) => {
  const { count, dispatch } = props;
  console.log(props);
  return (
    <>
      <div>{count}</div>
      <button
        onClick={() => {
          dispatch({
            type: "ADD",
          });
        }}
      >
        +
      </button>
      <button
        onClick={() => {
          dispatch({
            type: "DEC",
          });
        }}
      >
        -
      </button>
      <button
        onClick={() => {
          dispatch({
            type: "SET",
            value: 0,
          });
        }}
      >
        设置为0
      </button>
    </>
  );
};

//	connect是一个高阶组件,将App传过去,再将一个包装过后的App组件返回出来
const withConnect = connect((state) => {
  return { count: state.count };
})(App);

export default withConnect;
Result:
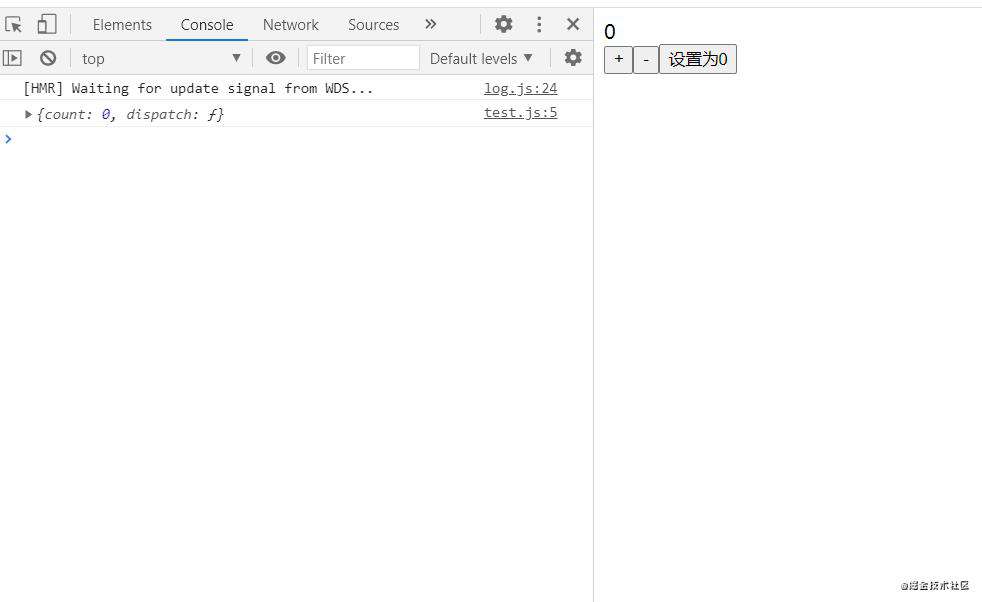
3、react-redux 7.0之后的使用
react-redux 7.0之后支持了hooks的使用,这意味着我们可以摆脱那个丑陋的connect 连接器。
- useStore 获取store
- useSelector 获取state
- useDispatch 获取dispatch
我们用hooks继续进行修改
import { useDispatch, useSelector, useStore } from "react-redux";

const App = () => {

  const count = useSelector((state) => state.count);
  const dispatch = useDispatch();
  console.log(useStore());

  return (
    <>
      <div>{count}</div>
      <button
        onClick={() => {
          dispatch({
            type: "ADD",
          });
        }}
      >
        +
      </button>
      <button
        onClick={() => {
          dispatch({
            type: "DEC",
          });
        }}
      >
        -
      </button>
      <button
        onClick={() => {
          dispatch({
            type: "SET",
            value: 0,
          });
        }}
      >
        设置为0
      </button>
    </>
  );
};

export default App;
Result:
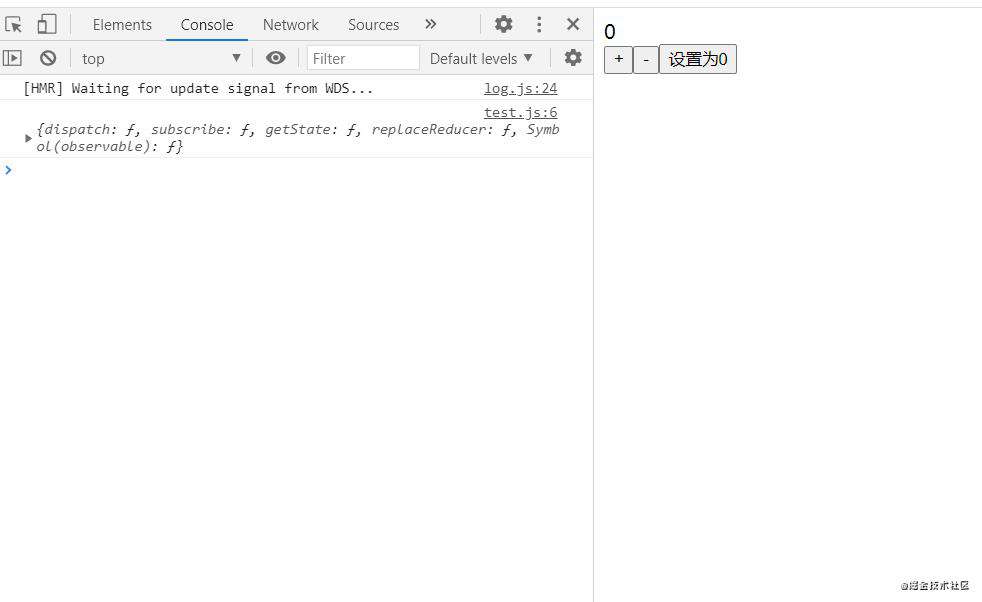
redux-thunk
前面我们提到,reducer是一个纯函数,纯函数要满足
- 相同的输入,永远返回相同的输出
- 不修改外部的输入值
- 不依赖外部环境,只依赖自己的参数
- 无任何副作用
那么问题来了,异步操作怎么处理?我们总会遇到需要通过ajax拉取数据或者其他的一些异步操作,reducer 不允许副作用的操作这可怎么办。
midleware 中间件
- 如果使用过 node ,我们应该知道中间件是什么。就是在类似在你接收到输入之后,中间件会做一些操作,然后将控制权返回,再继续你之前的操作。
- 在这里的话就是由dispatch -> reducer -> 更新state 变为 dispatch -> midleware -> dispatch -> 更新state。
- store如果要使用中间件,需要用到 redux 中的
applyMiddleware
redux-thunk
官方介绍
也就是说使用thunk中间件后,action支持两种形式的参数: 对象或者函数
- 对象 像之前一样,直接调用reducer修改我们的state
- 函数 调用该函数,并且把dispatch 和 getState 传递我们的函数,并且在函数中可以进行异步操作
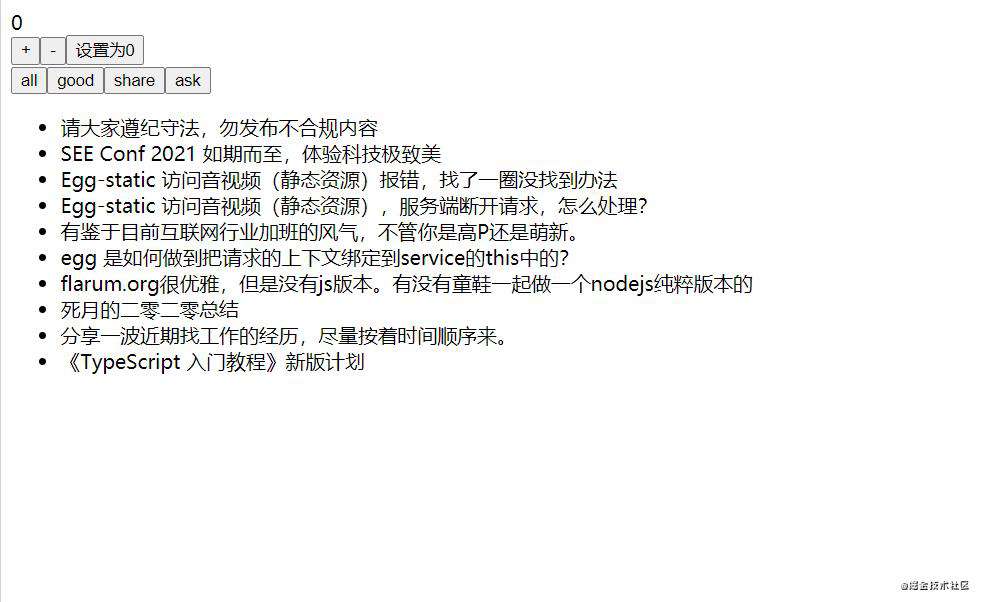
那么我们在原有的counter基础上,再来做一个用axios获取远程数据,并可以切换展示数据类别的功能。
store的改造 - 合并reducer
由于我们由两个不同的功能块,reducer全部写在一起无疑会显得十分的臃肿。redux 提供了一个可以合并 reducer 的api,叫做 combineReducers 。
store.js
import { createStore, combineReducers, applyMiddleware } from "redux";
import thunk from "redux-thunk";

/**
 *  使用thunk中间件后,action支持两种形式的参数: 对象或者函数
 *    对象 像之前一样,直接调用reducer修改我们的state
 *    函数 调用该函数,并且把dispatch 和 getState 传递我们的函数,并且在函数中可以进行异步操作
 */

// 这里可以注意到我们由原来的state = {count: 0} 改成了 count,因为combineReducers会将状态进行合并
const count = (count = 0, action) => {
  switch (action.type) {
    case "COUNT_ADD": {
      return count + 1;
    }
    case "COUNT_DEC": {
      return count - 1;
    }
    case "COUNT_SET": {
      return action.value;
    }

    default: {
      return count;
    }
  }
};

//	这是处理展示异步数据的reducer
const list = (list = { dataType: "all", data: [], loading: true }, action) => {
	//	dataType表示我们请求的是哪种数据
    //	data表示我们请求获取到的数据
    //	loading 表示我们是否处于正在请求的状态

  switch (action.type) {
    case "LIST_LOADED": {
      return { ...list, data: action.data, loading: false };
    }

    case "LIST_LOADING": {
      return {
        ...list,
        data: [],
        dataType: action.dataType || list.dataType,
        loading: true,
      };
    }

    case "LIST_CHANGE_TYPE": {
      return { ...list, dataType: action.dataType };
    }

    default: {
      return list;
    }
  }
};

//	对reducer进行合并
const reducer = combineReducers({ count, list });

//	createStore接收第二参数,启用redux-thunk中间件
const store = createStore(reducer, applyMiddleware(thunk));

export default store;
中间件的编写
middlware.js
import axios from "axios";
//	我们使用axios进行请求

//	LIST_LOADING 表示我们正在请求
//	LIST_LOADED 表示我们请求完毕
const getListData = async (dispatch, getState) => {
  dispatch({
    type: "LIST_LOADING",
  });
  const dataType = getState().list.dataType;
  let { data } = await axios.get(
    `https://cnodejs.org/api/v1/topics?page=1&tab=${dataType}&limit=10`
  );
  data = data.data;
  dispatch({
    type: "LIST_LOADED",
    data,
  });
};

export { getListData };
List组件的编写
import { useDispatch, useSelector } from "react-redux";
import { useEffect } from "react";
import { getListData } from "./middleware";

const List = () => {
  const list = useSelector((state) => state.list);

  const { dataType, data, loading } = list;
  const dispatch = useDispatch();

//	挂载完毕或者dataType发生变化的时候,去请求数据
  useEffect(() => {
    dispatch(getListData);
  }, [dataType]);

  return (
    <>
      <div>
        <button
          onClick={() => {
            dispatch({
              type: "LIST_CHANGE_TYPE",
              dataType: "all",
            });
          }}
        >
          all
        </button>
        <button
          onClick={() => {
            dispatch({
              type: "LIST_CHANGE_TYPE",
              dataType: "good",
            });
          }}
        >
          good
        </button>
        <button
          onClick={() => {
            dispatch({
              type: "LIST_CHANGE_TYPE",
              dataType: "share",
            });
          }}
        >
          share
        </button>
        <button
          onClick={() => {
            dispatch({
              type: "LIST_CHANGE_TYPE",
              dataType: "ask",
            });
          }}
        >
          ask
        </button>
        {loading ? (
          <div>正在加载</div>
        ) : (
          <ul>
            {data.map((item) => (
              <li key={item.id}>{item.title}</li>
            ))}
          </ul>
        )}
      </div>
    </>
  );
};
Result:
结束
常见问题FAQ
- 免费下载或者VIP会员专享资源能否直接商用?
- 本站所有资源版权均属于原作者所有,这里所提供资源均只能用于参考学习用,请勿直接商用。若由于商用引起版权纠纷,一切责任均由使用者承担。更多说明请参考 VIP介绍。
- 提示下载完但解压或打开不了?
- 找不到素材资源介绍文章里的示例图片?
- 模板不会安装或需要功能定制以及二次开发?


发表评论
还没有评论,快来抢沙发吧!