1.注意
本文主要是模拟将组件和常见的utils打包到npm,结果就是在npm平台上任何人都能搜到这个包,是一种共享的行为,是公开的!方法是比较适用于个人或者公司愿意将一些稳定的包公开,给大家共同使用,并且长期维护
不适用于:
假设我司好几个项目,有很多重复的组件,utils,想减少代码复用,较少维护成本,所以建立npm私有仓储,只有项目内部使用,不公开,这种就千万不要发到公开平台去了,可参考使用 Verdaccio 搭建 npm 私有仓储
2.打包成npm 包的流程(vue页面代码)
2.1 vue页面代码
父页面
<template>
  <div id="app">
    <welcome

    />
  </div>
</template>

<script>
import welcome from './components/welcome.vue'
export default {
  components: {
     welcome,
  },
  name: 'App',
}
</script>
子页面-公共组件welcome
<template>
  <div class="each-page-title">欢迎进入{{ title }}</div>
</template>
<script>
export default {
  props: {
    title: {
      type: String,
      required: true,
    }
  },
}
</script>

<style scoped>
  .each-page-title {
    text-align: center;
    color: red;
    background-color: yellowgreen;
  }
</style>

2.2 将vue组件打包到npm
1 新建包bingxixi-common-title->新建src-> 初始化
mkdir bingxixi-common-title
 这里的包名,我是由 项目名+功能
cd bingxixi-common-title
mkdir src
 待会把我们的welcome.vue放到src地下(一般是src地下,如果是单纯index.js页面,我觉得可以不用放)
npm init
这里如果文件名没问题的话,直接enter就好
2.在src同级建立一个index.js的文件
import welcome from './src/welcome'
export default welcome
3.创建npm 帐号以及邮箱验证
进入官网,输入帐号,密码,邮箱,并且要把这里记录下来,待会要用
如果有收到邮件就去邮箱验证一下,或者在登录不上去的时候去看看邮箱需要验证(邮箱一定要验证一下)
4.正式发布

在bingxixi-common-title文件下进行git操作
npm login
#如果你们公司有自己的默认npm仓库或者使用的淘宝镜像,注意需要指定一下仓库地址;
`npm login --registry=https://registry.npmjs.org`

依次让你输入用户名、密码、和邮箱
Username:
Password:
Email: (this IS public)

npm publish --registry=https://registry.npmjs.org
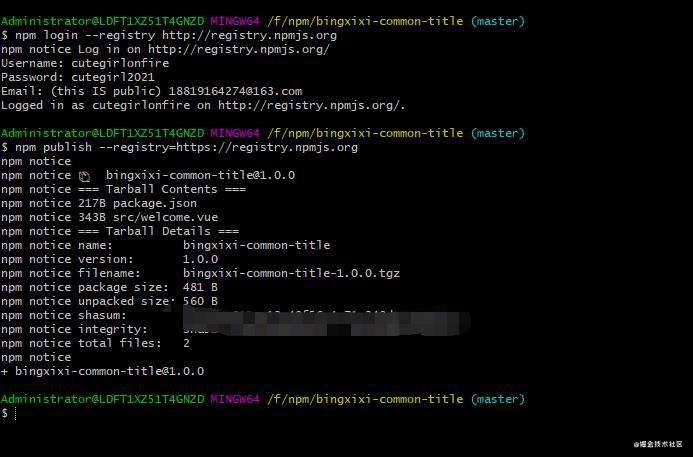
以上就是发布成功了~
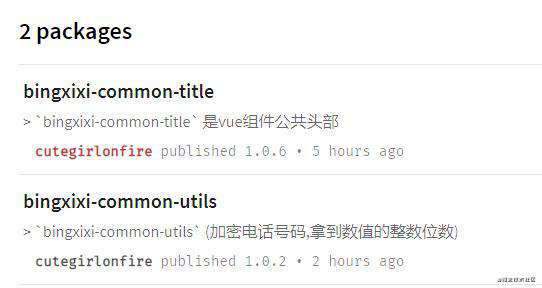
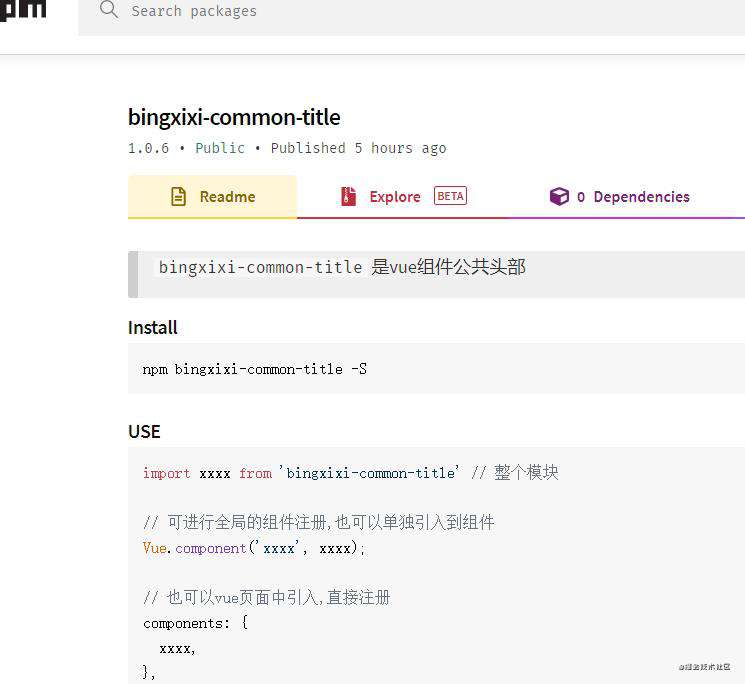
5.查询

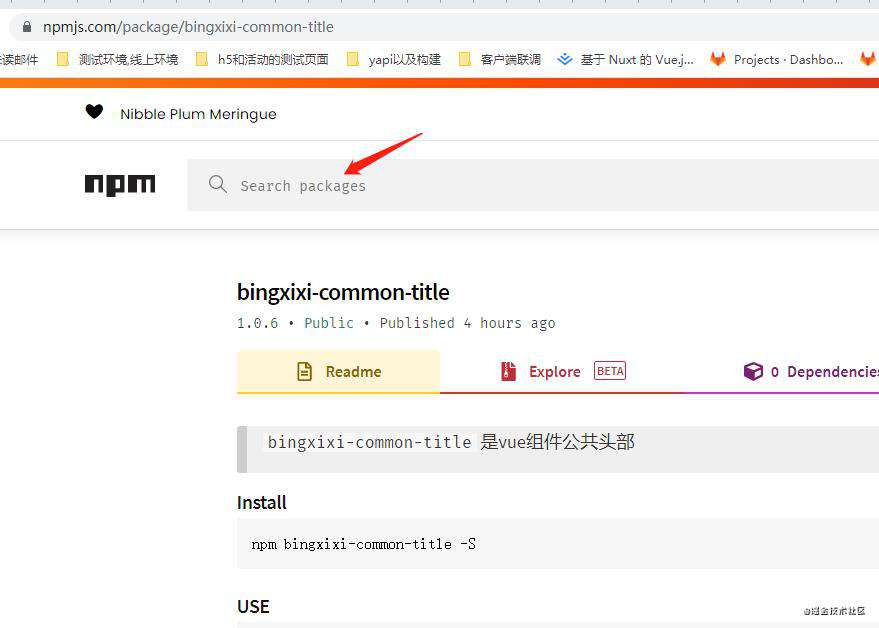
6.vue里面如何使用这个包
1.安装
npm i bingxixi-common-title --save
2.main.js里面引入,并且全局注册
import welcome from 'bingxixi-common-title'
Vue.component('welcome', welcome);
3.刚刚的公共组件不需要了,只保留父页面 父页面代码
<template>
  <div id="app">
    <welcome

    />
  </div>
</template>
7.如何更新包以及添加md文件
1 新建README.md文件并写入规范,用markdown写就行
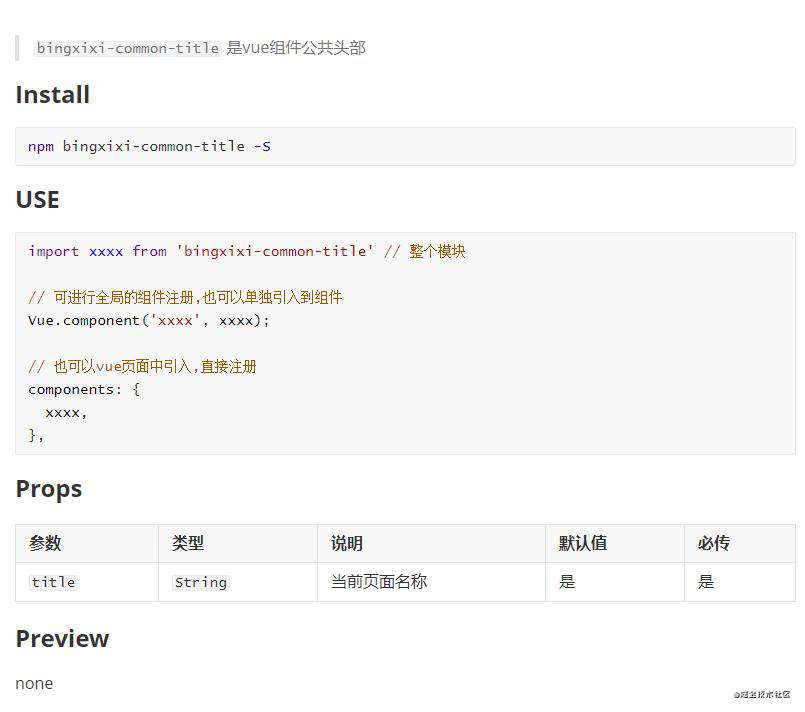
这些使用说明,随便在npm找个,看别人怎么写的,随便改改就行
2.更新包
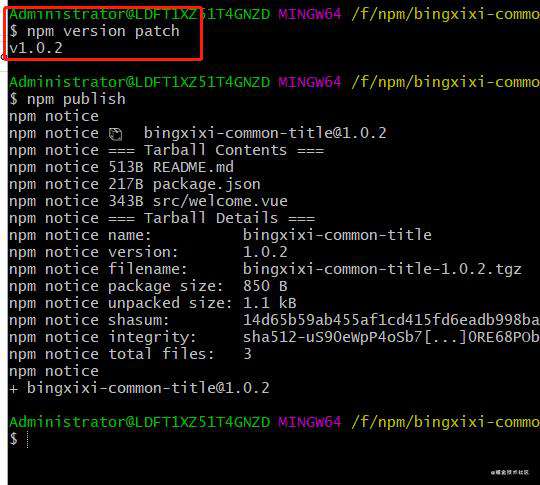
npm version patch
npm publish --registry=https://registry.npmjs.org
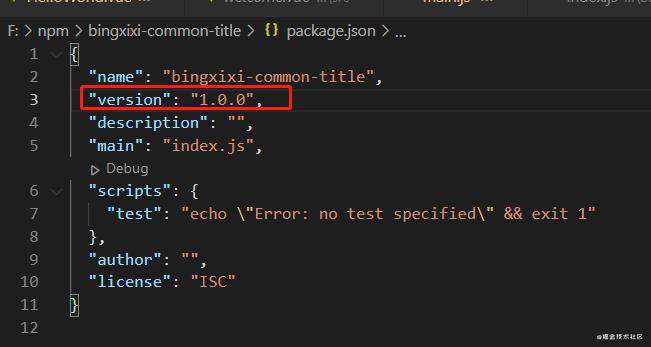
注意:npm version patch是在你原有的版本号,假设v1.0.0,他会在这个基础上加1,如果你的版本不是加1,你可以不用npm version patch,直接手动改package.json,然后再npm publish --registry=https://registry.npmjs.org
8.如何避免每次都要我输入--registry=registry.npmjs.org
在src同级加上.npmrc文件
通过指令npm config edit
将下面位置改成registry=https://registry.npmjs.org
以后就不用运行指令每次都要加这句话拉

3.2.打包成npm 包的流程(utils代码)
3.1 vue页面代码以及utils
vue页面
<template>
  <div id="app">
    call me : {{ userPrivate(phone) }}
    <br>你的捐款是{{ money }}, 总共有 {{ userPrivate(money)}} 位数
  </div>
</template>

<script>
import { userPrivate, getNumBit } from './utils/index'
export default {
  name: 'App',
  data() {
    return {
      phone: 18819168888,
      money: 12345.88,
      userPrivate,
      getNumBit,
    }
  }
}
</script>
utils
 /**
   * 用户手机信息加密显示
   * @param { Number, String } phone 用户手机/帐号
   */
module.exports = {
  // 给电话号码加密
  userPrivate(phone) {
    const phoneStr = String(phone)
    if (!phone || phoneStr.length < 11) return phone
    const privateIndex = phoneStr.indexOf('86') > -1 ? 5 : 3
    return `${phoneStr.substring(0, privateIndex)}****${
    phoneStr.substring(privateIndex + 4, phoneStr.length)}`
  },
  // 获取数字的整数位长度
  getNumBit(num) {
    let intNum = num.toFixed(0);
    return intNum.length;
  }
}

2.2 将utils打包到npm
1 新建包bingxixi-common-utils->将utils的index.js放到bingxixi-common-title文件底下(直接做入口文件)->初始化
mkdir bingxixi-common-utils
 这里的包名,我是由 项目名+功能
cd bingxixi-common-utils
npm init
这里如果文件名没问题的话,直接enter就好
3.4.5.7步骤同上
6.vue里面如何使用这个包
1.安装
npm i bingxixi-common-utils --save
2.main.js里面引入,并且全局注册
import { userPrivate, getNumBit } from 'bingxixi-common-utils'
Vue.prototype.$userPrivate = userPrivate
Vue.prototype.$getNumBit = getNumBit
3.页面代码
<template>
  <div id="app">
    call me : {{ $userPrivate(phone) }}
    <br>你的捐款是{{ money }}, 总共有 {{ $userPrivate(money)}} 位数
  </div>
</template>

<script>
export default {
  name: 'App',
  data() {
    return {
      phone: 18819168888,
      money: 12345.88,
    }
  }
}
</script>
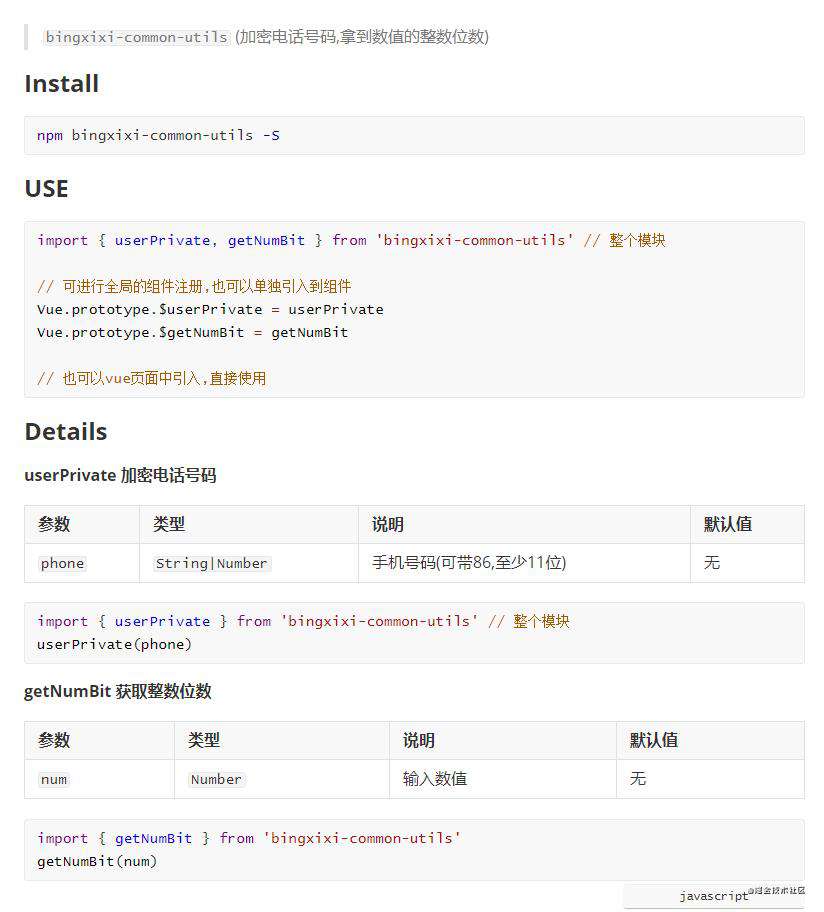
7.添加md文件
3.结尾哦~
推荐从0到1发布一个npm包
常见问题FAQ
- 免费下载或者VIP会员专享资源能否直接商用?
- 本站所有资源版权均属于原作者所有,这里所提供资源均只能用于参考学习用,请勿直接商用。若由于商用引起版权纠纷,一切责任均由使用者承担。更多说明请参考 VIP介绍。
- 提示下载完但解压或打开不了?
- 找不到素材资源介绍文章里的示例图片?
- 模板不会安装或需要功能定制以及二次开发?


发表评论
还没有评论,快来抢沙发吧!