前言
在Flutter开发中,Container作为一个容器类的Widget,有点类似HTML的div,在项目中也是高频使用;那在使用过程中,你是否有过下面的这些疑问:
- Container是什么,它如何实现的?
- Container的大小约束规则是什么?下面几种情况你知道为什么吗?

Container介绍
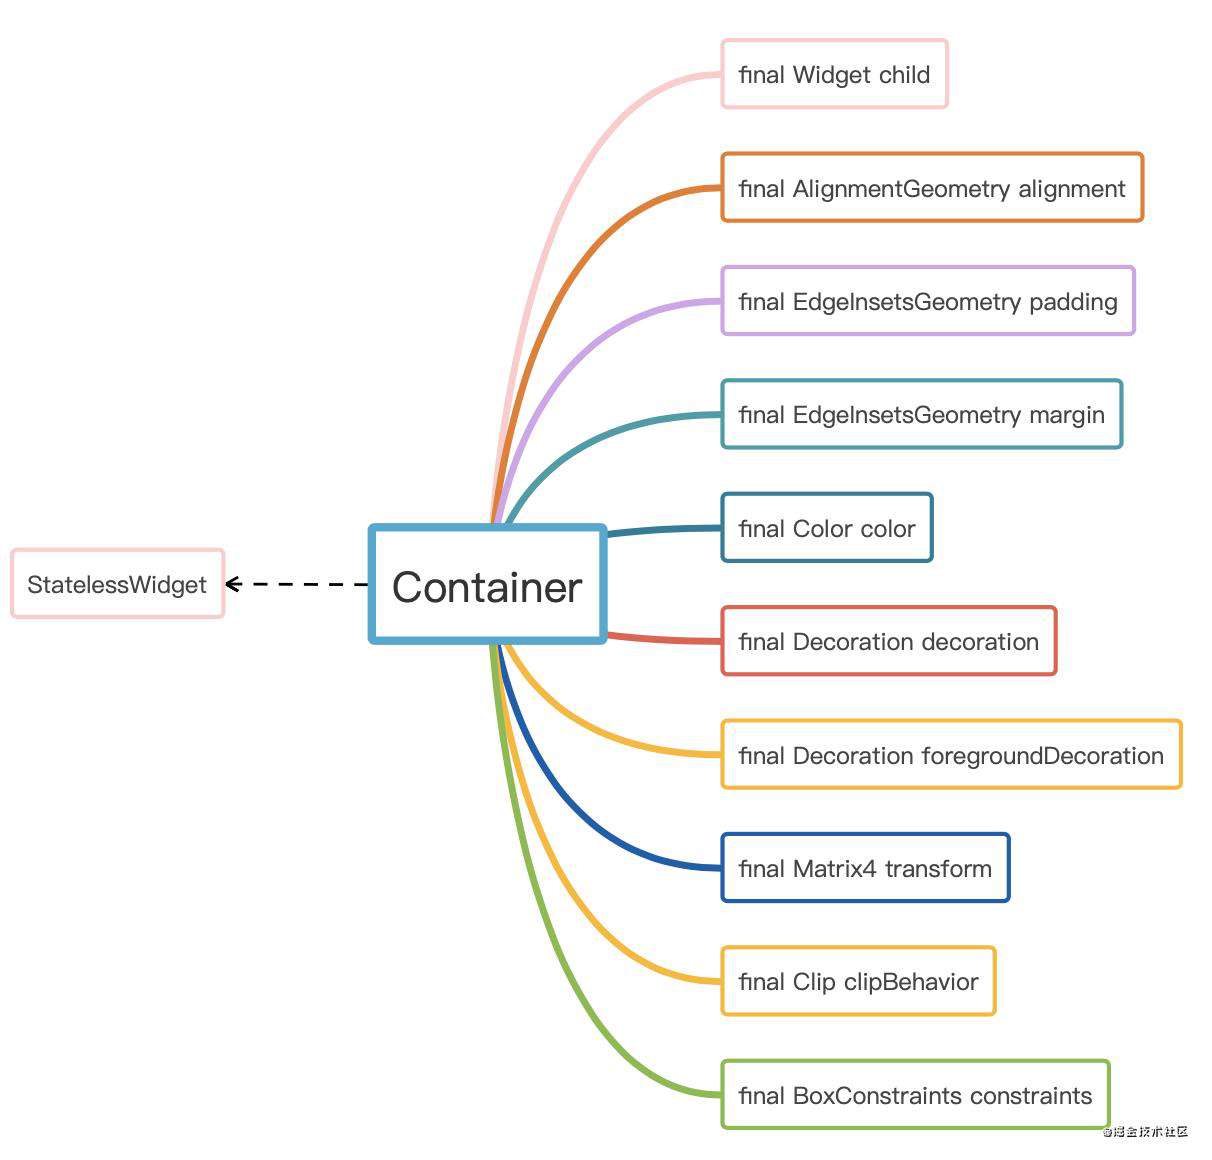
首先我们来看一下Contaienr是什么:
 可以看到,通过上面可以知道,Container是继承自StatelessWidget的widget,有丰富的属性配置,通过这些属性,我们可以设置前景,背景,颜色,内外边距,裁剪方式,对齐方式等。而且由于Container是继承自StatelessWidget,所以它并不能构建renderObject,不能直接参与绘制,所以看一下它的
build()函数的实现:
@override
  Widget build(BuildContext context) {
    Widget current = child;
    if (child == null && (constraints == null || !constraints.isTight)) {
      current = LimitedBox(
        maxWidth: 0.0,
        maxHeight: 0.0,
        child: ConstrainedBox(constraints: const BoxConstraints.expand()),
      );
    }
    if (alignment != null)
      current = Align(alignment: alignment, child: current);
    final EdgeInsetsGeometry effectivePadding = _paddingIncludingDecoration;
    if (effectivePadding != null)
      current = Padding(padding: effectivePadding, child: current);
    if (color != null)
      current = ColoredBox(color: color, child: current);
    if (clipBehavior != Clip.none) {
      assert(decoration != null);
      current = ClipPath(
        clipper: _DecorationClipper(
          textDirection: Directionality.of(context),
          decoration: decoration
        ),
        clipBehavior: clipBehavior,
        child: current,
      );
    }
    if (decoration != null)
      current = DecoratedBox(decoration: decoration, child: current);
    if (foregroundDecoration != null) {
      current = DecoratedBox(
        decoration: foregroundDecoration,
        position: DecorationPosition.foreground,
        child: current,
      );
    }
    if (constraints != null)
      current = ConstrainedBox(constraints: constraints, child: current);
    if (margin != null)
      current = Padding(padding: margin, child: current);
    if (transform != null)
      current = Transform(transform: transform, child: current);
    return current;
  }
通过build()函数可以知道,Container只是对不同的renderObjectWidget的组合封装。这简化了我们布局时的widget嵌套层数;其次,注意这里各种widgets的组合的先后顺序,flutter的“盒模型”没有内外边距的概念,边距的实现是通过嵌套一个“盒子”实现的,我们能看到边距的效果,就是因为这里的顺序,是先嵌套了边距widget,这个widget的大小是child的大小加上我们设置的"padding"。关于大小约束在后面再具体聊。

大小和约束的流程
在学习大小约束之前,我们需要知道renderObject的布局计算流程。我们定位到RenderObject类中,定位到函数:
abstract class RenderObject extends AbstractNode with DiagnosticableTreeMixin implements HitTestTarget {
  void layout(Constraints constraints, { bool parentUsesSize = false }) {
    if (!kReleaseMode && debugProfileLayoutsEnabled)
      Timeline.startSync('$runtimeType',  arguments: timelineArgumentsIndicatingLandmarkEvent);
    ...
    RenderObject? relayoutBoundary;
    if (!parentUsesSize || sizedByParent || constraints.isTight || parent is! RenderObject) {
      relayoutBoundary = this;
    } else {
      relayoutBoundary = (parent as RenderObject)._relayoutBoundary;
    }
    ...
    if (!_needsLayout && constraints == _constraints && relayoutBoundary == _relayoutBoundary) {
      ...
      if (!kReleaseMode && debugProfileLayoutsEnabled)
        Timeline.finishSync();
      return;
    }
    _constraints = constraints;
    ...
    if (sizedByParent) {
      ...
      try {
        performResize();
        ...
      } catch (e, stack) {
        ...
      }
      ...
    }
    ...
    try {
      performLayout();
      ...
    } catch (e, stack) {
      ...
    }
    ...
    _needsLayout = false;
    markNeedsPaint();
    if (!kReleaseMode && debugProfileLayoutsEnabled)
      Timeline.finishSync();
  }


  @protected
  void performResize();

  @protected
  void performLayout();

  void paint(PaintingContext context, Offset offset) { }

}
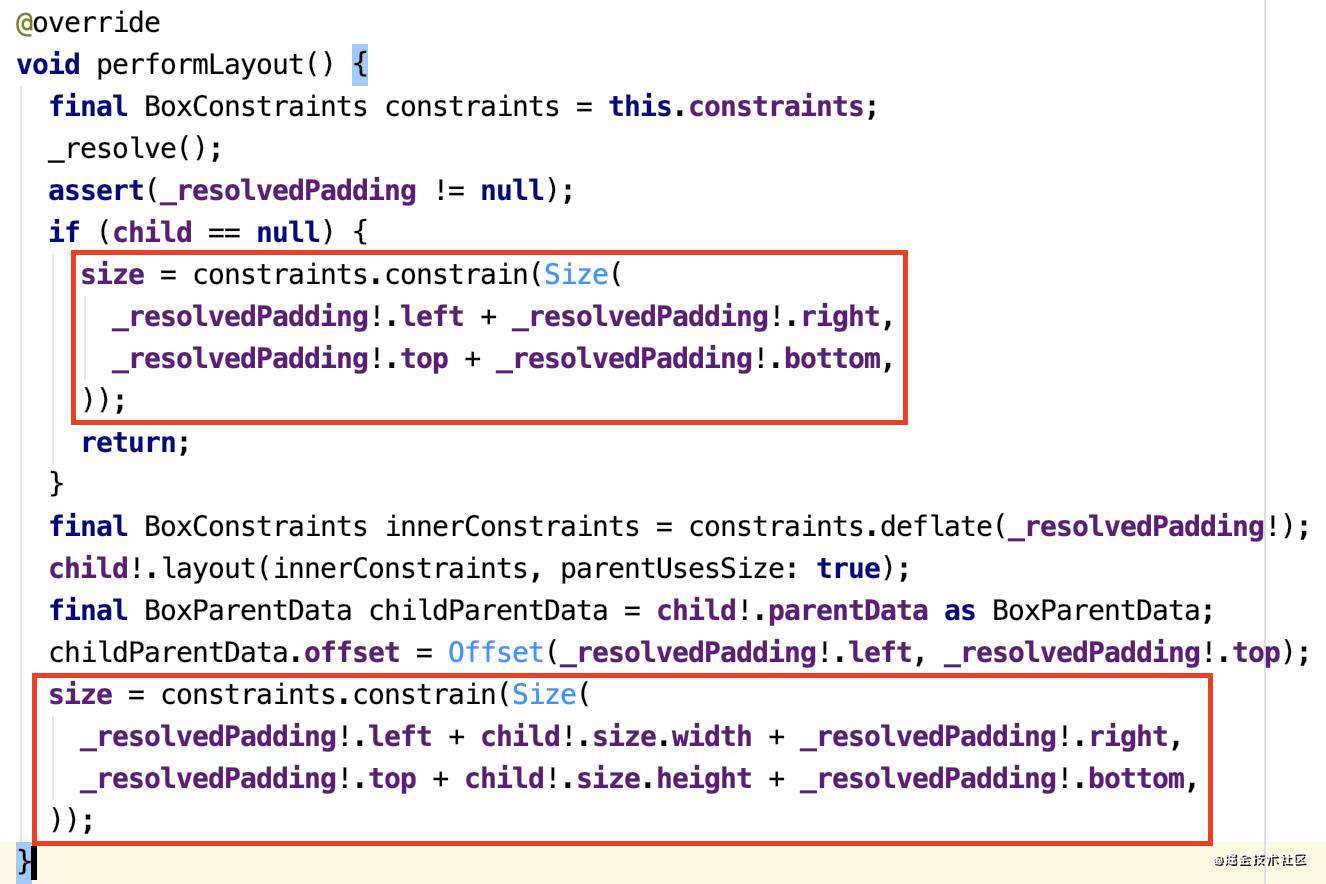
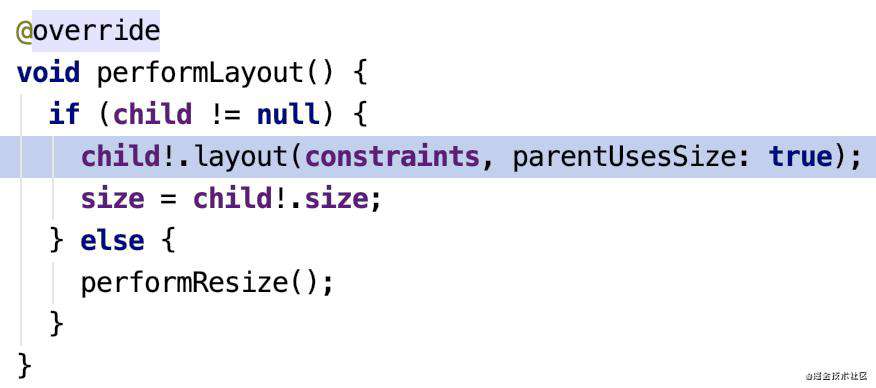
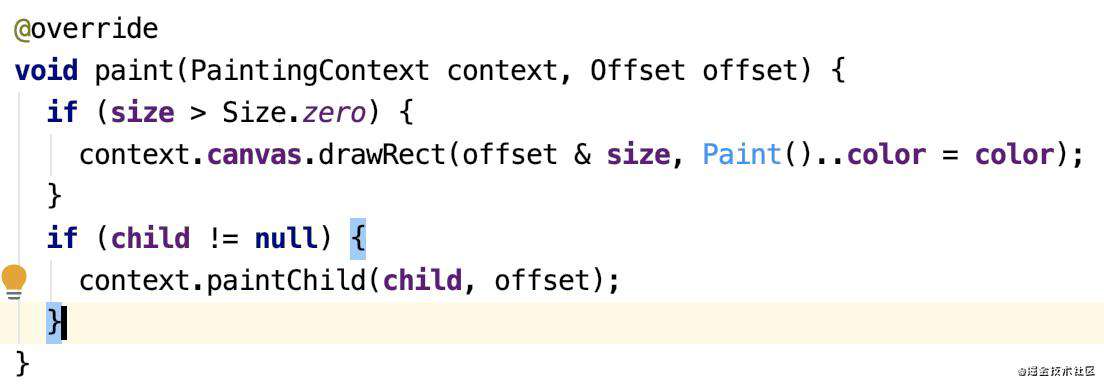
找一个layout的调用:

 好了,我们来分析一下:
layout函数的入参是一个约束,可以从外部获取约束,然后再调用performResize和performLayout,这里官方要求子类不能重写layout,而是直接重写performResize或performLayout;主要的作用是:把自己的约束传给子类;从子类获取大小;继续绘制子类,最后通过类的paint函数进行绘制。整个过程递归,就完成了各个renderObject的大小和约束的计算并绘制。
约束规则
偷个懒直接看Flutter官网的介绍:

常见问题FAQ
- 免费下载或者VIP会员专享资源能否直接商用?
- 本站所有资源版权均属于原作者所有,这里所提供资源均只能用于参考学习用,请勿直接商用。若由于商用引起版权纠纷,一切责任均由使用者承担。更多说明请参考 VIP介绍。
- 提示下载完但解压或打开不了?
- 找不到素材资源介绍文章里的示例图片?
- 模板不会安装或需要功能定制以及二次开发?


发表评论
还没有评论,快来抢沙发吧!