回顾
《SPA 路由三部曲之核心原理》的姊妹篇《SPA 路由三部曲之实践演练》终于要跟大家见面了,在开篇之前,我们先来回顾一下,在上一篇中都了解到了哪些知识:前端路由流行的模式有两种 hash 模式和 history 模式,两者分别利用浏览器自有特性实现单页面导航。
- hash 模式:window.location 或 a 标签改变锚点值,window.hashchange() 监听锚点变化
- history 模式:history.pushState()、history.repalceState() 定义目标路由,window.onpopstate() 监听浏览器操作导致的 URL 变化
那《SPA 路由三部曲之实践演练》会带来哪些内容呢,利用之前学到的核心原理,加上前端路由在 Vue 技术栈的使用方式,动手实现属于自己的前端路由管理器 myRouter。小编将使用原生 JS、Vue 分别实现 hash 模式路由与 history 模式路由。
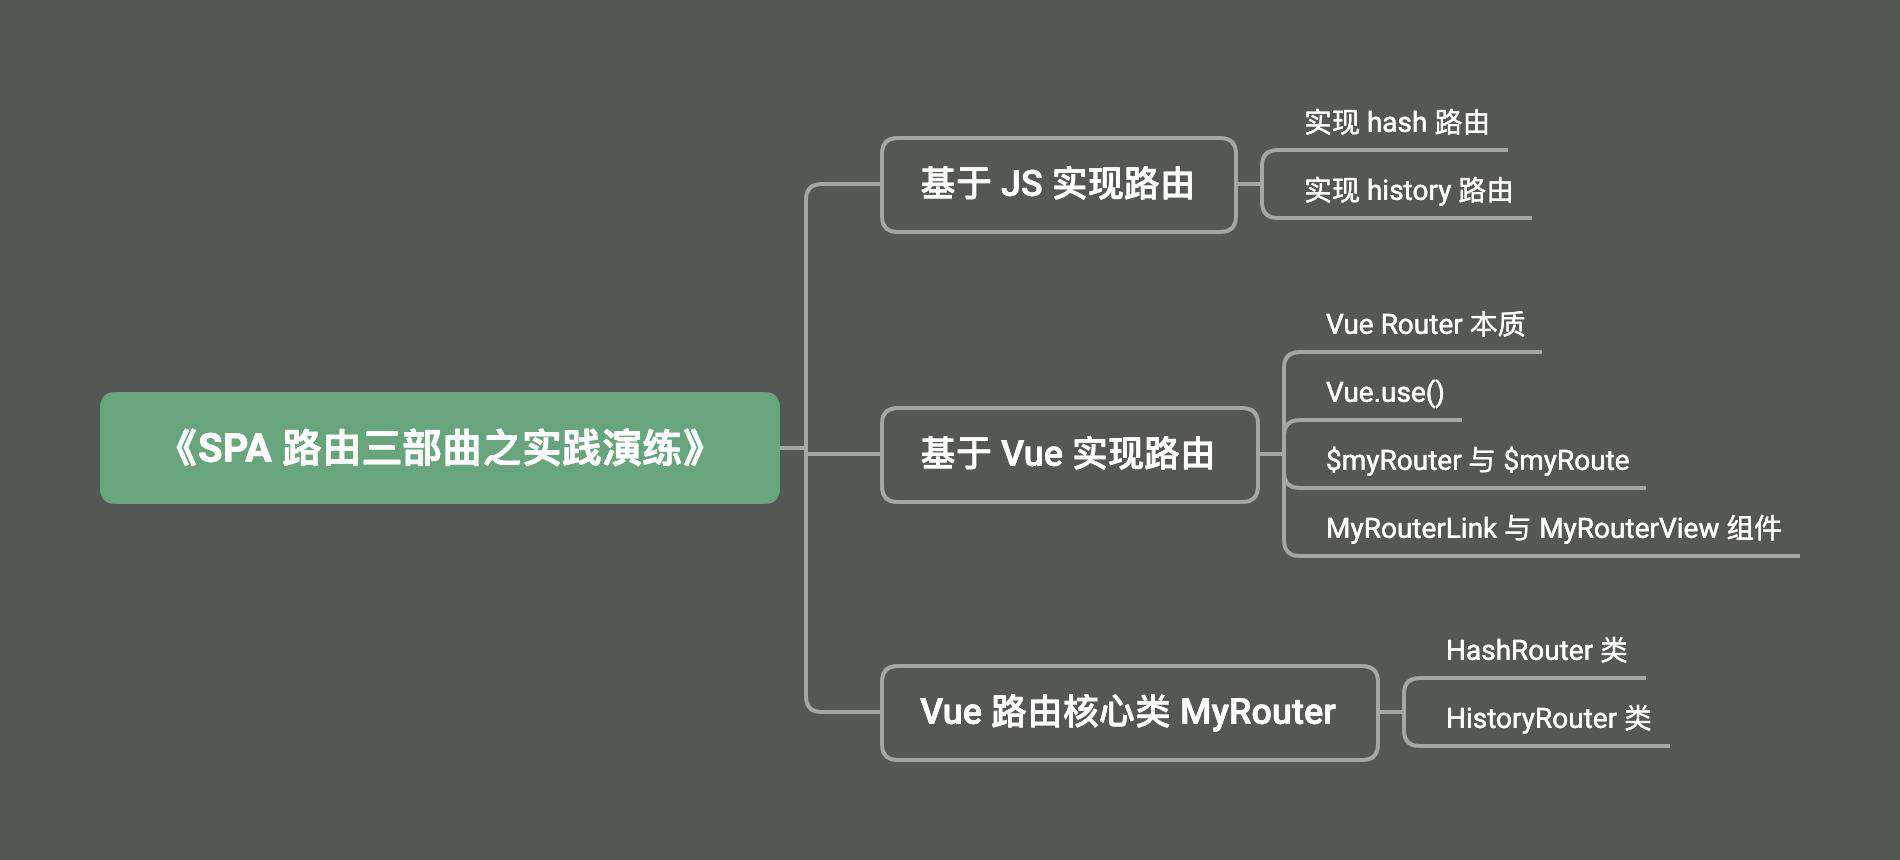
原生 JS 实现路由
在基于技术栈 Vue 实现 myRouter 之前,先用原生 JS 小试牛刀。
实现 hash 路由
在使用原生 JS 实现 hash 路由,我们需要先明确,触发路由导航的方式都有哪些:
- 利用 a 标签,触发锚点改变,监听 window.onhashchange() 进行路由导航
- JS 动态改变 hash 值,window.location.hash 赋值,进行路由导航
那我们就一步步来,先来完成 HTML 的设计:
index.html
<body>
  <div>
      <h3>Hash 模式路由跳转</h3>
      <ul class="tab">
          <!-- 定义路由 -->
          <li><a href="#/home"> a 标签点击跳转 home</a></li>
          <li><a href="#/about"> a 标签点击跳转 about</a></li>
      </ul>
      <!-- JS 动态改变 hash 值,实现跳转 -->
      <div id="handleToCart"> JS 动态点击跳转 cart</div>
      <!-- 渲染路由对应的 UI -->
      <div id="routeViewHash" class="routeView"></div>
  </div>
</body>
接下来,将对 URL 的操作定义成 JSHashRouter 类
class JSHashRouter {
    constructor(routerview){
        this.routerView = routerview
    }
    init(){
        // 首次渲染如果不存在 hash 值,那么重定向到 #/,若存在 hash 值,就渲染对应的 UI
        if(!location.hash){
            location.hash="#/"
        }else{
            this.routerView.innerHTML = '当前路由:'+ location.hash
        }
        // 监听 hash 值改变
        window.addEventListener('hashchange', ()=>{
            this.routerView.innerHTML = '当前路由:'+ location.hash
        })
    }
    push(path){
        window.location.hash = path
    }
}
JSHashRouter 类自身定义了 routerView 属性,接收渲染路由 UI 的容器。JSHashRouter 类定义了 2 个方法:init() 和 push()
- init()
首先页面渲染时,不会触发 window.onhashchange(),根据当前 hash 值,渲染 routerView。监听 window.onhashchange() 事件,一旦事件触发,重新渲染 routerView。
- push()
在实际开发过程中,进行路由跳转需要使用 JS 动态设置。通过为 window.location.hash 设置值,实现路由跳转。这里需要注意,window.location.hash 改变 hash 值,也会触发 window.onhashchange() 事件。
所以不管是 a 标签改变 hash,还是 window.location.hash 改变 hash,统一在 window.onhashchange() 事件中,重新渲染 routerView。
接下来只要 JSHashRouter 实例化,调用就完成了 hash 路由:
index.html
<script type="text/javascript" src="./hash/hash.js"></script>
<script>
window.onload = function () {
    let routerview = document.getElementById('routeViewHash')
    // HashRouter 实例化
    let hashRouter = new JSHashRouter(routerview)
    hashRouter.init()
    // 点击 handleToCart ,JS 动态改变 hash 值
    var handleToCart = document.getElementById('handleToCart');
    handleToCart.addEventListener('click', function(){
        hashRouter.push('/cart')
    }, false);
}
</script>
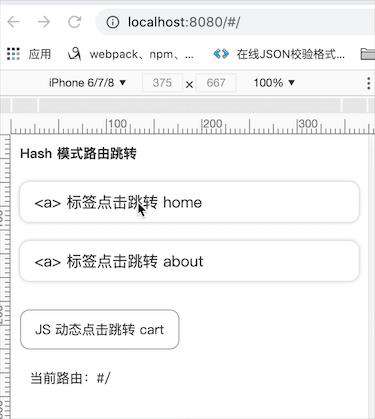
ok,来看一下效果:
实现 history 路由
顺利实现了 hash 路由,按照相同的思路实现 History 路由前,明确触发 history 路由跳转的方式有哪些:
- 动态触发 pushState()、replaceState()
- 拦截 a 标签默认事件,检测 URL 变化,使用 pushState() 进行跳转。
History 模式触发路由跳转的方式与 Hash 模式稍有不同。通过《SPA 路由三部曲之核心原理》我们了解到,pushState()、replaceState()、a 标签改变 URL 都不会触发 window.onpopstate() 事件。那该怎么办,在实际开发过程中,我们是需要在 HTML 中进行跳转的。好在可以拦截 a 标签的点击事件,阻止 a 标签默认事件,检测 URL,使用 pushState() 进行跳转。
index.html
<div>
    <ul class="tab">
        <li><a href="/home">点击跳转 /home</a></li>
        <li><a href="/about">点击跳转 /about</a></li>
    </ul>
    <!-- JS 动态改变 URL 值,实现跳转 -->
    <div id="handlePush" class="btn"> JS 动态 pushState 跳转 list</div>
    <div id="handleReplace" class="btn"> JS 动态 replaceState 跳转 item</div>
    <!-- 渲染路由对应的 UI -->
    <div id="routeViewHistory" class="routeView"></div>
</div>
history 路由与 hash 路由定义的 html 模板大同小异,区别在于 a 标签 href 属性的定义方式不同,history 模式下的 URL 中是不存在 # 号的。接下来,到了定义 JSHistoryRouter 类的时候。
class JSHistoryRouter {
    constructor(routerview){
        this.routerView = routerview
    }
    init(){
        let that = this
        let linkList = document.querySelectorAll('a[href]')
        linkList.forEach(el => el.addEventListener('click', function (e) {
            e.preventDefault()  // 阻止 <a> 默认跳转事件
            history.pushState(null, '', el.getAttribute('href')) // 获取 URL,跳转
            that.routerView.innerHTML = '当前路由:' + location.pathname
        }))
        // 监听 URL 改变
        window.addEventListener('popstate', ()=>{
            this.routerView.innerHTML = '当前路由:' + location.pathname
        })
    }
    push(path){
        history.pushState(null, '', path)
        this.routerView.innerHTML = '当前路由:' + path
    }
    replace(path){
        history.replaceState(null, '', path)
        this.routerView.innerHTML = '当前路由:' + path
    }
}
与 JSHashRouter 类一样,JSHistoryRouter 类自身定义了 routerView 属性,接收渲染路由 UI 的容器。JSHistoryRouter 类同样定义了三个方法:init() 、push()、replace()。
- init() 中主要做了两件事:
- 定义 window.onpopstate() 事件,用于监听 history.go()、history.back()、history.forword() 事件。
- 点击 a 标签,浏览器 URL 默认更新为 href 赋值的 url,使用 e.preventDefault() 阻止默认事件。将 href 属性赋值的 url 通过 pushState() 更新浏览器 URL,重新渲染 routerView。
- push() 函数,通过 history.pushState() 新增浏览器 URL,重新渲染 routerView。
- replace()函数,通过 history.replaceState() 替换浏览器 URL,重新渲染 routerView。
ok,现在只要实例化 JSHistoryRouter 类,调用方法就实现了 history 路由!
index.html
<script type="text/javascript" src="./history/history.js"></script>
<script>
window.onload = function () {
    let routerview = document.getElementById('routeViewHistory')
    let historyRouter = new JSHistoryRouter(routerview)  // HistoryRouter 实例化
    historyRouter.init()
    // JS 动态改变 URL 值
    document.getElementById('handlePush').addEventListener('click', function(){
        historyRouter.push('/list')
    }, false);
    document.getElementById('handleReplace').addEventListener('click', function(){
        historyRouter.replace('/item')
    }, false);
}
</script>
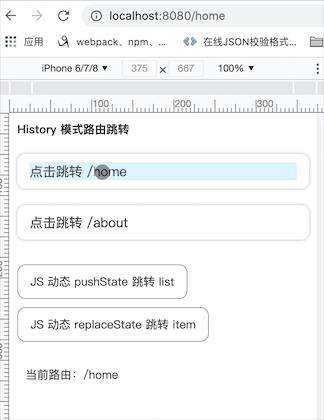
来来来,展示效果啦!
细心的同学应该发现了,在 HashRouter 类的 init() 方法中,处理了页面首次渲染的情况,但在 HistoryRouter 类中却没有。这是为什么呢?Hash 模式下,改变的是 URL 的 hash 值,浏览器请求是不携带 hash 值的,所以由 http://localhost:8080/#/home 到 http://localhost:8080/#/cart, 浏览器是不发送请求。 History 模式下,改变的则是 URL 除锚点外的其他部分,所以由 http://localhost:8080/cart 到 http://localhost:8080/home ,浏览器会重新发送请求。这也就解释了 vue-router 的 Hash 模式,后端不需要做任何处理,而 History 模式后端需要将域名下匹配不到的静态资源,重定向到同一个 index.html 页面。
好了,使用 JS 原生实现了基础的路由跳转,是不是更加期待基于 Vue 技术栈实现自己的路由了呢,马上安排!
基于 Vue 实现路由
vue-router 与 react-router 是现在流行的单页面路由管理器。虽然二者的使用方式有些差别,但核心原理是大同小异的,只要掌握了其中一个,另一个也就不难理解了。我们参照 vue-router 的使用方式与功能,实现基于 Vue 技术栈的 myRouter。首先通过 vue-cli 搭建简单的 Vue 开发环境,搭建过程在这里就不赘述了,调整之后的目录如下:
├── config
├── index.html
├── package.json
├── src
│   ├── App.vue
│   ├── main.js
│   ├── assets
│   │   ├── css
│   │   ├── image
│   │   └── js
│   ├── components
│   ├── plugins                  // 插件
│   │   └── myRouter
│   │       ├── index.js         // MyRouter 类
│   │       └── install.js       // MyRouter 对象的 install 函数
│   ├── router
│   │   └── myRouter.js
│   ├── util
│   └── view
│       └── home.vue
├── static
└── vue.config.js
Vue Router 的本质
在实现 myRouter 之前,我们先来回忆一下 Vue 中是如何引入 Vue Router 的。
- 通过 NPM 安装 vue-router 依赖包
import VueRouter from vue-router - 定义路由变量 routes,每个路由映射一个组件
const routes = [ { path: '/foo', component: { template: '<div>foo</div>' } }, // 可以通过 import 等方式引入 { path: '/bar', component: { template: '<div>bar</div>' } } ] - router 实例化,将路由变量 routes 作为配置项
const router = new VueRouter({ mode:'history', routes // (缩写) 相当于 routes: routes }) - 通过 Vue.use(router) 使得 vue 项目中的每个组件都可以拥有 router 实例与当前路由信息
- 将 router 挂载在根实例上。
export default new Vue({
    el: '#app',
    router
})
通过这五步,就顺利完成了路由的配置工作,在任何组件内可以通过 this.$router 获得 router 实例,也可以通过 this.$route 获得当前路由信息。在配置路由的过程中,我们获得了哪些信息呢?
- router 实例是通过 new VueRouter({...}) 创建的,也就是说,我们引入的 Vue Router 其实就是 VueRouter 类。
- router 实例化的配置项是一个对象,也就是,VueRouter 类的 contractor 方法接收一个对象参数,routes、mode 是该对象的属性。
- 通过 Vue.use(...) 为每个组件注入 router 实例,而 Vue.use() 其实是执行对象的 install 方法。
通过这三点信息,我们基本上可以将 MyRouter 的基本结构设计出来:
class MyRouter{
    constructor(options){
        this.routes = options.routes || []
        this.mode = options.mode || 'hash' // 模式 hash || history
        ......
    }
}
MyRouter.install = function(Vue,options){
    ......
}
export default MyRouter
将项目中 Vue Router 替换成定义好的 MyRouter ,运行项目,页面空白,没有报错。
Vue.use()
Vue 官网描述:如果插件是一个对象,必须提供 install 方法。如果插件是一个函数,它会被作为 install 方法。install 方法调用时,会将 Vue、vue 实例化时传入的选项 options 作为参数传入,利用传入的 Vue 我们便可以定义一些全局的变量、方法、组件等。
- Vue.component() 全局组件注册
项目中的任何组件都可以直接使用 <my-router-view>,不需要引入。MyRouter.install = function(Vue,options){ Vue.component("my-router-view", {template: '<div>渲染路由 UI</div>'}) } - Vue.mixin() 全局注册一个混入
MyRouter.install = function(Vue,options){
    Vue.mixin({
        beforeCreate(){
            Object.defineProperty(this,'$location',{
                get(){ return  window.location}
            })
        }
    })
}
使用全局混入,它将影响每个之后单独创建的 vue 实例。通过 Object.defineProperty() 为注入的 vue 实例,添加新的属性 $location,运行项目,在每一个 vue 实例(组件)中,都可以通过 this.$location 获得 location 对象。
$myRouter 与 $myRoute
项目中使用了 vue-router 插件后,在每个 vue 实例中都会包含两个对象 $router 和 $route。
- $router 是 Vue Router 的实例化对象,是全局对象,包含了所有 route 对象。
- $route 是当前路由对象,每一个路由都是一个 route 对象,是局部对象。
$myRouter
在注册 vue-router 时,最后一步是将 router 挂载在根实例上,在实例化根组件的时候,将 router 作为其参数的一部分。也就是目前只有根组件有 router 实例,其他子组件都没有。问题来了,如何将 router 实例放到每个组件呢?
通过之前对 Vue.use() 的基本了解,我们知道:Vue.mixin() 可以全局注册一个混入,之后的每个组件都会执行。混入对象的选项将被“混合”进入该组件本身的选项,也就是每个组件在实例化时,install.js 中 Vue.mixin() 内定义的方法,会与组件中的方法合并。利用这个特性,就可以将 router 实例传递到每一个子组件。先来看一下代码:
install.js
MyRouter.install = function(Vue,options){
    Vue.mixin({
        beforeCreate(){
            if (this.$options && this.$options.myRouter){  // 根组件
                this._myRouter = this.$options.myRouter;
            }else {
                this._myRouter= this.$parent && this.$parent._myRouter // 子组件
            }
            // 当前实例添加 $router 实例
            Object.defineProperty(this,'$myRouter',{
                get(){
                    return this._myRouter
                }
            })
        }
    })
}
上述代码中,是在组件 beforeCreate() 阶段混入的路由信息,是有什么特殊的含义吗?在 Vue 初始化 beforeCreate 阶段,会将 Vue 之前定义的原型方法(Vue.prototype)、全局 API 属性、全局 Vue.mixin() 内的参数,合并成一个新的 options,并挂载到 $options 上。在根组件上,$options 可以获得到 myRouter 对象。this 指向的是当前 Vue 实例,即根实例,myRouter 对象通过自定义的 _myRouter 变量,挂载到根实例上。子组件在初始化 beforeCreate 阶段,除了合并 install 方法中定义的 Vue.mixin() 的内容外,还会将父组件的参数进行合并,比如父组件定义在子组件上的 props,当然还包括在根组件上自定义的 _myRouter 属性。
不知道大家有没有思考一个问题,当知道组件为子组件时,为什么就可以直接拿父组件的 _myRouter 对象呢?想要解释这个问题,我们先来思考一下,父组件与子组件生命周期的执行顺序:
父 beforeCreate -> 父 created -> 父 beforeMount -> 子 beforeCreate -> 子 create -> 子 beforeMount ->子 mounted -> 父 mounted
问题的答案是不是很清楚了,子组件 beforeCreate 执行时,父组件 beforeCreate 已经执行完了,_myRouter 已经挂载到父组件的实例上了。
最后,我们通过 Object.defineProperty 将 $myRouter 挂载到组件实例上。
$myRoute
$myRoute 用于存储当前路径。参照 vue-router 的 $route,$myRoute 的属性包括:path、name、hash、meta、fullPath、query、params,那如何获取这些值呢?不管在哪种路由模式下,MyRouter 类肯定会包含通过 URL 与配置的路由表做匹配,获得到目标路由信息的逻辑处理,$myRouter 又可以拿到 MyRouter 类的所有信息,是不是很完美。在 MyRouter 类中定义 current 属性,用于存储目标路由信息,current 会根据路由的改变而重新赋值,也就保证了 $myRouter 中一直目标路由的信息。
install.js
MyRouter.install = function(Vue,options){
    Vue.mixin({
        beforeCreate(){
            ......
            // 为当前实例添加 $route 属性
            Object.defineProperty(this,'$myRoute',{
                get(){
                    return this._myRouter.current
                }
            })
        }
    })
}
MyRouterLink 组件与 MyRouterView 组件
好了,回到我们之前的话题,我们通过回顾 Vue Router 的引入,实现了 MyRouter 类的基本结构。接下来,我们在看看 Vue Router 是如何使用的。
Vue Router 定义了两个组件:<router-link>、<router-view>
- <router-link> 用来路由导航,默认会被渲染成 a 标签,通过传入 to 属性定义目标路由
- <router-view> 用来渲染匹配到的路由组件
<div id="app">
  <p>
    <router-link to="/foo">Go to Foo</router-link>
    <router-link to="/bar">Go to Bar</router-link>
  </p>
  <router-view></router-view>
</div>
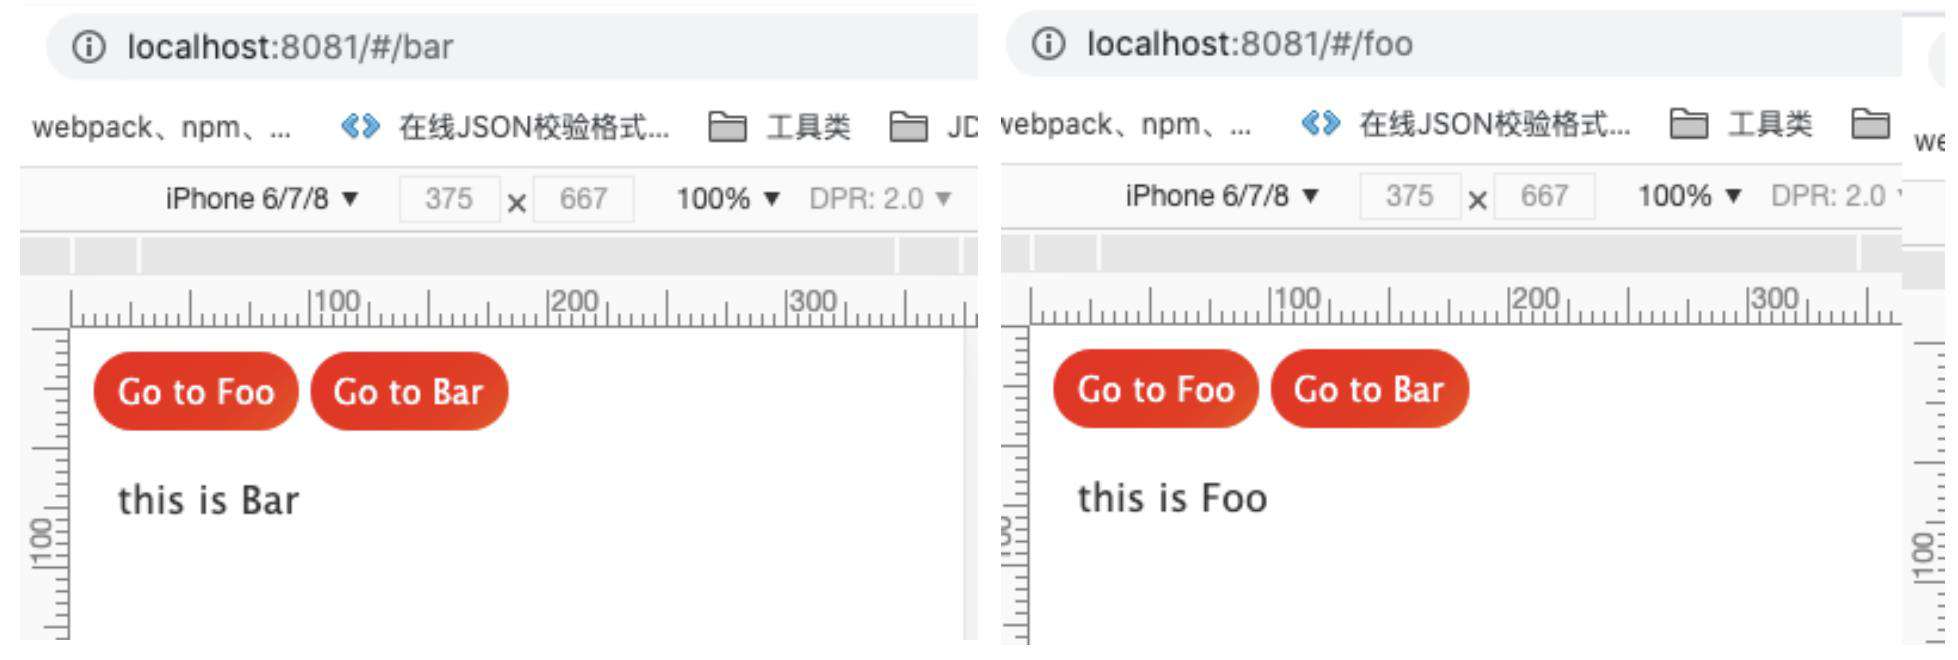
仿照 Vue Router,在 myRouter 中同样添加两个全局组件 <my-router-view>、<my-router-link>。通过上面对 Vue.use() 定义插件的介绍,相信大家已经知道该如何在插件中定义组件了,那就先来定义 <my-router-link> 组件吧。
<router-link> 默认会被渲染成 a 标签,<router-link to="/foo">Go to Foo</router-link> 在最终在浏览器中渲染的结果是 <a href="/foo">Go to Foo</a>。当然,可以通过 <router-link> 的 tag prop 指定标签类型。小伙伴们有没有发现问题,按照常规的定义组件方式,在 <my-router-link> 组件中放的是 a 标签,<solt/> 代替模板内容:
<template>
  <a :href="to"><slot/></a>
</template>
<script>
export default {
  name: 'MyRouterLink',
  props:['to'],
  data () {return {}}
}
</script>
我们该如何定义 tag prop 呢?如果路由导航的触发条件不是 click,是 mouseover ,又如何定义呢?还记得 Vue 中提供的 render 渲染函数吗,render 函数结合数据生成 Virtual DOM 树、Diff 算法和 Patch 后生成新的组件。<my-router-link> 就使用 render 函数定义。
link.js
export default {
    name: 'MyRouterLink',
    functional: true,
    props: {
        to: {   // 目标导航
            type: [String, Object],
            required: true
        },
        tag:{   // 定义导航标签
            type: String,
            default: 'a'
        },
        event: {  // 触发事件
            type: String,
            default: 'click'
        }
    },
    render: (createElement, {props,parent}) => {
        let toRoute = parent.$myRoute.mode == 'hash'?`#/${props.to}`:`/${props.to}`
        return createElement(props.tag,{
            attrs: {
                href: toRoute
            },
            on:{
                [event]:function(){}
            }
        },context.children)
    }
};
ok,引用组件来看一下效果!
App.vue
<div class="footer">
    <my-router-link to="home" tag="p">首页</my-router-link>
    <my-router-link to='classify'>分类</my-router-link>
</div>
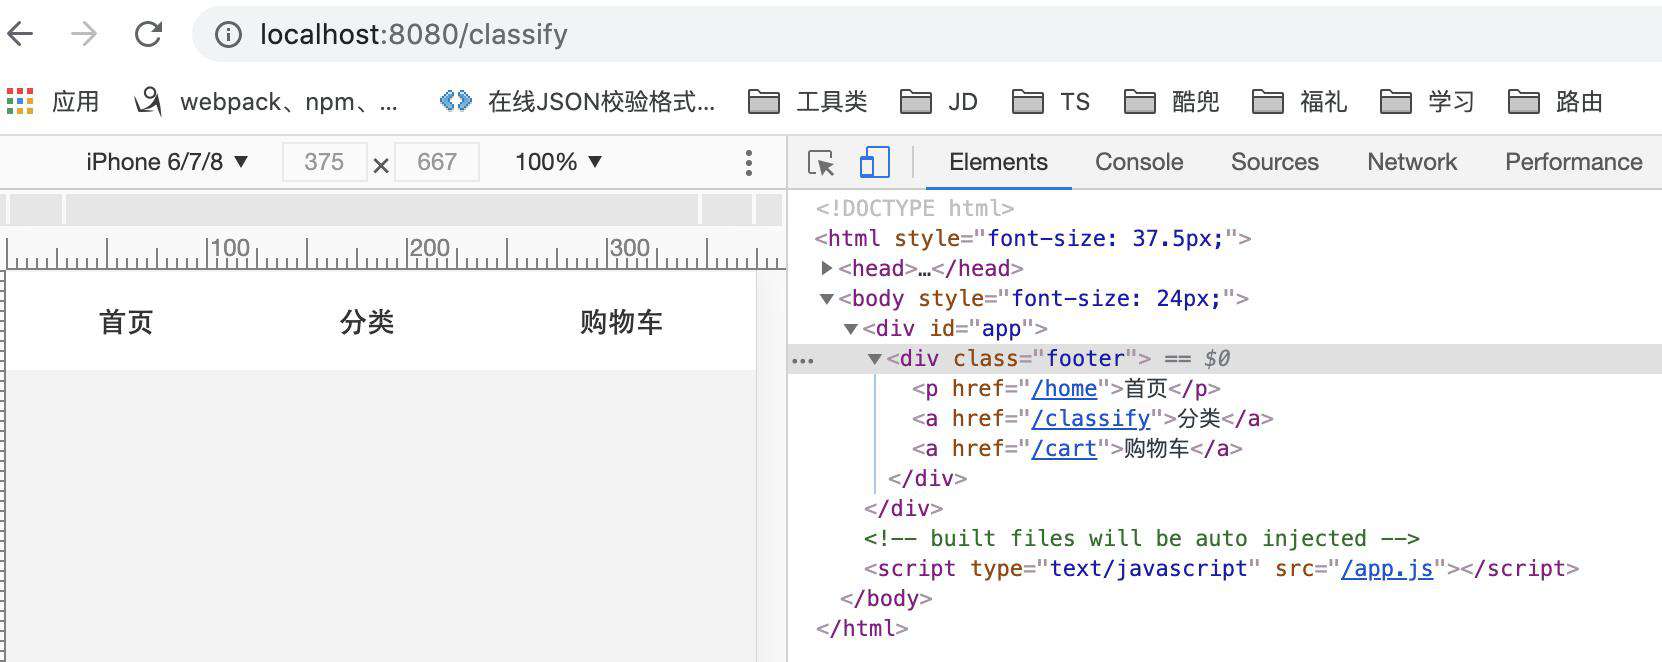
正常渲染,没有报错,使用 p 标签成功渲染,但问题也就接踵而至。<my-router-link> 默认渲染成 a 标签,history 路由模式下,a 标签默认的跳转事件,不仅会跳出当前的 document,还不能触发 popstate 事件。如果使用的是自定义标签,触发导航的时候,需要用 pushState 或 window.location.hash 更新 URL,难道这里还要写 if 判断?No,为何不阻止 a 标签的默认事件呢,这样一来,a 标签与自定义标签就没有差别了,导航标签都通过 pushState 或 window.location.hash 进行路由导航。
link.js
export default {
    ......
    render: (createElement, {props,parent,children}) => {
        let toRoute = parent.$myRoute.mode == 'hash'?`#/${props.to}`:`/${props.to}`
        let on = {'click':guardEvent}
        on[props.event] = e=>{
            guardEvent(e)  // 阻止导航标签的默认事件
            parent.$myRouter.push(props.to)   // props.to 的值传到 router.push()
        }
        return createElement(props.tag,{
            attrs: { href: toRoute },
            on,
        },children)
    }
};
function guardEvent(e){
    if (e.preventDefault) {
        e.preventDefault()
    }
}
太不容易了,单实现 MyRouterLink 组件就死了无数的脑细胞。接下来,让大脑放松一下!按照 MyRouterLink 组件的思路,实现 MyRouterView 组件。MyRouterView 的功能相对简单,将当前路由匹配到的组件进行渲染就行。还记得上面提到的 $myRoute 对象吗,将当前路由信息注入到了每个 vue 实例中,在 $myRoute 对象上新增 component 属性,存储路由对应的组件。其实,在 $route 的 matched 数组中,同样记录着组件信息,包括嵌套路由组件、动态路由匹配 regx 等等,小编只是将其简化。
view.js
export default {
    ......
    render: (createElement, {props, children, parent, data}) => {
        let temp = parent.$myRoute && parent.$myRoute.component?parent.$myRoute.component.default:''
        return createElement(temp)
    }
}
install.js
import MyRouterView from './view'
MyRouter.install = function(Vue,options){
    Vue.component(MyRouterView.name, MyRouterView)
}
又到了激动人心的时刻了,添加上 <my-router-view>,看看能不能如愿以偿!
App.vue
<template>
  <div id="app">
    <my-router-view/>
    <div class="footer">
        <my-router-link to="home" tag="p">首页</my-router-link>
        <my-router-link to='classify'>分类</my-router-link>
        <my-router-link to='cart'>购物车</my-router-link>
    </div>
  </div>
</template>
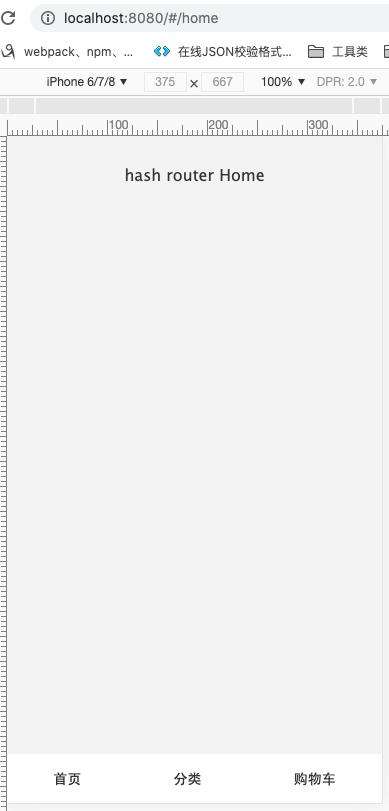
赞,MyRouter 插件已将初见雏形了,太不容易了!做好准备,关键内容来喽~~
核心类 MyRouter
终于到了完善 MyRouter 类了,在完善之前,我们先来确定一下,MyRouter 类需要做哪些事情。
- 接收 MyRouter 实例化时传入的选项 options,数组类型的路由表 routes、代表当前路由模式的 mode
- vue-router 使用时,不仅可以使用 path 匹配,还可以通过 name 匹配,路由表 routes 不方便路由匹配,将路由表转换成 key:value 的形式,key 为路由表 routes 配置的 path 或 name
- 为了区分路由的两种模式,创建 HashRouter 类、HistoryRouter 类,合称为 Router 类,新增 history 属性存储实例化的 Router 类
- 定义 current 属性,存储目标路由信息,通过 $myRoute 挂载到每一个实例上
- 定义 push()、replace()、go()方法
MyRouter 类做的事情还是挺多的,对于程序猿来说,只要逻辑清楚,再多都不怕。那就一点一点的来实现吧!先来将 MyRouter 类的基本结构搭起来。
index.js
class MyRouter {
    constructor(options){
        this.routes = options.routes || [] // 路由表
        this.mode = options.mode || 'hash' // 模式 hash || history
        this.routesMap = Utils.createMap(this.routes) // 路由表装换成 key:value 形式
        this.history = null  // 存储实例化 HashRouter 或 HistoryRouter
        this.current= {
            name: '',
            meta: {},
            path: '/',
            hash: '',
            query:{},
            params: {},
            fullPath: '',
            component:null
        } // 记录当前路由
        // 根据路由模式,实例化 HashRouter 类、HistoryRouter 类
        switch (options.mode) {
            case 'hash':
                this.history = new HashRouter(this)
            case 'history':
                this.history = new HistoryRouter(this)
            default:
                this.history = new HashRouter(this)
        }
    }
    init(){
        this.history.init()
    }
    push(params){
        this.history.push(params)
    }
    replace(params){
        this.history.replace(params)
    }
    go(n){
        this.history.go(n)
    }
}
export default MyRouter
Utils.createMap(routes)
createMap(routes){
    let nameMap = {} // 以每个路由的名称创建 key value 对象
    let pathMap = {} // 以每个路由的路径创建 key value 对象
    routes.forEach((route)=>{
        let record = {
            path:route.path || '/',
            component:route.component,
            meta:route.meta || {},
            name:route.name || ''
        }
        if(route.name){
            nameMap[route.name] = record
        }
        if(route.path){
            pathMap[route.path] = record
        }
    })
    return {
        nameMap,
        pathMap
    }
}
将路由表 routes 中的每一个路由对象,重新组合,分别调整为以 route.path、route.name 为关键字,value 值为 record 对象的形式。这里只是一个简单的处理,并没有考虑嵌套路由、父组件路由、重定向、props 等情况。
我们在回过头来看看之前说的 MyRouter 类需要做的 5 件事情,现在还需要完成的就是定义 HashRouter 类与 HistoryRouter 类,并在其中为 current 赋值。废话不多说,开整!
HashRouter 类
顾名思义,HashRouter 类用来实现 Hash 模式下的路由的跳转。通过定义 MyRouter 类,可以明确 HashRouter 类需要定义 4 个函数。同时 HashRouter 类为 MyRouter 类中的 current 属性赋值,需要接收 MyRouter 类的参数。那么,HashRouter 类的基本框架就出来了。
hash.js
export default class HashRouter {
    constructor(router){
        this.router = router // 存储 MyRouter 对象
    }
    init(){}
    push(params){}
    replace(params){}
    go(n){}
}
实现 hash 模式路由跳转的关键就是监听 URL Hash 值的变化。还记得之前原生 JS 实现的 Hash 路由吗,原理是一模一样的,代码直接拿来用都可以。
export default class HashRouter {
    ......
    init(){
        this.createRoute()   // 页面首次加载时,判断当前路由
        window.addEventListener('hashchange', this.handleHashChange.bind(this))  // 监听 hashchange
    }
    handleHashChange(){
        this.createRoute()
    }
    // 更新当前路由 current
    createRoute(){
        let path = location.hash.slice(1)
        let route = this.router.routesMap.pathMap[path]
        // 更新当前路由
        this.router.current = {
            name: route.name || '',
            meta: route.meta || {},
            path: route.path || '/',
            hash: route.hash || '',
            query:location.query || {},
            params: location.params || {},
            fullPath: location.href,
            component: route.component
        }
    }
    ......
}
HashRouter 类与 JSHashRouter 类实现思路是一样的,稍有不同的是对 UI 渲染的方式。HashRouter 类是通过 <my-router-view> 渲染组件的。
HashRouter 类中的 createRoute() 获取 URL 的 hash 值,即 path 值,通过 MyRouter 类中的 routesMap.pathMap 对象,获取到当前路由匹配的路由配置选项,将路由配置选项合并到 myRouter.current 对象中,myRouter.current 通过 $myRoute 挂载到了每个实例中。也就是说,$myRoute.component 就是我们匹配到的路由组件,<my-router-view> 也是通过它确定要渲染的组件。
代码实现到这里,应该可以实现基本的跳转了,来看一下效果,验证一下!
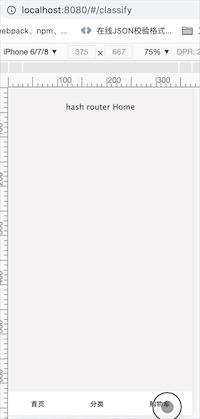
页面初始渲染显示正常,点击底部导航也能正常跳转,但是为什么页面不更新呢?虽然我们通过 myRouter.current 将 hash 值变化与 <my-router-view> 建立了联系,但没有对 myRouter.current 进行双向绑定,说白了,<my-router-view> 并不知道 myRouter.current 的发生了改变。难道要实现双向绑定,当然不用!小编给大家安利一个 Vue 隐藏的 API:Vue.util.defineReactive(),了解过 Vue 源码的童鞋应该知道这个 API,用于定义一个对象的响应属性。那就简单了,在 MyRouter 插件初始化的时候,利用 Vue.util.defineReactive(),使 myRouter.current 得到监听。
install.js
MyRouter.install = function(Vue,options){
    Vue.mixin({
        beforeCreate(){
            ......
            Object.defineProperty(this,'$myRoute',{ .... })
            // 新增代码 利用 Vue defineReactive 监听当前路由的变化
            Vue.util.defineReactive(this._myRouter,'current')
        }
    })
}
现在来看看,<my-router-view> 的内容有没有更新。
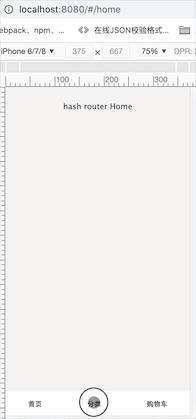
太不容易了,终于得到我们想要的效果了。HashRouter 类的 push()、replace()、go() 方法,直接 copy JSHashRouter 类的代码就实现了。
export default class HashRouter {
    ......
    push(params){
        window.location.href = this.getUrl(params)
    }
    replace(params){
        window.location.replace(this.getUrl(params))
    }
    go(n){
        window.history.go(n)
    }
    // 获取当前 URL
    getUrl(path){
        let path = ''
        if(Utils.getProperty(params) == 'string'){
            path = params
        } else if(params.name || params.path){
            path = params.name?params.name:params.path
        }
        const fullPath = window.location.href
        const pos = fullPath.indexOf('#')
        const p = pos > 0?fullPath.slice(0,pos):fullPath
        return `${p}#/${path}`
    }
}
参照 vue-router,动态导航方法可以是字符串,也可以是描述地址的对象,getUrl 函数处理 params 的各种情况。
HashRouter 类基本功能实现完了,是不是挺简单的,对 HistoryRouter 类的实现充满了信心,那就趁热打铁,实现 HistoryRouter 类走起!!
çççHistoryRouter 类**
HistoryRouter 类与 Hash 类一样,同样需要 push()、replace()、go() 动态设置导航,一个自有参数接收 MyRouter 类。唯一不同的就是处理监听 URL 变化的方式不一样。
history.js
export default class HistoryRouter {
    constructor(router){
        this.router = router
    }
    init(){
        window.addEventListener('popstate', ()=>{
            // 路由改变
        })
    }
    push(params){}
    replace(params){}
    go(n){}
}
history 路由模式导航是通过 history.pushState()、history.replaceState() 配合 window.onpopstate() 实现的。与 HashRouter 类一样,HistoryRouter 类的实现依然可以将原生 JS 实现的 JSHistoryRouter 类的代码直接拿过来。
history.js
export default class HistoryRouter {
    constructor(router){
        this.router = router
    }
    init(){
        // 监听 popstate
        window.addEventListener('popstate', ()=>{
            this.createRoute(this.getLocation())  // 导航 UI 渲染
        })
    }
    push(params){
        history.pushState(null, '', params.path)
        this.createRoute(params)  // 导航 UI 渲染
    }
    replace(params){
        history.replaceState(null, '', params.path)
        this.createRoute(params)  // 导航 UI 渲染
    }
    go(n){window.history.go(n)}
    getLocation () {
        let path = decodeURI(window.location.pathname)
        return (path || '/') + window.location.search + window.location.hash
    }
}
由于 history.pushState 与 history.replaceState 对浏览器历史状态进行修改并不会触发 popstate,只有浏览器的后退、前进键才会触发 popstate 事件。所以在通过 history.pushState、history.replaceState 对历史记录进行修改、监听 popstate 时,都要根据当前 URL 进行导航 UI 渲染。除了进行 UI 渲染,还有非常重要的一点,对 router.current 的更新,只要将其更新,<my-router-view> 才会更新。
history.js
export default class HistoryRouter {
    ......
    createRoute(params){
        let route = {}
        if(params.name){
            route = this.router.routesMap.nameMap[params.name]
        }else{
            let path = Utils.getProperty(params) == 'String'?params:params.path
            route = this.router.routesMap.pathMap[path]
        }
        // 更新路由
        this.router.current = {
            name: route.name || '',
            meta: route.meta || {},
            path: route.path || '/',
            hash: route.hash || '',
            query:location.query || {},
            params: location.params || {},
            fullPath: location.href,
            component: route.component
        }
    }
}
细心的同学可能发现了问题,在原生 JS JSHistoryRouter 类中,将 a 标签的点击事件进行了改造,阻止了默认事件,使用 pushState 实现路由导航。HistoryRouter 类中为什么没有添加这个逻辑呢?还记得 <my-router-link> 的实现吗,其阻止了 a 标签的默认事件,统一使用 MyRouter 类的 push 方法,进行路由导航。
HistoryRouter 类的基本功能也实现完了,已经迫不及待想要验证代码的正确性了!
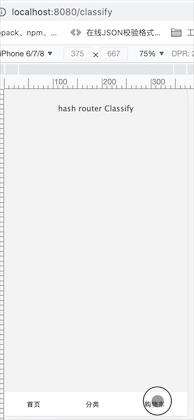
完美实现,有点小小的佩服自己!居然出现了可以参与编写 vue-router 的错觉。与 vue-router 相比,还有很多的功能没有实现,比如嵌套路由、路由导航守卫、过渡动画等等,myRouter 插件只是实现了简单的路由导航和页面渲染。往往一件事情最难的是第一步,myRouter 已经开了一个不错的头,相信完善之后的功能也不是问题。感兴趣的小伙伴可以跟小编一起继续开发下去!
总结
vue-router 实现思路不难,源码逻辑却是相当的复杂,MyRouter 相比 vue-router 虽然简化了很多,但整体思路是一致的。小编相信,MyRouter 的实现一定能帮助小伙伴更加快速的掌握 vue-router 的源码。小伙伴们在编写代码时,有没有跟小编一样的经历,需要不停地修改、完善之前的代码,哪怕当时想的很全面,也依然会亲手把代码删除,单单是 <my-router-link> 组件的实现,小编就修改了不下五遍。过程虽然痛苦,但结果却是收获却满满,成就感爆棚。由衷佩服 vue-router 的开发者,不知道他们是进行多少遍的修改,才能做到如今的地步!
欢迎大家期待之后《SPA 路由三部曲》的最后一篇,在这篇文章中,小编将带领大家进入 vue-router 的源码世界。相信在了解了 vue-router 的实现思路后,大家就都可以真正实现自己的前端路由了。
常见问题FAQ
- 免费下载或者VIP会员专享资源能否直接商用?
- 本站所有资源版权均属于原作者所有,这里所提供资源均只能用于参考学习用,请勿直接商用。若由于商用引起版权纠纷,一切责任均由使用者承担。更多说明请参考 VIP介绍。
- 提示下载完但解压或打开不了?
- 找不到素材资源介绍文章里的示例图片?
- 模板不会安装或需要功能定制以及二次开发?


发表评论
还没有评论,快来抢沙发吧!