之前在写业务的时候,用svg-sprite-loader封装了icon组件,但也是照猫画虎,回过头看,连svg也没搞明白。
矢量图形
不同与传统的位图(PNG、JPG ...), 矢量图是一种面向对象的图像。矢量文件中的图形元素称为对象。每个对象都是一个自成一体的实体,它具有颜色、形状、轮廓、大小和屏幕位置等属性。
SVG
基本结构
下图是一个svg的基本结构
<svg width='100' heiight='100' xmlns='http://wwww.w3.org/2000/svg'>
  <title>SVG</title>
  <desc>Desc of SVG</desc>
  <!-- ...draw sth !-->
</svg>
我们可以利用图形和属性来组合成一个矢量图
基本图形:<rect>、<circle>、<ellipse>、<line>、<polyline>、<polygon>
基本属性:fill、stroke、stroke-width、transform
具体可参考 MDN-SVG
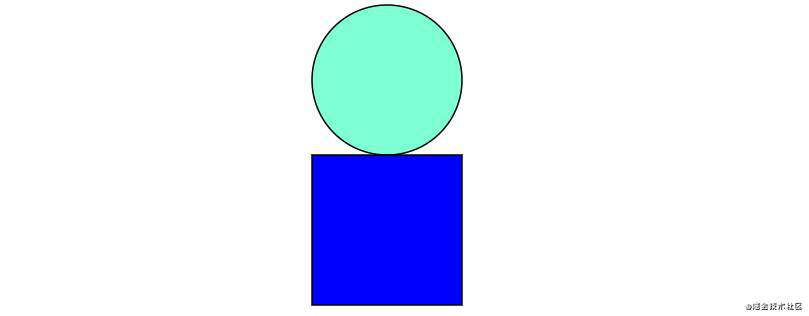
接下来我们就可以随意组合图形了!
<svg width="500" height="500" xmlns="http://wwww.w3.org/2000/svg">
  <circle
    cx="250"
    cy="80"
    r="50"
    style="stroke: black; fill: aquamarine"
  />
  <rect
    x="200"
    y="130"
    width="100"
    height="100"
    style="stroke: black; fill: blue"
  />
</svg>

分组
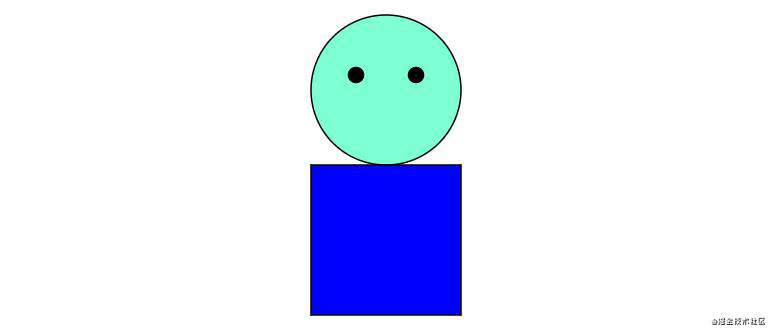
除了直接使用基础元素,还可以用<g>标签来定义自己的分组,比如我们想给上面的图形加个眼睛。
<svg width="500" height="500" xmlns="http://wwww.w3.org/2000/svg">
  <circle
    cx="250"
    cy="80"
    r="50"
    style="stroke: black; fill: aquamarine"
  />
  <rect
    x="200"
    y="130"
    width="100"
    height="100"
    style="stroke: black; fill: blue"
  />
  <g id="eye">
    <circle cx="230" cy="70" r="5" style="stroke: black; fill: black" />
  </g>
  <use xlink:href="#eye" transform="translate(40 0)"></use>
</svg>

<g>定义了一个可复用的分组,用<use>可以深度克隆一份分组元素,并且可以重新定义元素样式
路径
<path>大致可以理解成通过描述一个点的运动路径,来绘制图像。首先需要了解以下命令
- M = moveto
- L = lineto
- H = horizontal lineto
- V = vertical lineto
- C = curveto
- S = smooth curveto
- Q = quadratic Bézier curve
- T = smooth quadratic Bézier curveto
- A = elliptical Arc
- Z = closepath
注:大写为绝对路径,小写为相对路径(相对于上一个M/m)
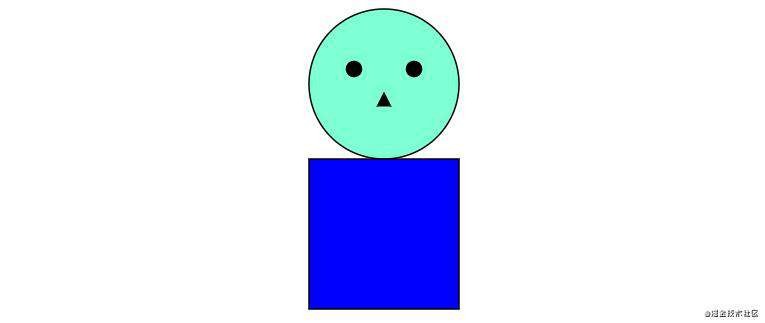
尝试给上面的小人加个鼻子
<svg width="500" height="500" xmlns="http://wwww.w3.org/2000/svg">
  <circle
    cx="250"
    cy="80"
    r="50"
    style="stroke: black; fill: aquamarine"
  />
  <rect
    x="200"
    y="130"
    width="100"
    height="100"
    style="stroke: black; fill: blue"
  />
  <g id="eye">
    <circle cx="230" cy="70" r="5" style="stroke: black; fill: black" />
  </g>
  <use xlink:href="#eye" transform="translate(40 0)"></use>

  <!-- 加个鼻子 !-->
  <path style="fill: #000" d="M 250 85 l -5 10 l 10 0 Z" />
</svg>
来解读一下 M 250 85 l -5 10 l 10 0 Z
M 250 85:绝对路径,标识起点是绝对坐标(250,85)
l -5 10: 相对于上一个坐标的路径,即(245,95)
l 10 0: 相对于上一个坐标的路径,即(255,95)
效果:

defs
上面我们说到<g>和<use>搭配可以做到元素的复用,但在定义<g>时,就已经完成了一次绘制,如果我们想仅仅定义而不马上使用,可以使用<defs>
<svg width="500" height="500" xmlns="http://wwww.w3.org/2000/svg">
  <circle
    cx="250"
    cy="80"
    r="50"
    style="stroke: black; fill: aquamarine"
  />
  <rect
    x="200"
    y="130"
    width="100"
    height="100"
    style="stroke: black; fill: blue"
  />

  <!-- 定义模板 !-->
  <defs>
    <g id="eye">
      <circle r="5" cx="5" cy="5" style="stroke: black; fill: black" />
    </g>
  </defs>

  <!-- 使用模板模板 !-->
  <use x="225" y="70" xlink:href="#eye"></use>
  <use x="265" y="70" xlink:href="#eye"></use>

  <!-- 加个鼻子 !-->
  <path style="fill: #000" d="M 250 85 l -5 10 l 10 0 Z" />
</svg>
symbol
<symbol>有点像<g>+ <defs>的结合体
<svg width="500" height="500" xmlns="http://wwww.w3.org/2000/svg">
  <circle
    cx="250"
    cy="80"
    r="50"
    style="stroke: black; fill: aquamarine"
  />
  <rect
    x="200"
    y="130"
    width="100"
    height="100"
    style="stroke: black; fill: blue"
  />

  <!-- symbol 定义模板 !-->
  <symbol id="eye">
    <circle r="5" cx="5" cy="5" style="stroke: black; fill: black" />
  </symbol>

  <!-- 使用模板模板 !-->
  <use x="225" y="70" xlink:href="#eye"></use>
  <use x="265" y="70" xlink:href="#eye"></use>

  <!-- 加个鼻子 !-->
  <path style="fill: #000" d="M 250 85 l -5 10 l 10 0 Z" />
</svg>
实现自定义svg组件
这一部分我们将参考antd-mobile的icon组件实现,来理解一下如何使用svg来封装icon
首先来看看icon组件的核心代码,掐去不重要的部分
const Icon = (props) => {
  useEffect(() => {
    loadSprite(); // important
  }, []);
  const { type, className, size, ...restProps } = props;
  const cls = classnames(
    className,
    'au-icon',
    `au-icon-${type}`,
    `au-icon-${size}`
  );
  return (
    <svg className={cls} {...(restProps as any)}>
      <use xlinkHref={`#${type}`} />
    </svg>
  );
};
最重要的部分应该就是loadSprite方法的执行了,继续看
...未完
常见问题FAQ
- 免费下载或者VIP会员专享资源能否直接商用?
- 本站所有资源版权均属于原作者所有,这里所提供资源均只能用于参考学习用,请勿直接商用。若由于商用引起版权纠纷,一切责任均由使用者承担。更多说明请参考 VIP介绍。
- 提示下载完但解压或打开不了?
- 找不到素材资源介绍文章里的示例图片?
- 模板不会安装或需要功能定制以及二次开发?


发表评论
还没有评论,快来抢沙发吧!