前言
最近关注洛竹的朋友,都知道我成为了 Deno Contributor。不过说来惭愧,我的 pr 和代码逻辑毫无关系。我本来只是为了调研 Deno 的 Github Action 应用情况,在写 叮,一份 Deno GitHub Action 源码解析请查收 一文的过程中,意外发现了 Deno CI 的谬误和不合理之处。在征询了迷渡大佬的意见后,提交了自己的 pr。 为了能够参与 Deno 的核心开发,经过几天的思想斗争,决定学习 Rust。
如果你问我为什么 Node 都没有精通,就开启了 Deno、Go、Rust 的学习之旅,那我还真的没办法正面回答你,尤其我还是个前端。我能告诉你的是如果不是先前入门了 Deno 和 Go,设计我们团队 CLI tpc 和 tuya-panel-demo 的管理时就拿不出一个好的方案。
另外作为一个计算机专业学生,谁还没学过 C/C++、Java、操作系统、数据结构、计算机原理呢?虽说学的不咋地,也忘得差不多了,但是对于自学任何一门编程语言都是够用的。在小帅的建议下,这些基础理论我也会捡起来温习。牛年也希望大家以开放的心态看待程序员职业生涯,不要被人为制造出来的焦虑所困扰。
Deno 与 Rust
Deno 早期是 Golang + TypeScript 的,后来因为 Golang 和 V8 的 GC 问题,Ryan 下了大工夫把 golang 统统换成没有 GC 的 Rust了。知乎看到的一个回答觉得很有道理:
- Go 自己有 GC,V8 自己也有 GC,双 GC 和复杂的运行时会造成多少性能损失。
- Rust 具有高性能、内存安全等特性,非常适合写这种对性能要求高的程序。
其实 Go 也是很优秀的编译语言,由于是初学,我能理解的就是 Go 不符合 Ryan 设计 Deno 的需求。
安装 Rust
和其他不太一样的是,Rust 官方提供了 rustup 命令行工具来下载、安装、管理不同的 Rust 发行版本以及其附带的工具链。
安装 rustup:
curl https://sh.rustup.rs -sSf | sh
输出:
$ curl https://sh.rustup.rs -sSf | sh
info: downloading installer

Welcome to Rust!

This will download and install the official compiler for the Rust
programming language, and its package manager, Cargo.

Rustup metadata and toolchains will be installed into the Rustup
home directory, located at:

  /Users/luozhu/.rustup

This can be modified with the RUSTUP_HOME environment variable.

The Cargo home directory located at:

  /Users/luozhu/.cargo

This can be modified with the CARGO_HOME environment variable.

The cargo, rustc, rustup and other commands will be added to
Cargo's bin directory, located at:

  /Users/luozhu/.cargo/bin

This path will then be added to your PATH environment variable by
modifying the profile files located at:

  /Users/luozhu/.profile
  /Users/luozhu/.zshenv

You can uninstall at any time with rustup self uninstall and
these changes will be reverted.

Current installation options:


   default host triple: x86_64-apple-darwin
     default toolchain: stable (default)
               profile: default
  modify PATH variable: yes

1) Proceed with installation (default)
2) Customize installation
3) Cancel installation
>1
以上信息可以总结为:
- Rustup 家目录:
~/.rustup,可以用RUSTUP_HOME环境变量修改 - Cargo 家目录:
~/.cargo,可以用CARGO_HOME环境变量修改 - cargo、rustc、rustup 和其他命令都安装在
~/.cargo/bin - PATH 环境变量是放在
~/.zshenv中的(这个方式第一次见)
这里让我们选择安装方式,由于是入门,我们直接选择默认安装,输入如下:
info: profile set to 'default'
info: default host triple is x86_64-apple-darwin
info: syncing channel updates for 'stable-x86_64-apple-darwin'
info: latest update on 2021-02-11, rust version 1.50.0 (cb75ad5db 2021-02-10)
info: downloading component 'cargo'
  4.3 MiB /   4.3 MiB (100 %)   3.1 MiB/s in  1s ETA:  0s
info: downloading component 'clippy'
info: downloading component 'rust-docs'
 14.7 MiB /  14.7 MiB (100 %)   2.2 MiB/s in  6s ETA:  0s
info: downloading component 'rust-std'
 23.3 MiB /  23.3 MiB (100 %)   2.2 MiB/s in 11s ETA:  0s
info: downloading component 'rustc'
 61.0 MiB /  61.0 MiB (100 %)   2.3 MiB/s in 26s ETA:  0s
info: downloading component 'rustfmt'
info: installing component 'cargo'
info: using up to 500.0 MiB of RAM to unpack components
info: installing component 'clippy'
info: installing component 'rust-docs'
 14.7 MiB /  14.7 MiB (100 %)   5.8 MiB/s in  1s ETA:  0s
info: installing component 'rust-std'
 23.3 MiB /  23.3 MiB (100 %)  13.0 MiB/s in  3s ETA:  0s
info: installing component 'rustc'
 61.0 MiB /  61.0 MiB (100 %)  13.3 MiB/s in  4s ETA:  0s
info: installing component 'rustfmt'
info: default toolchain set to 'stable-x86_64-apple-darwin'

  stable-x86_64-apple-darwin installed - rustc 1.50.0 (cb75ad5db 2021-02-10)


Rust is installed now. Great!

To get started you need Cargo's bin directory ($HOME/.cargo/bin) in your PATH
environment variable. Next time you log in this will be done
automatically.

To configure your current shell, run:
source $HOME/.cargo/env
以上这个过程是安装 rust 及其工具链并自动设置环境的过程,你可以根据提示输入 source $HOME/.cargo/env 让配置立即生效,也可以重新打开一个命令行让配置生效。
验证是否安装成功:
rustc --version
顺利的话,你会看到 rustc x.y.z (版本的哈希码 yyyy-mm-dd) 格式的输出。
更新:
rustup update
卸载:
rustup self uninstall
本地文档
安装工具在执行的过程中会在本地生成一份离线文档,你可以通过命令 rustup doc 在浏览器中打开它。但是我觉得一般用不到,我们在 vscode 中安装 Rust 插件有文档提示的功能。
Hello,World!
vscode
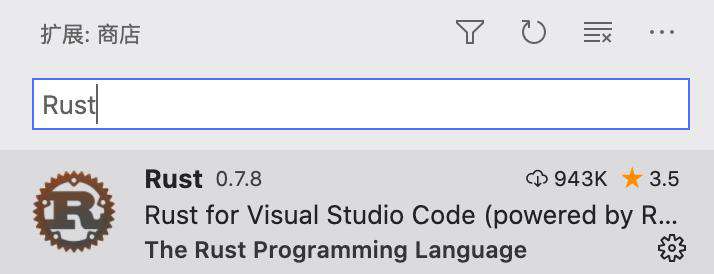
安装 Rust 插件:

安装成功后将 "rust-client.rustupPath": "$HOME/.cargo/bin/rustup" 添加到 setting.json 来修复 couldn't start client Rust Language Server
第一行代码
新建一个 main.rs 并写入以下代码:
fn main() {
  println!("Hello,World!");
}
- 使用关键字
fn定义了一个函数。(Go(func)、JS(function)、数学(f)),看起来 Rust 很省布料。 - main 函数比较特殊:当你运行一个可执行 Rust 程序的时候,所有的代码都会从这个入口函数开始运行(Go 也是一样)
- 按照惯例,Rust 推荐把左花括号与函数声明置于同一行并以空格分隔。
- 我们调用了一个被叫作
println!的宏:假如我们调用的是一个普通函数,那么这里会以去掉!符号的println来进行标记。 - 大部分 Rust 代码都会以分号来结尾。
然后在命令行输入 rustc main.ts 编译代码,编译成功后会生成可执行文件 main:
.
├── main
└── main.rs
执行 ./main 便会输出 Hello,World!
Hello,Cargo!
和 Go 一样(go build),使用系统的编译工具(rustc)编译简单的程序足够了,但是它们无法满足规模大、协同开发人员多的项目。Go 有 gox、goxc、xgo,Rust 有 Cargo 来帮助我们管理简化项目依赖、代码构建这样的事情。
Cargo 是 Rust 工具链中内置的构建系统及包管理器。由于它可以处理众多诸如构建代码、下载编译依赖库等琐碎但重要的任务,绝大多数 Rust 用会选择它来管理自己的 Rust 项目(比如 Deno)。
前面我们的 hellowordl 示例在 vscode 中,Rust 插件会报以下错误,可见 Cargo 是 Rust 的标配:

使用 Cargo 创建项目
使用 cargo new hello_cargo 新建项目:

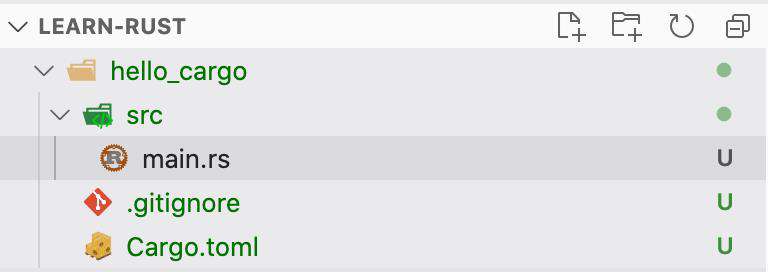
Cargo 为我们生成了两个文件与一个目录:一个名为 Cargo.toml 的文件,以及一个名为 main.rs 的源代码文件
,该源代码被放置在 src 目录下。于此同时,Cargo 还会初始化一个新的 Git 仓库并升成默认的 .gitignore 文件。
Cargo.toml
[package]
name = "hello_cargo"
version = "0.1.0"
authors = ["youngjuning <youngjuning@163.com>"]
edition = "2018"

# See more keys and their definitions at https://doc.rust-lang.org/cargo/reference/manifest.html

[dependencies]
[package]:是一个区域标签,它表明接下来的语句会被用于配置当前的程序包。author这里的邮箱和名字是从~/.gitconfig中读取的[dependencies]:同样是一个区域标签,它表明随后的区域会被用来声明项目的依赖。
按照惯例,Cargo 会默认把所有的源代码文件保存到 src 目录下,而项目根目录只被用来存放诸如 README 文档、许可声明、配置文件等与源代码无关的文件。使用 Cargo 可以帮助你合理并一致地组织自己的项目文件,从而使一切井井有条。
使用 Cargo 构建和运行项目
cargo build

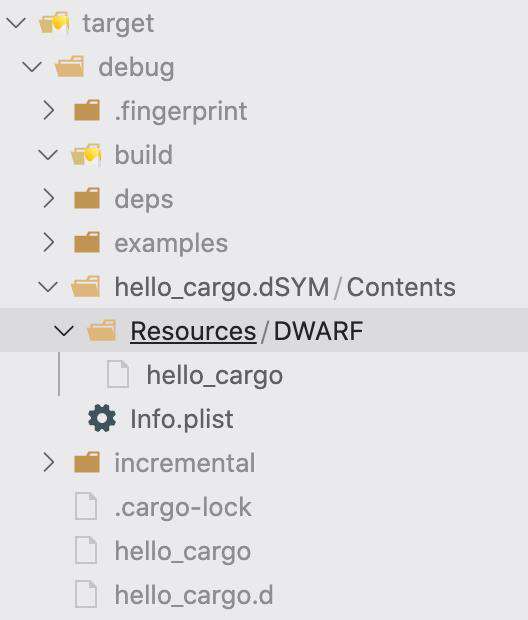
与之前不同,这个命令会将可执行程序生成在路径 target/debug/hello_cargo 下:

首次使用命令 cargo build 构建的时候,会生成 Cargo.lock(类似于 yarn.lock),不要手动修改该文件,默认 .gitignore 中只忽略了 target 目录,我们从 https://github.com/github/gitignore/blob/master/Rust.gitignore 中复制最佳实践过来。
使用 cargo run 命令可以简单地以此完成编译和运行工作:

以 Release 模式构建
cargo build --release
生成的可执行文件会被放置在 target/release 目录下,而不是之前的 target/debug 目录下。
假如你想要对代码的运行效率进行基准测试,请通过 cargo run --release 命令进行构建,并使用 target/release 目录下的可执行程序完成基准测试。

常见问题FAQ
- 免费下载或者VIP会员专享资源能否直接商用?
- 本站所有资源版权均属于原作者所有,这里所提供资源均只能用于参考学习用,请勿直接商用。若由于商用引起版权纠纷,一切责任均由使用者承担。更多说明请参考 VIP介绍。
- 提示下载完但解压或打开不了?
- 找不到素材资源介绍文章里的示例图片?
- 模板不会安装或需要功能定制以及二次开发?


发表评论
还没有评论,快来抢沙发吧!